
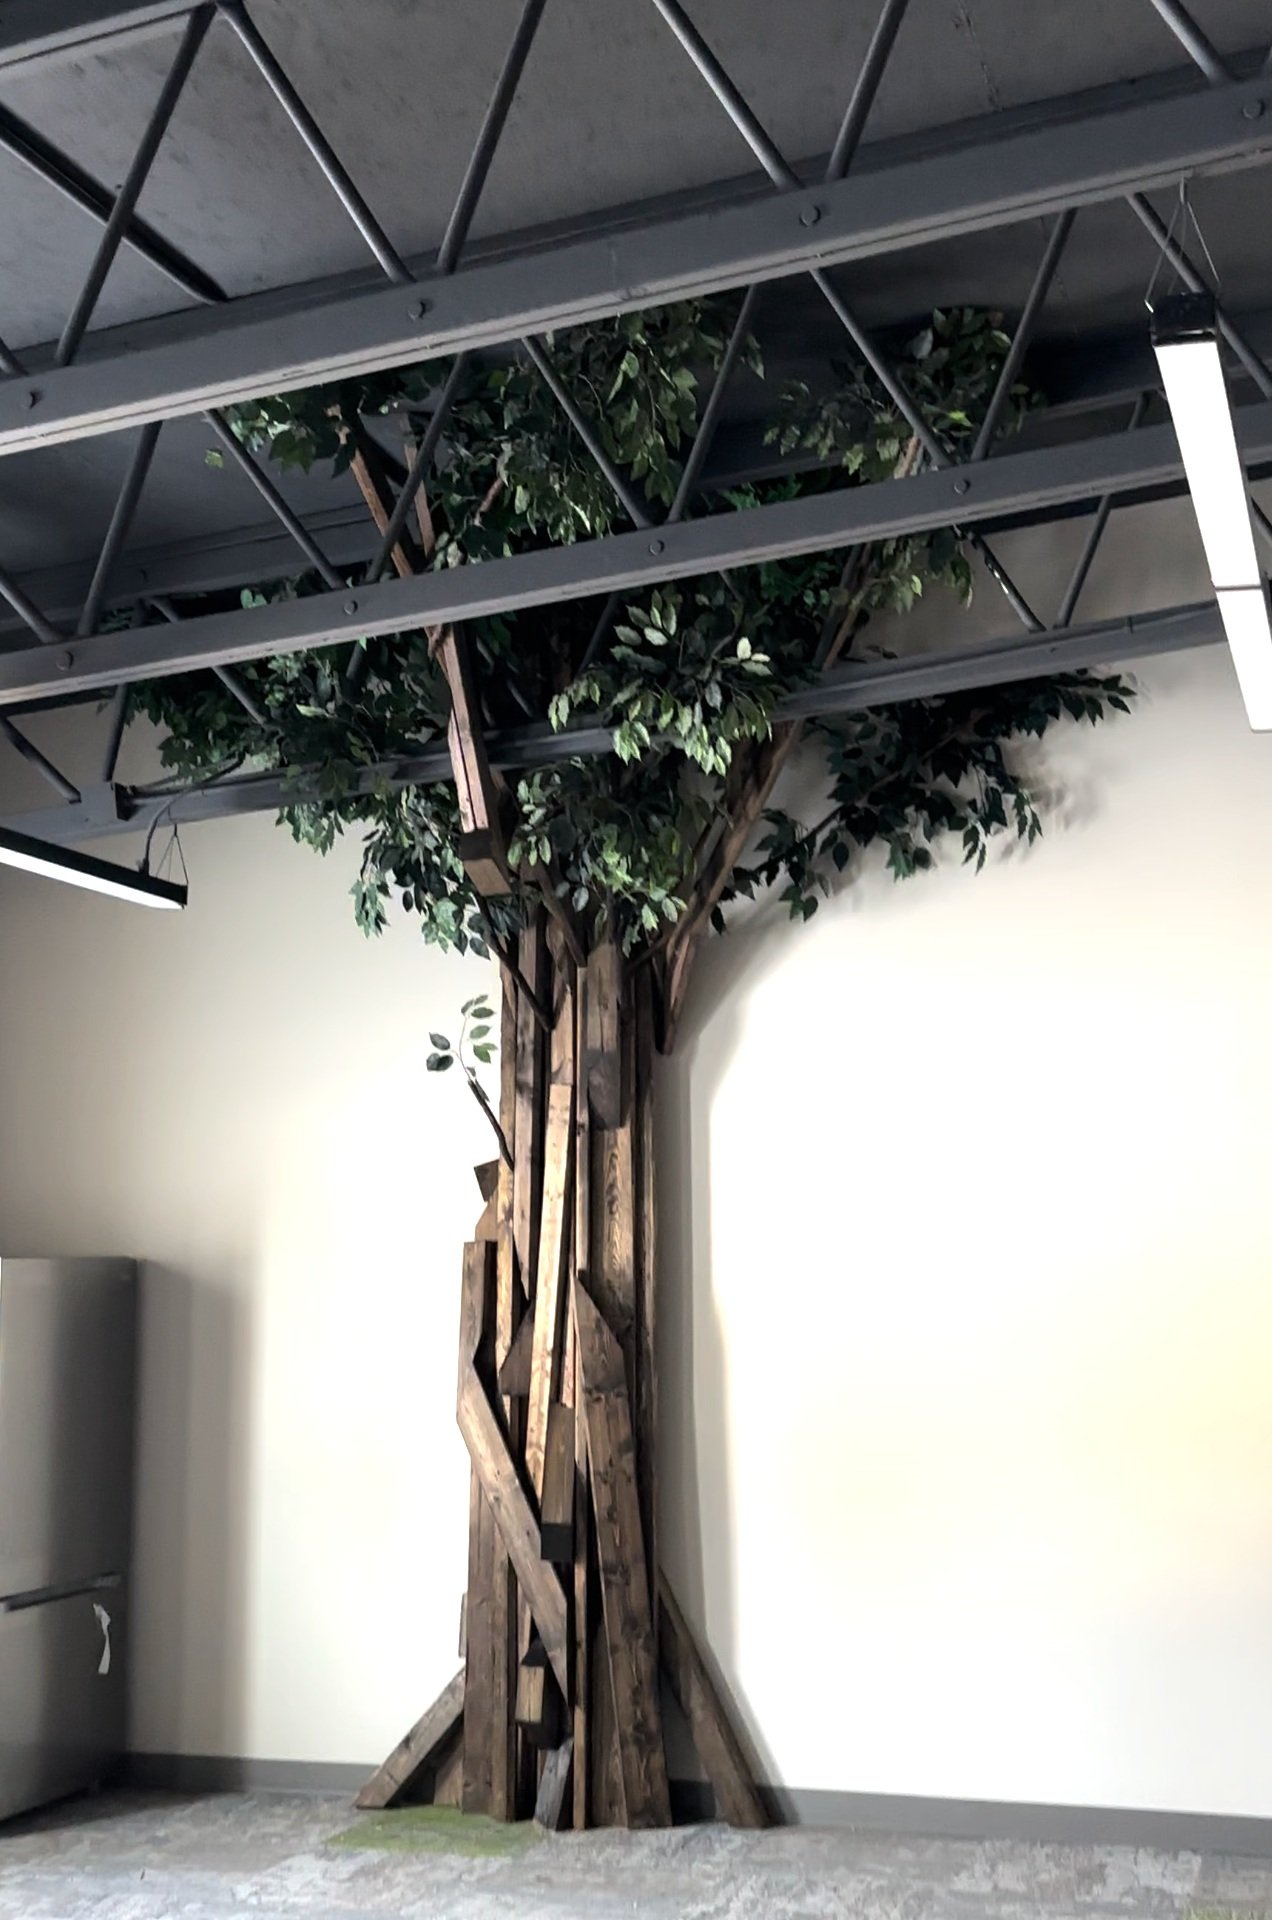
Our church just added on a wing for the kids program and we came up with the theme of “Everything outside”. We thought it would be cool to build a full size tree inside which is part one of the project. I had the absolute honor of building a Full Size Tree and Faux Playhouse as the backdrop for the Stage.
The Details
Time Spent: 12 hours
Skill Level: Intermediate
Cost: Materials were donated for this project, cost is roughly $300-$500
Tool List: Circular Saw, Power Drill, Tape Measure, Mater Saw, Jig Saw, Square, Ladder
Materials List
-
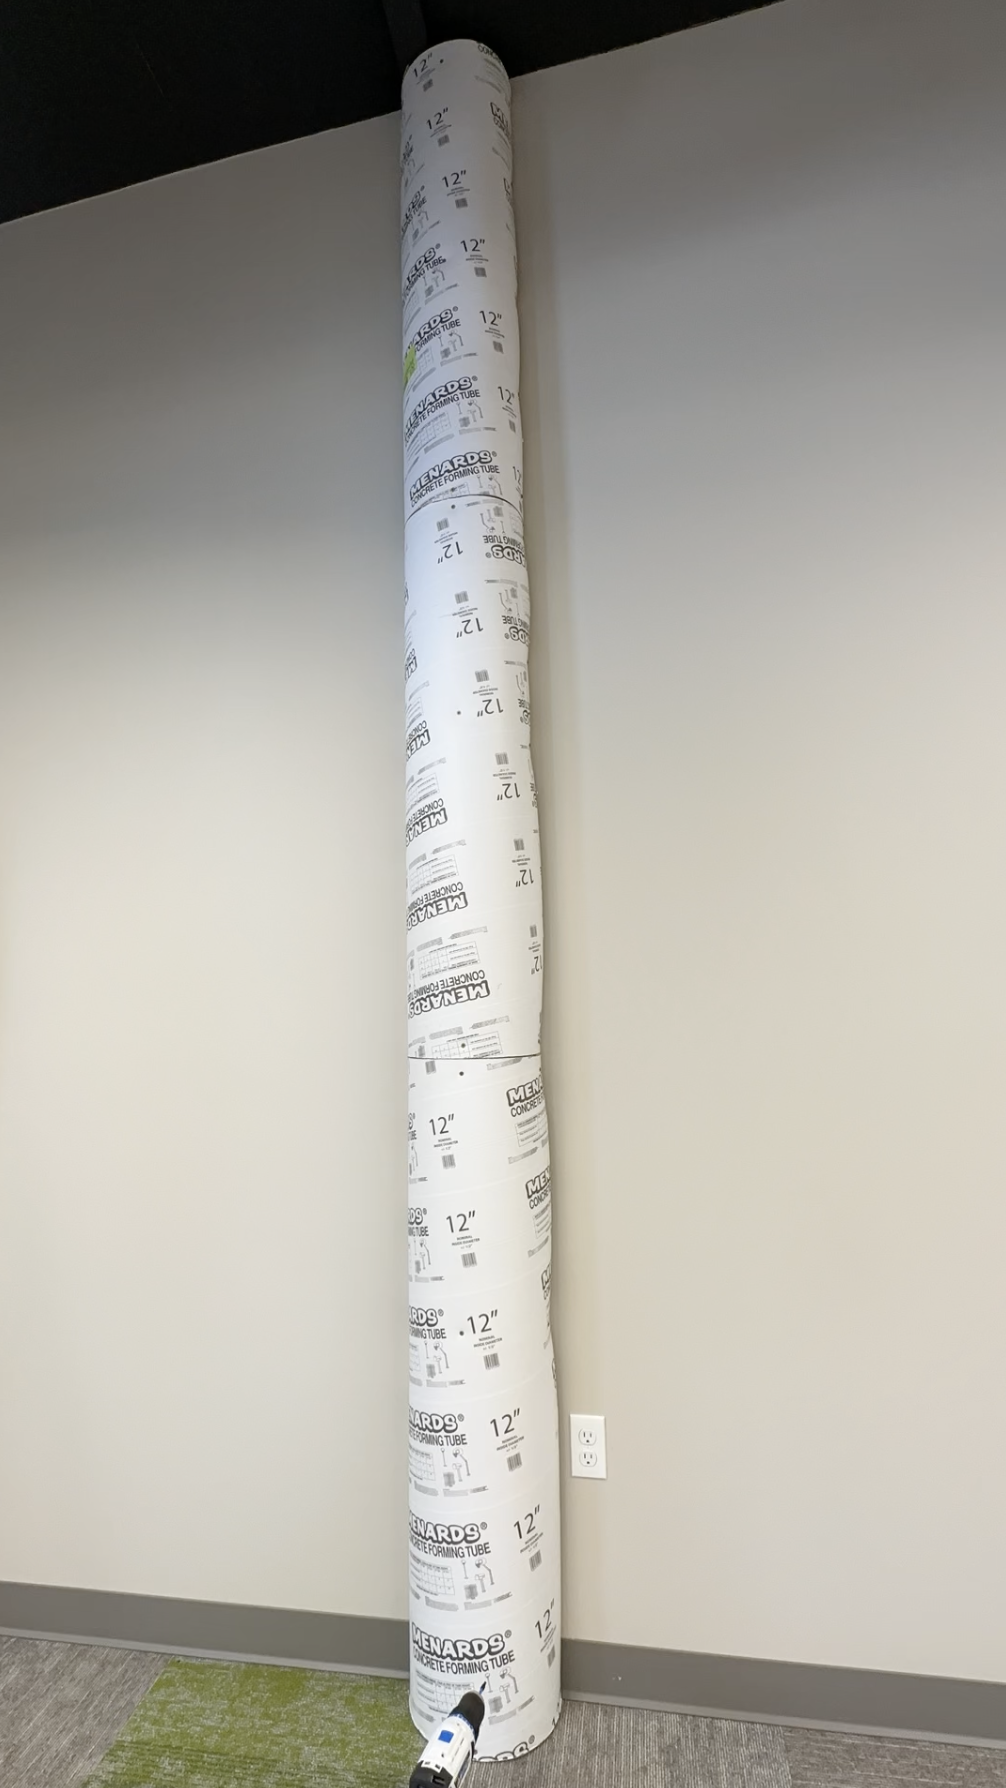
12inch concrete mold
-
Stained 2×4’s to create the faux tree trunk.
-
2.5” screws
-
Greenery
Build the Foundation
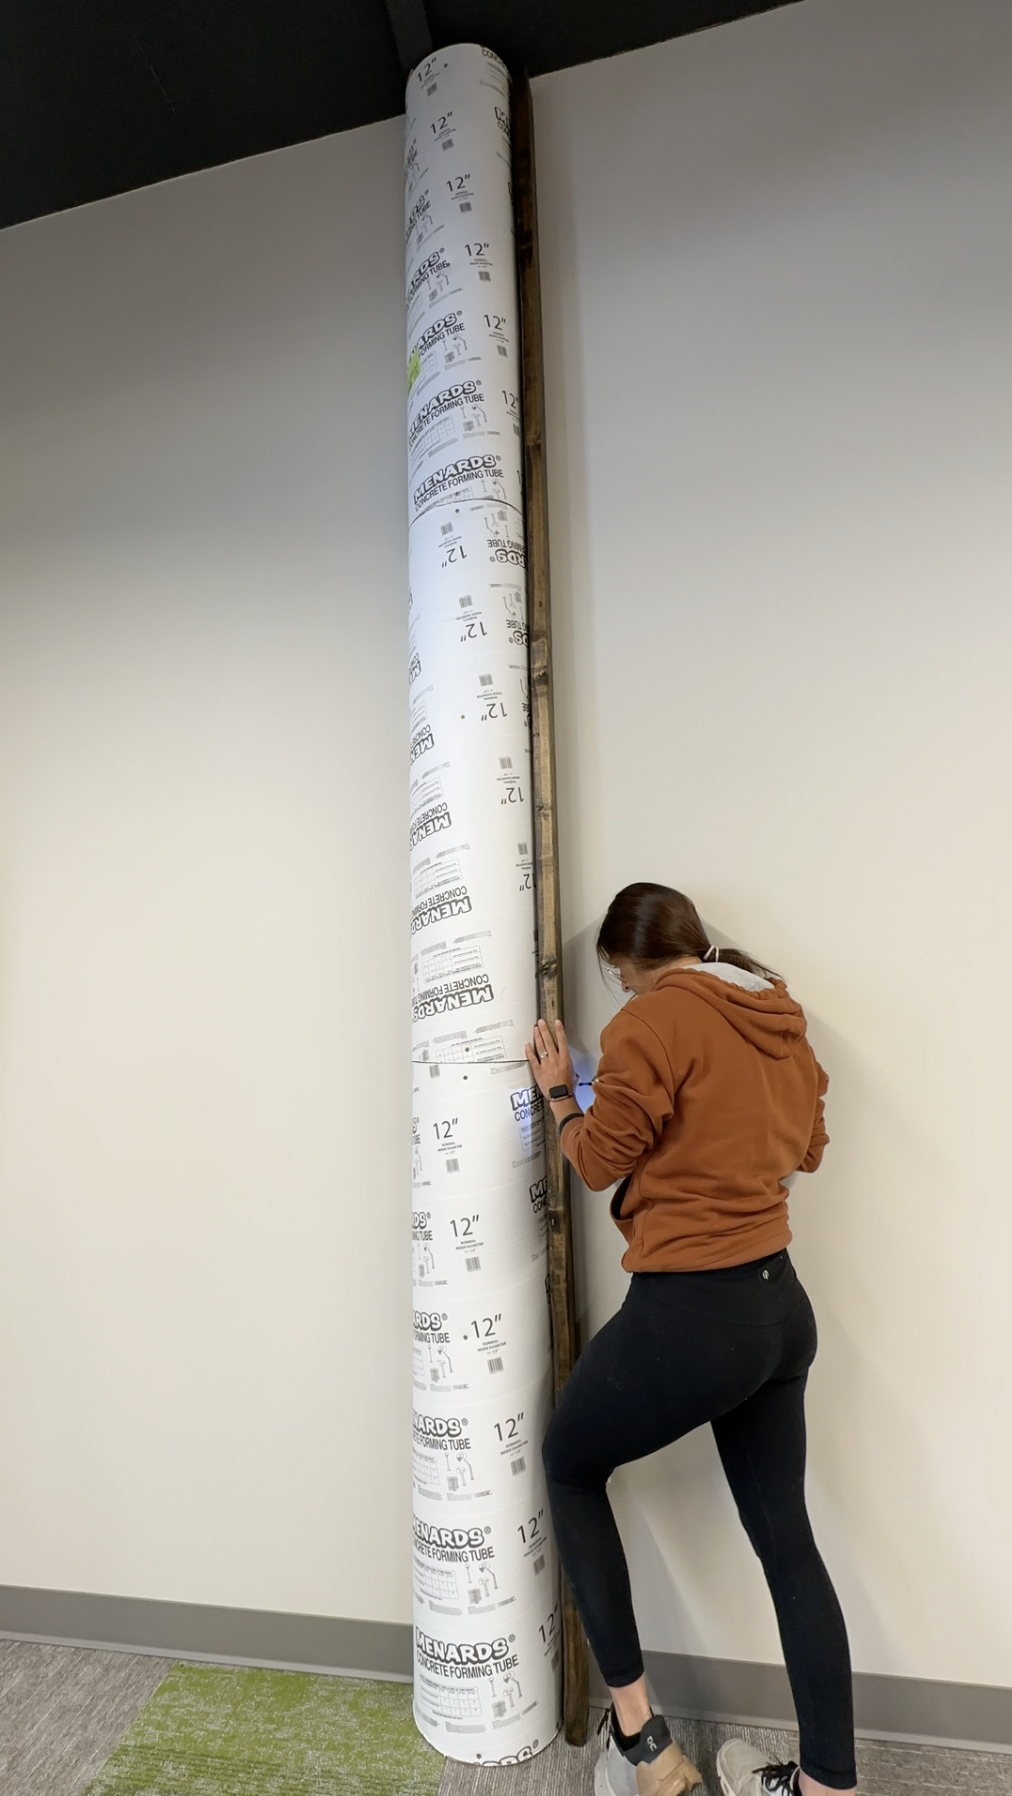

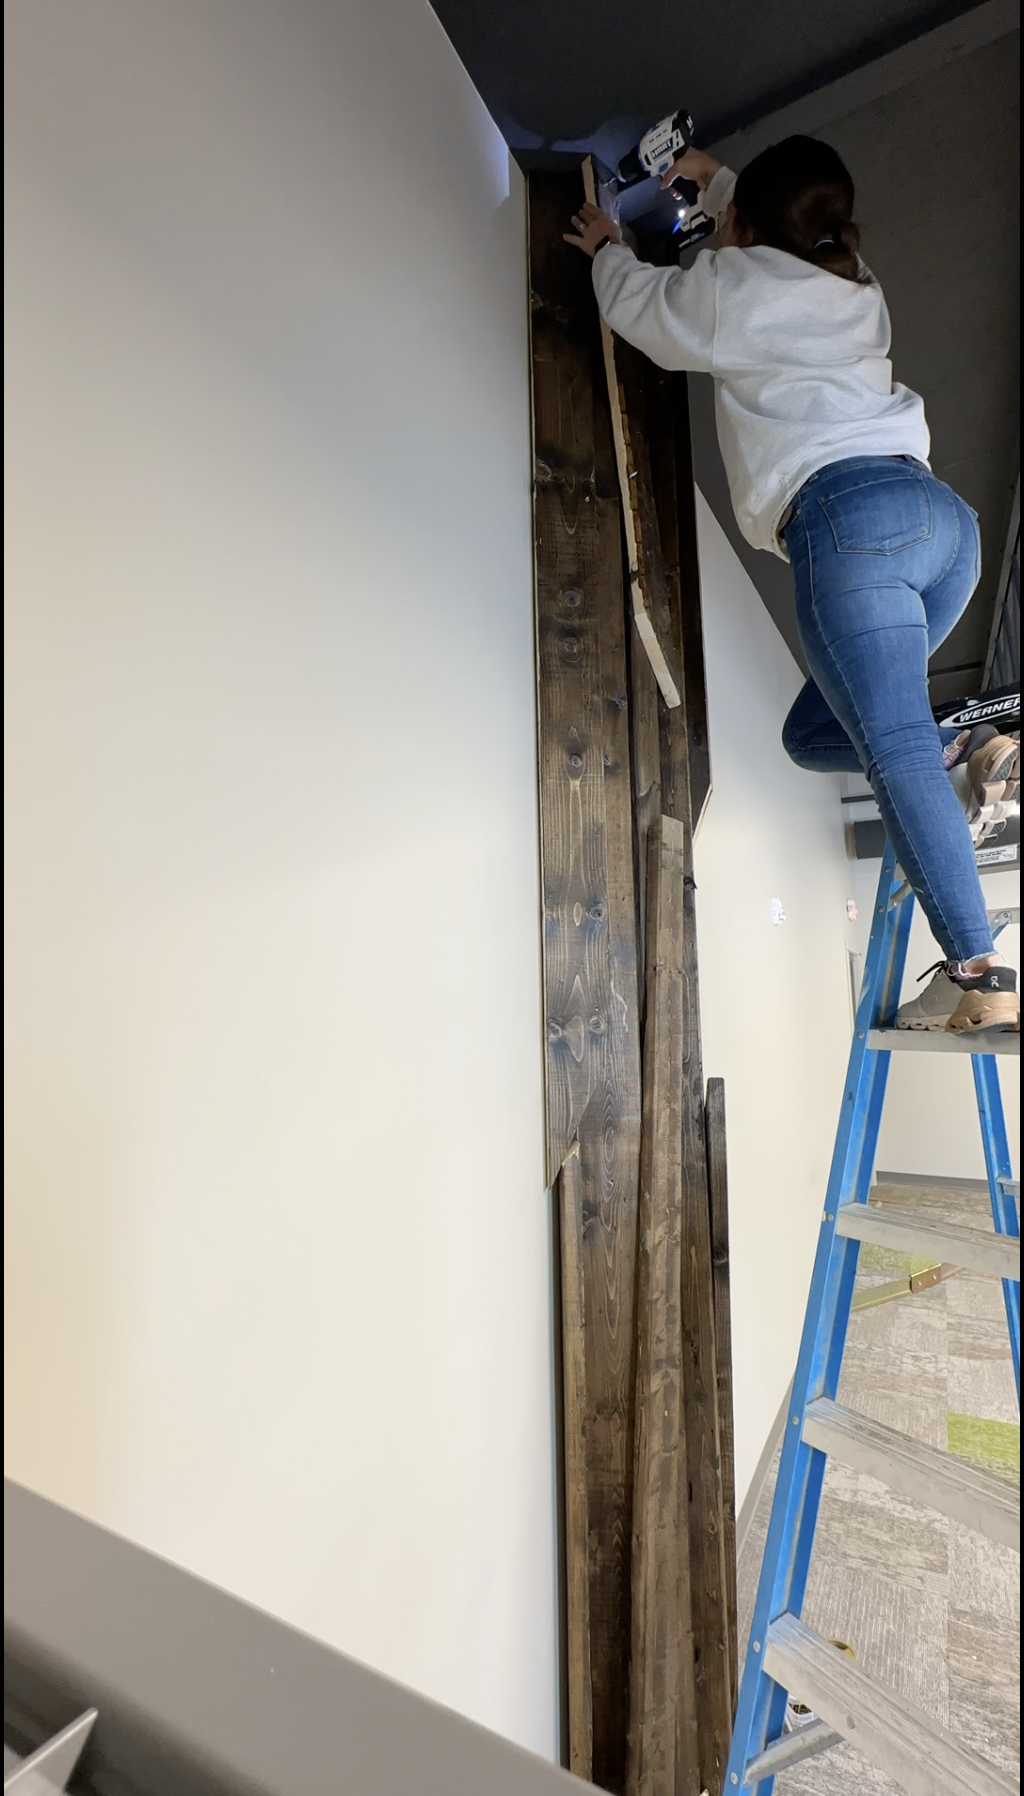
Step 1: Attach a 2×4’s to wall studs going as high as you want the trunk of the tree to be.
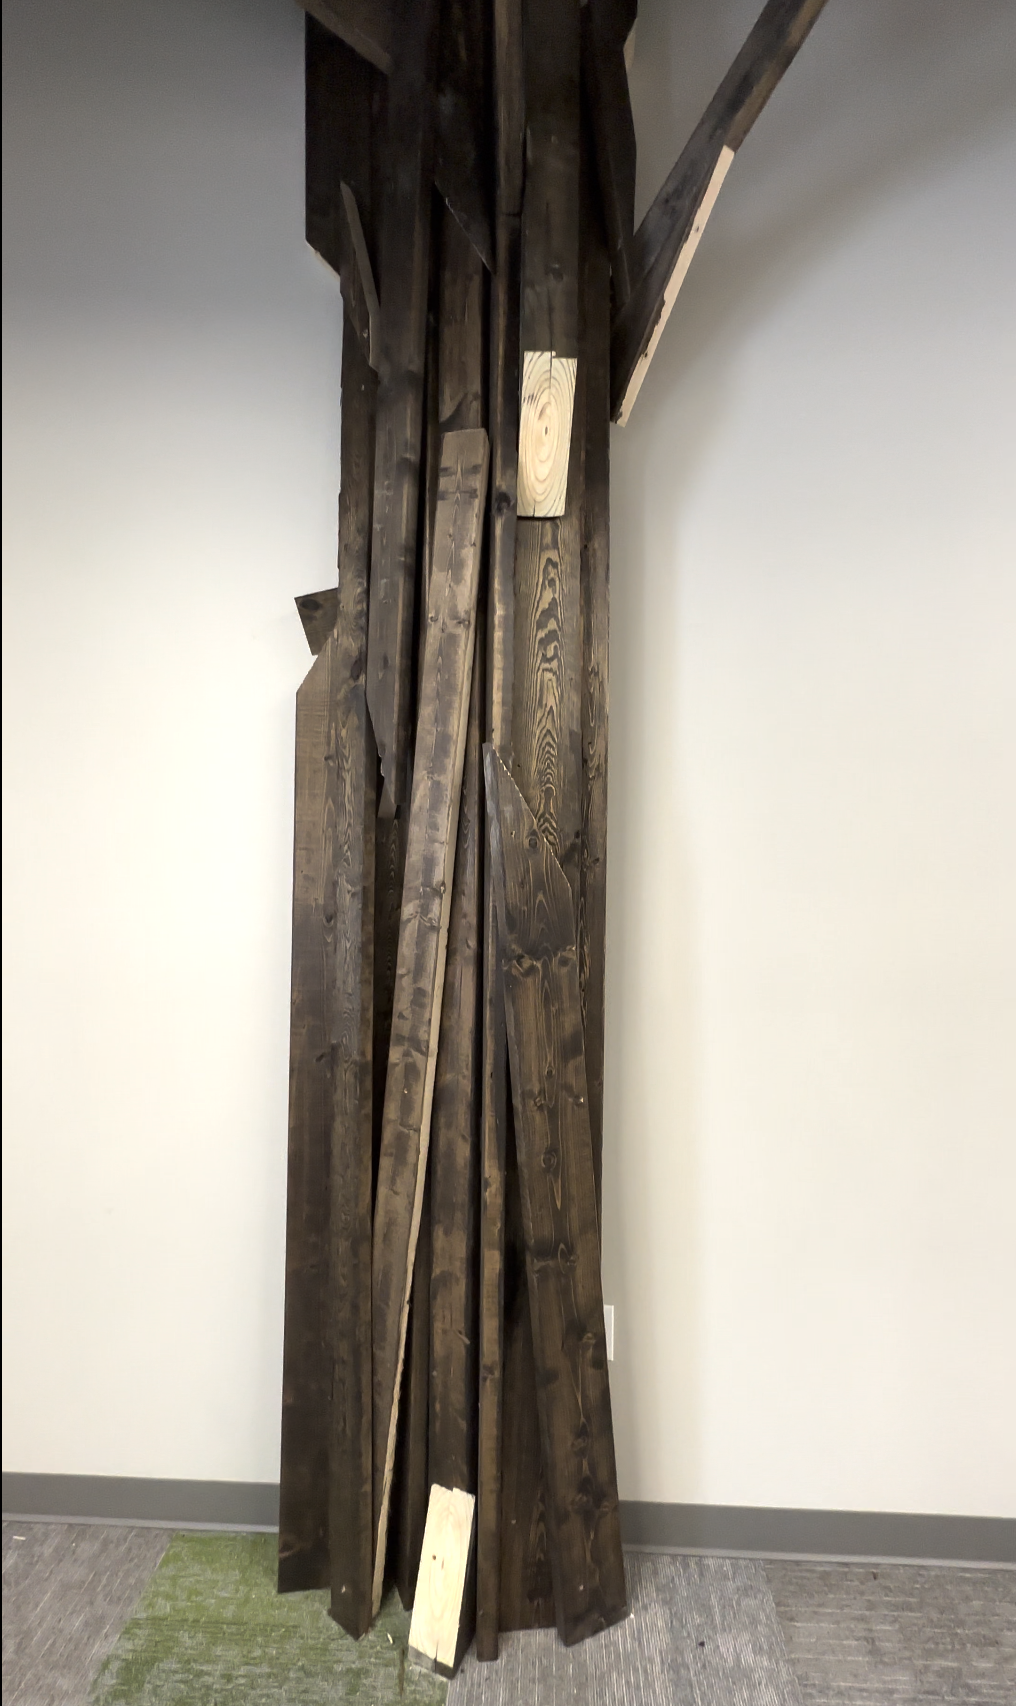
Step 2: Cut a 12inch concrete mold in half. You will want enough concrete mold to cover the 2×4’s. This is going to be what we use as the base for the faux tree trunk.
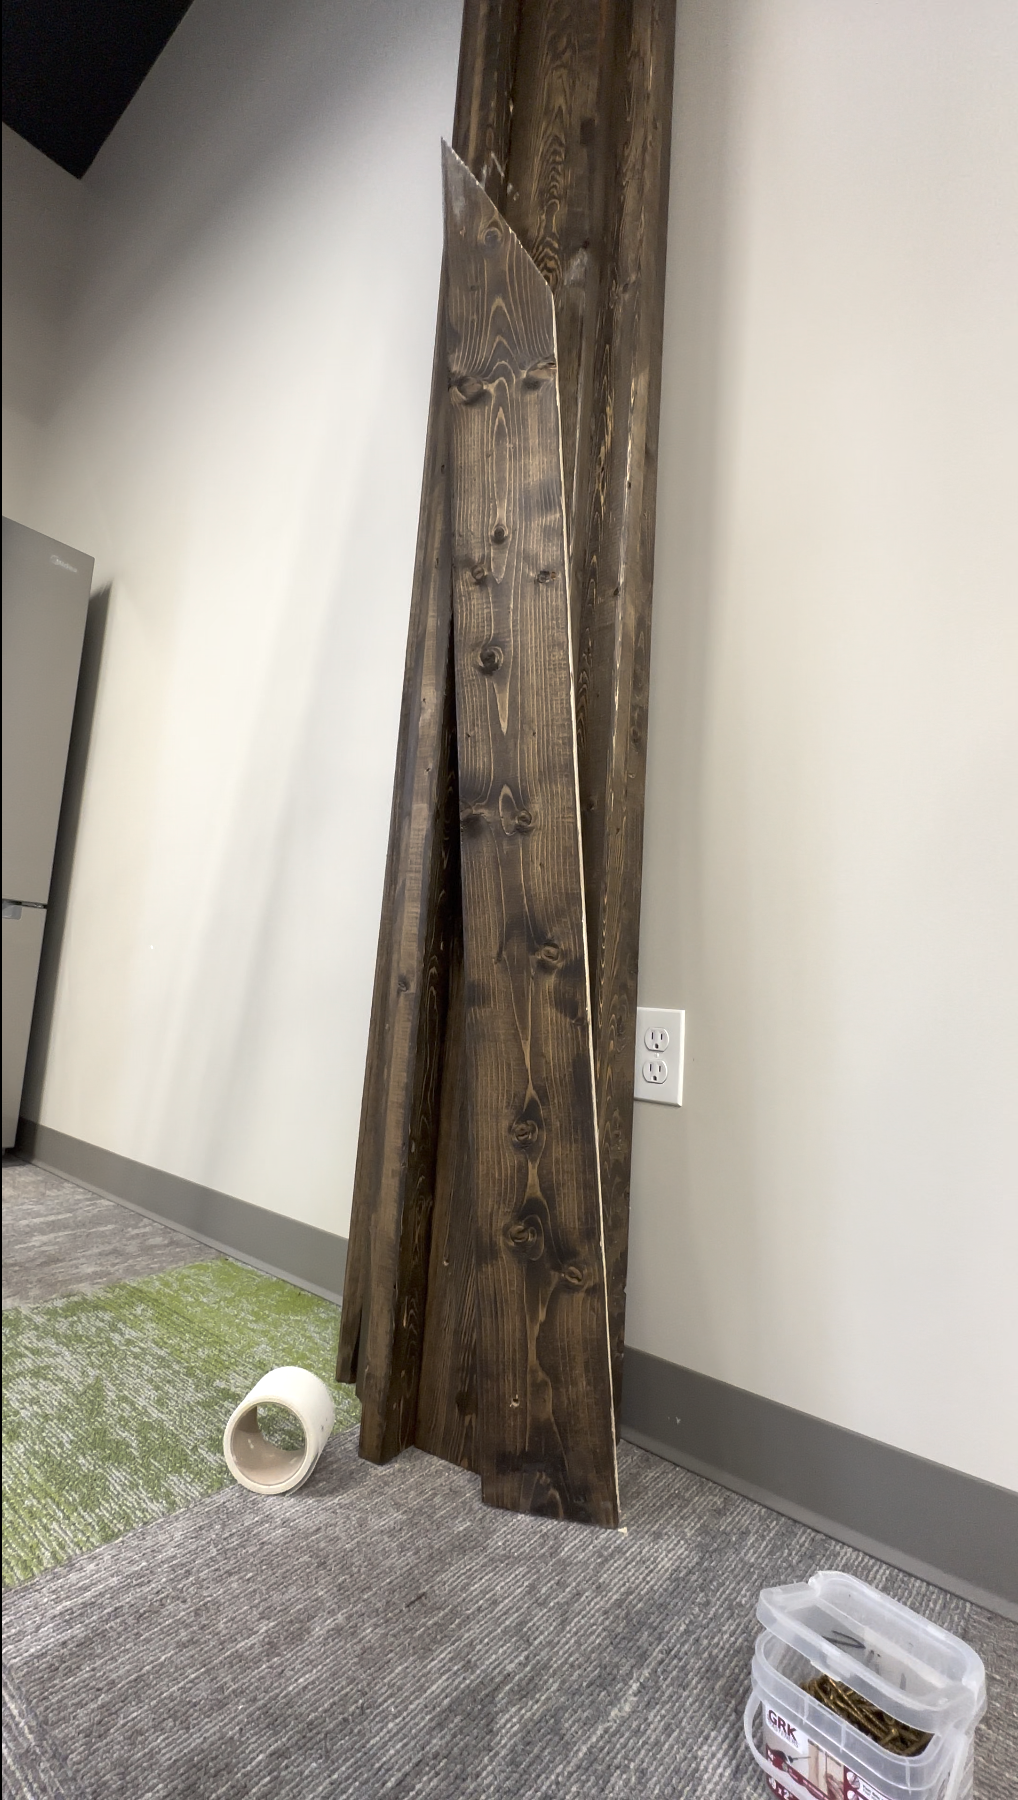
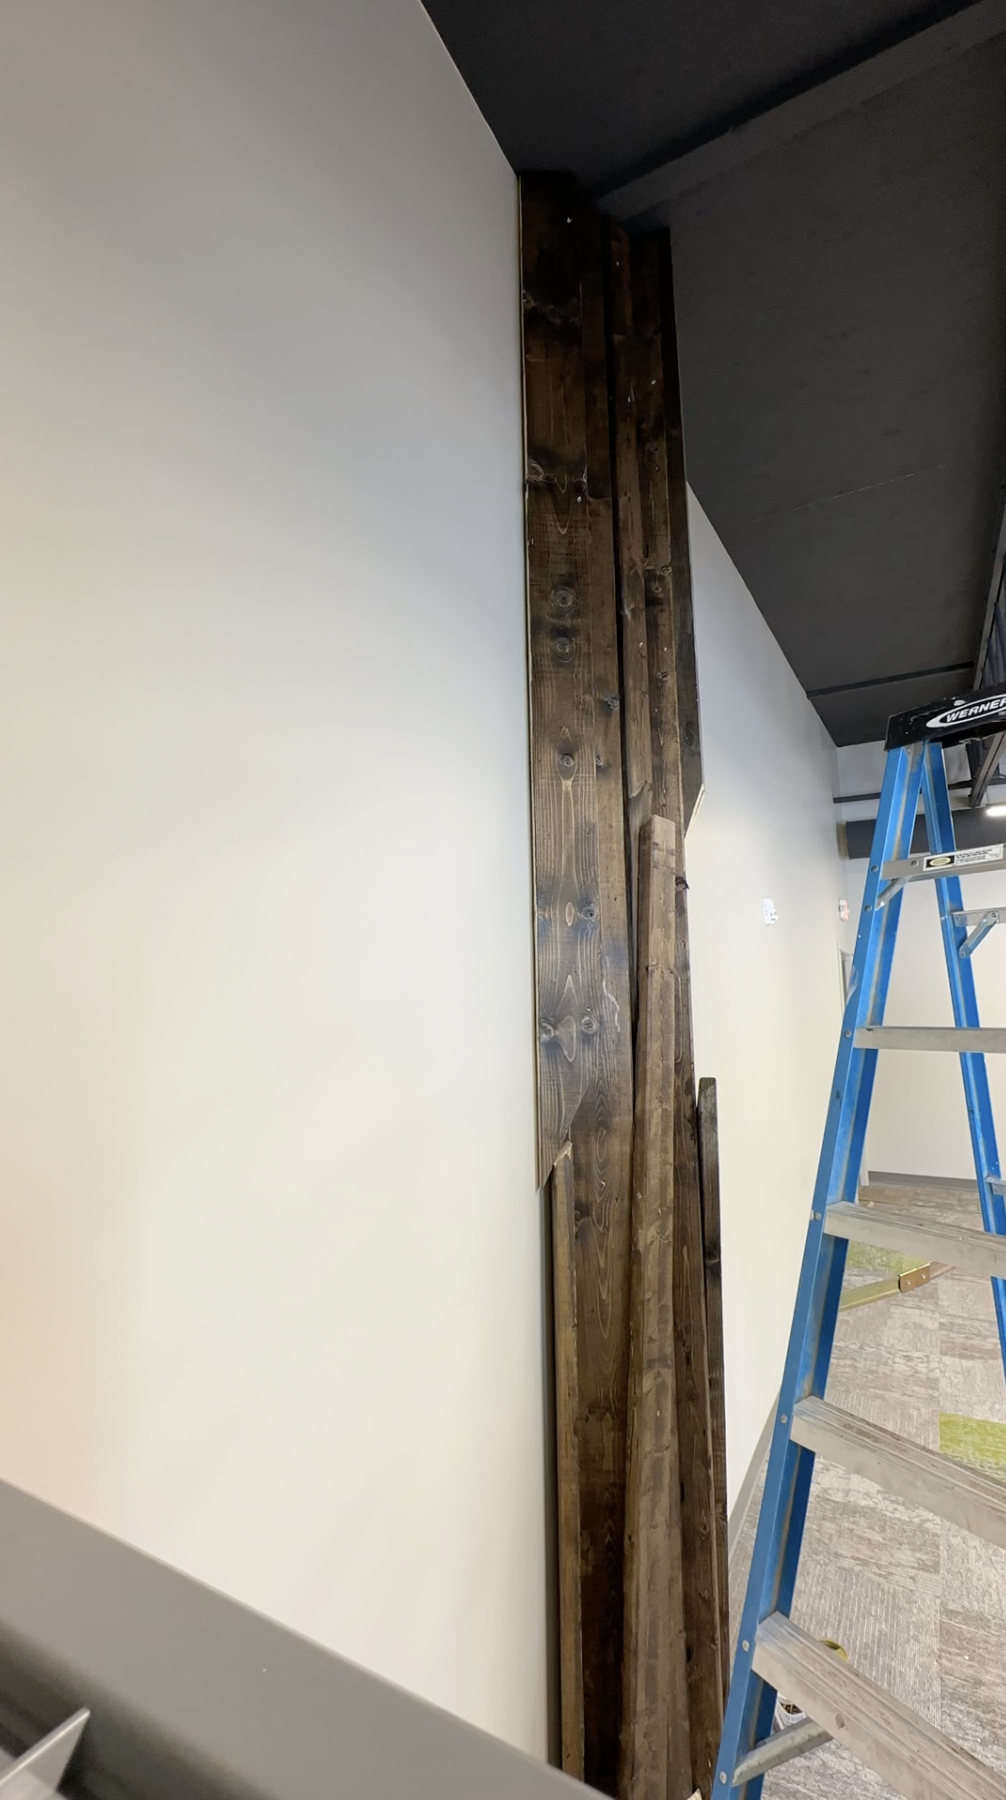
Step 3: Attach random 2×4’s to create the shape of the tree. I recommend going all around the tree with as long of 2×4’s as possible. Cover the entire concrete mold.
Step 4: Begin to use varying sizes and angle cuts of 2×4’s. This will create an uneven trunk texture.
Create the branches
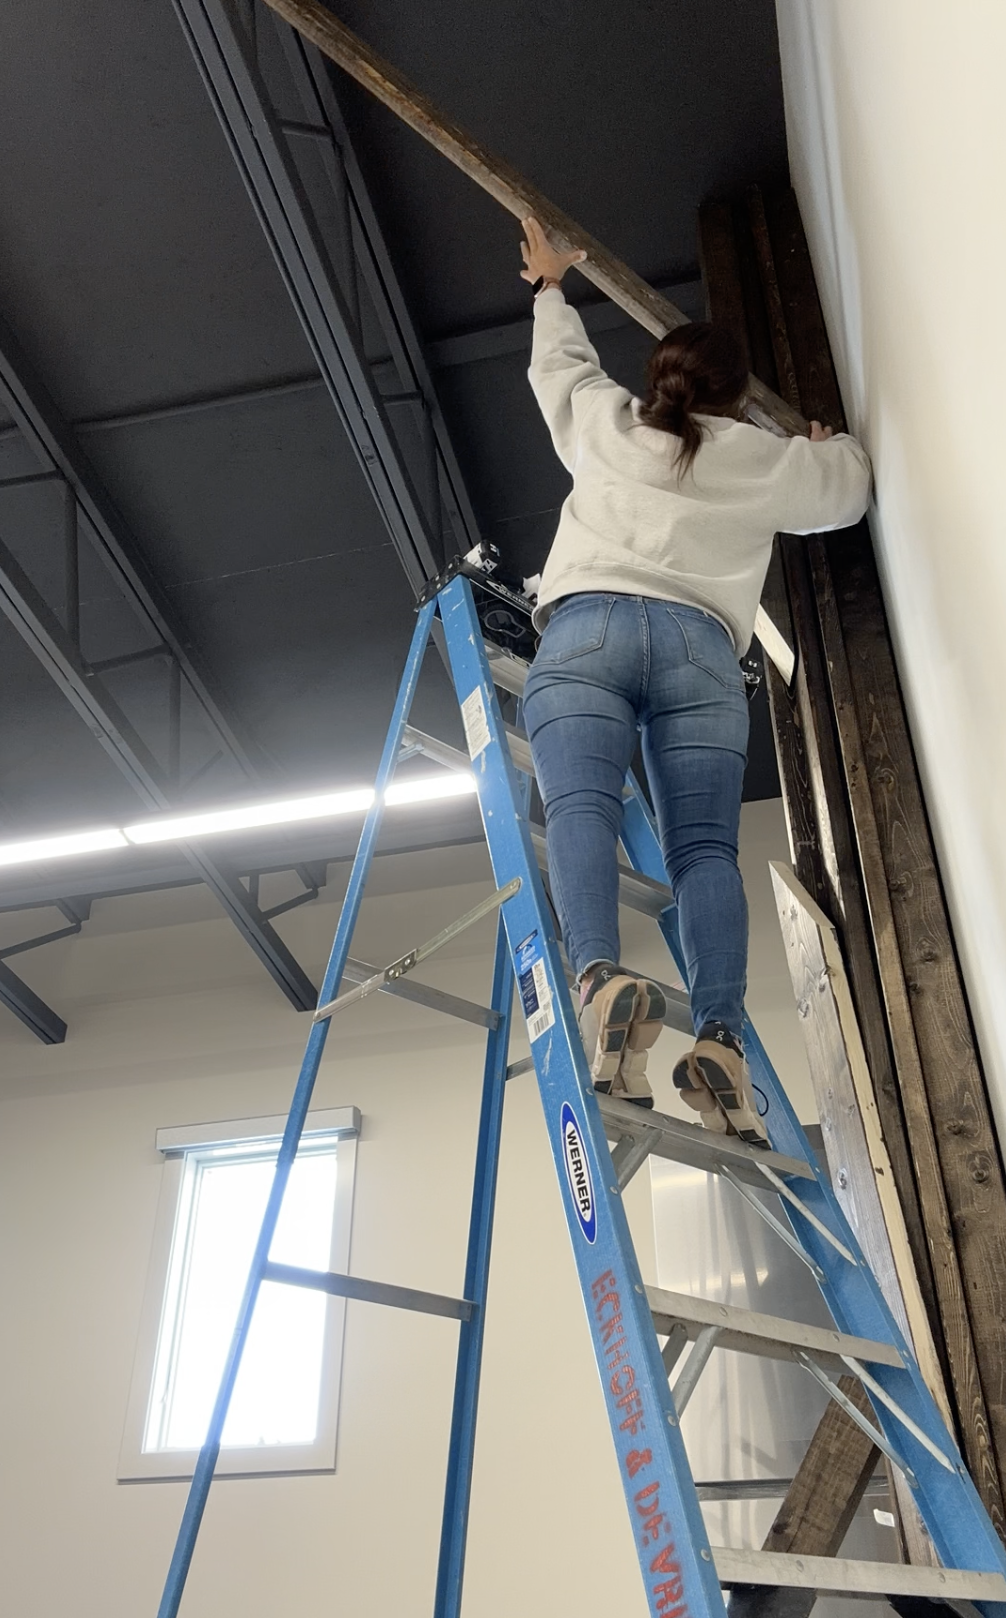
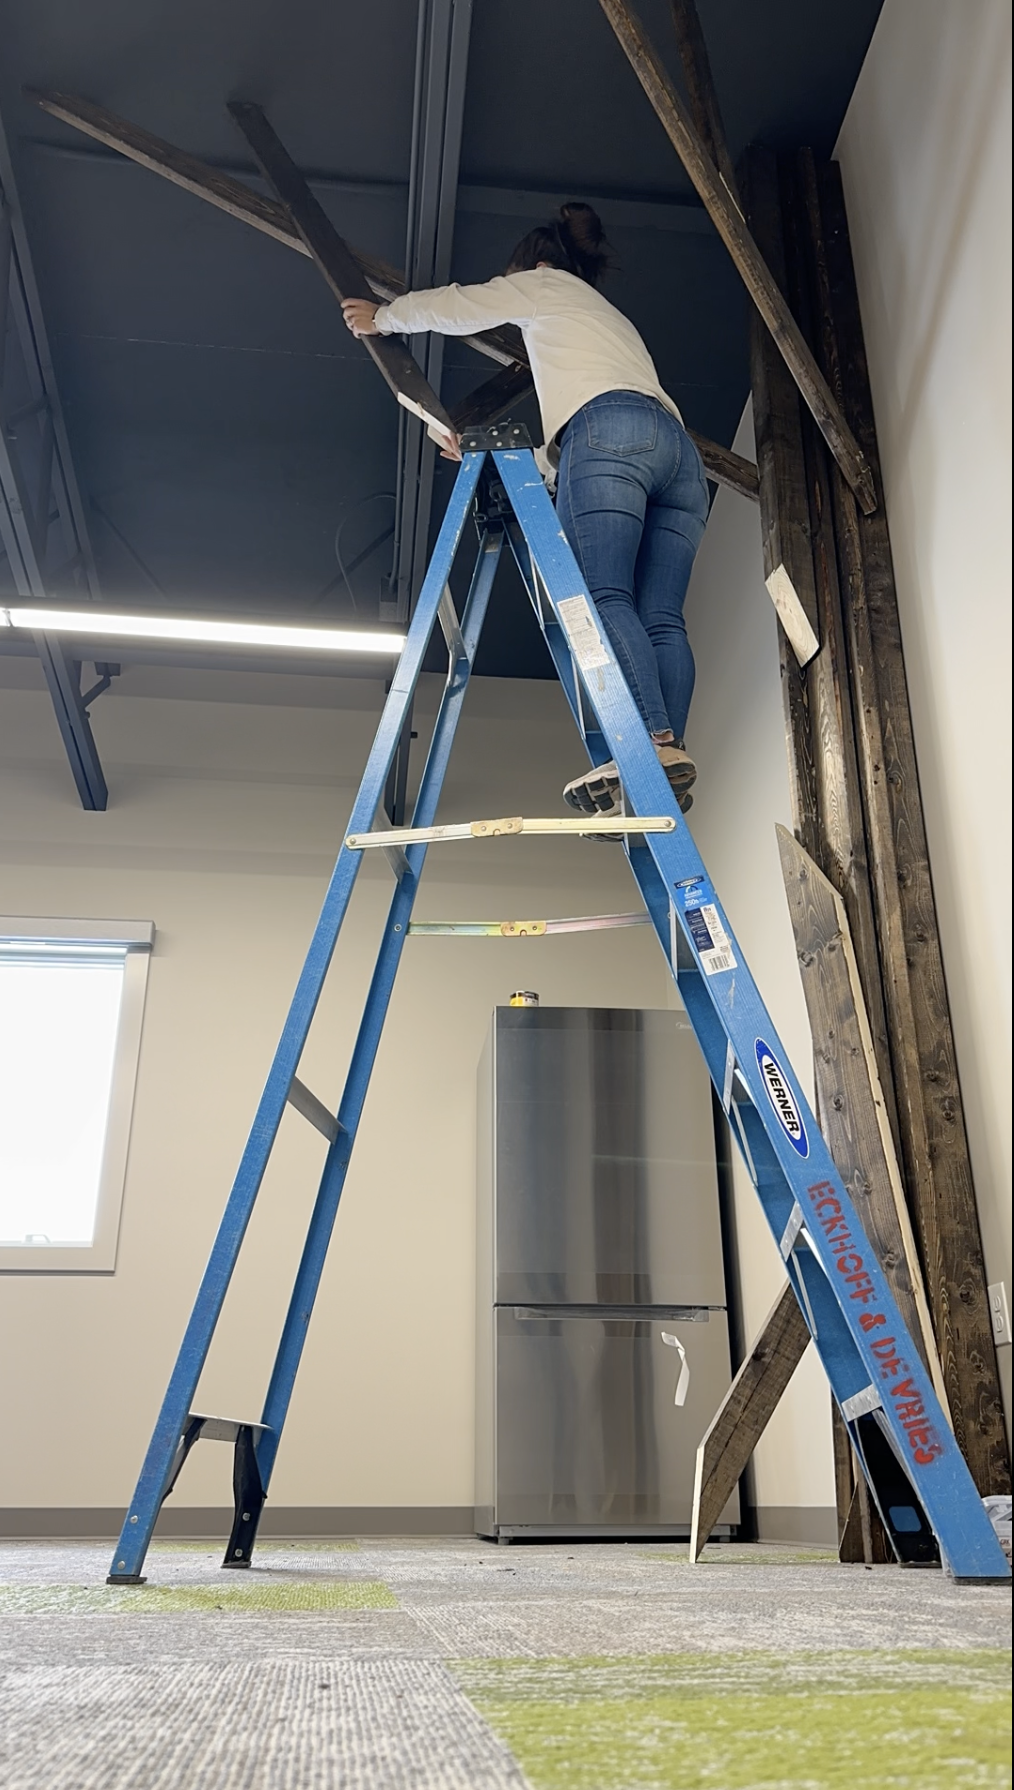
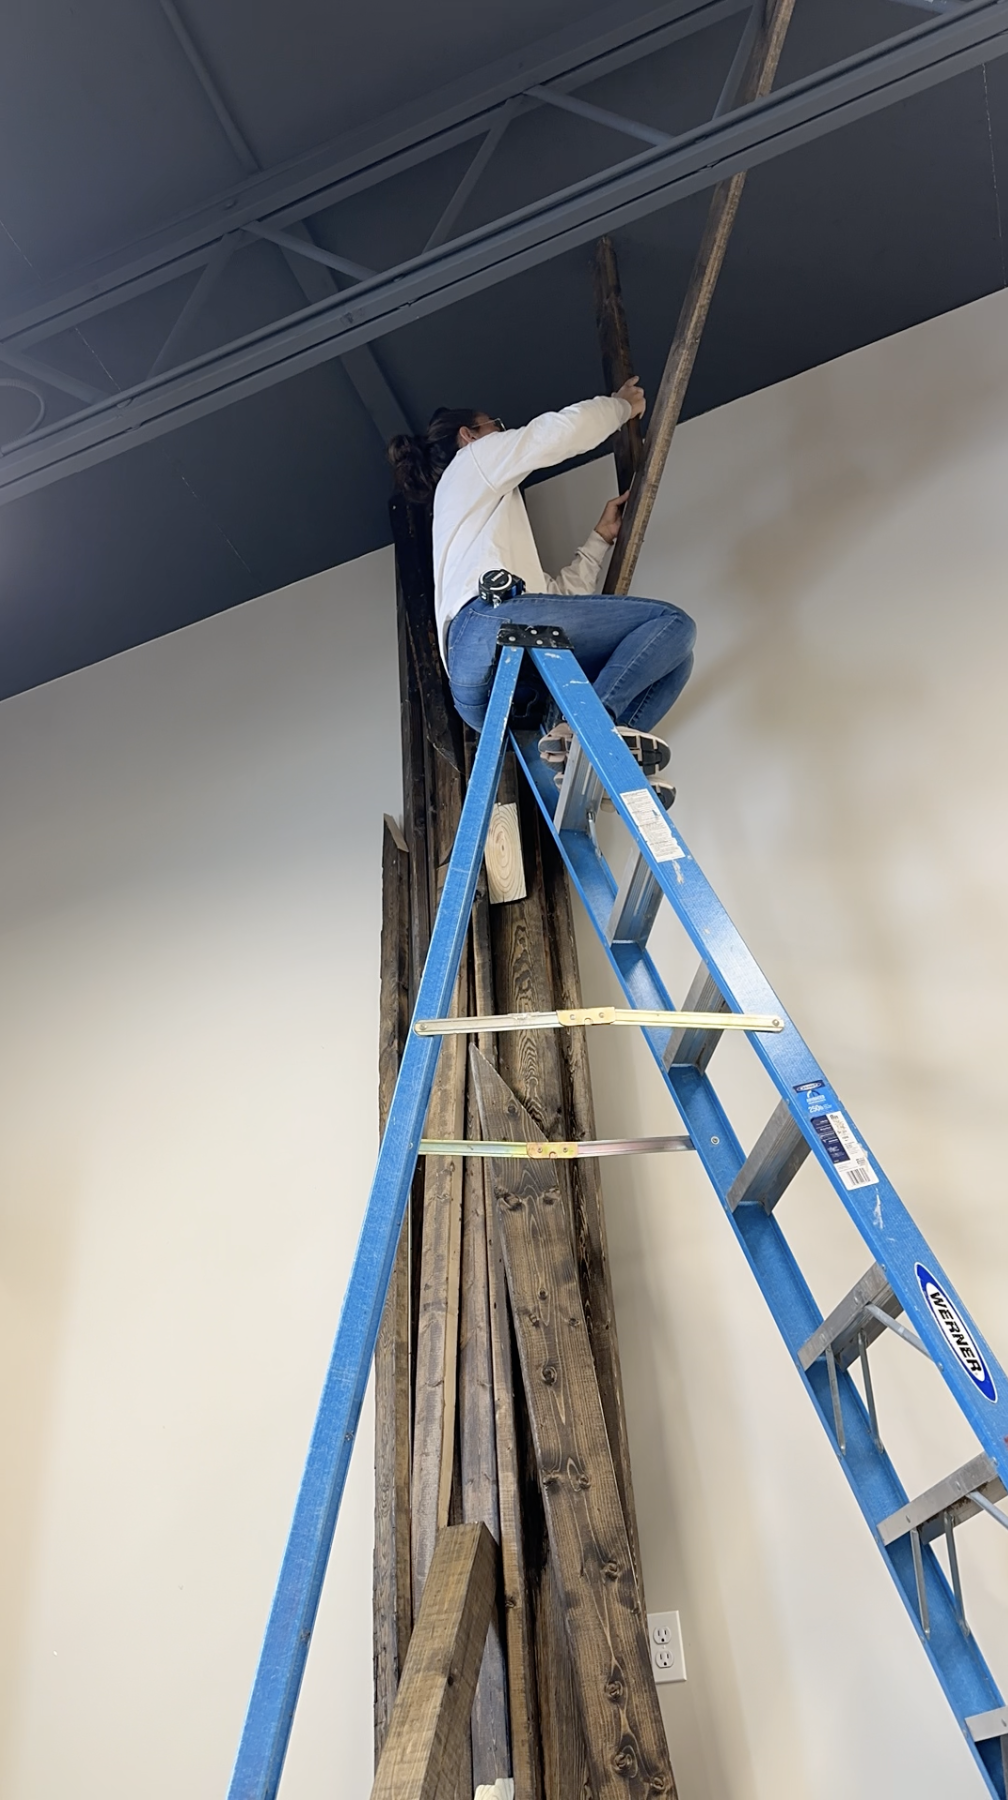
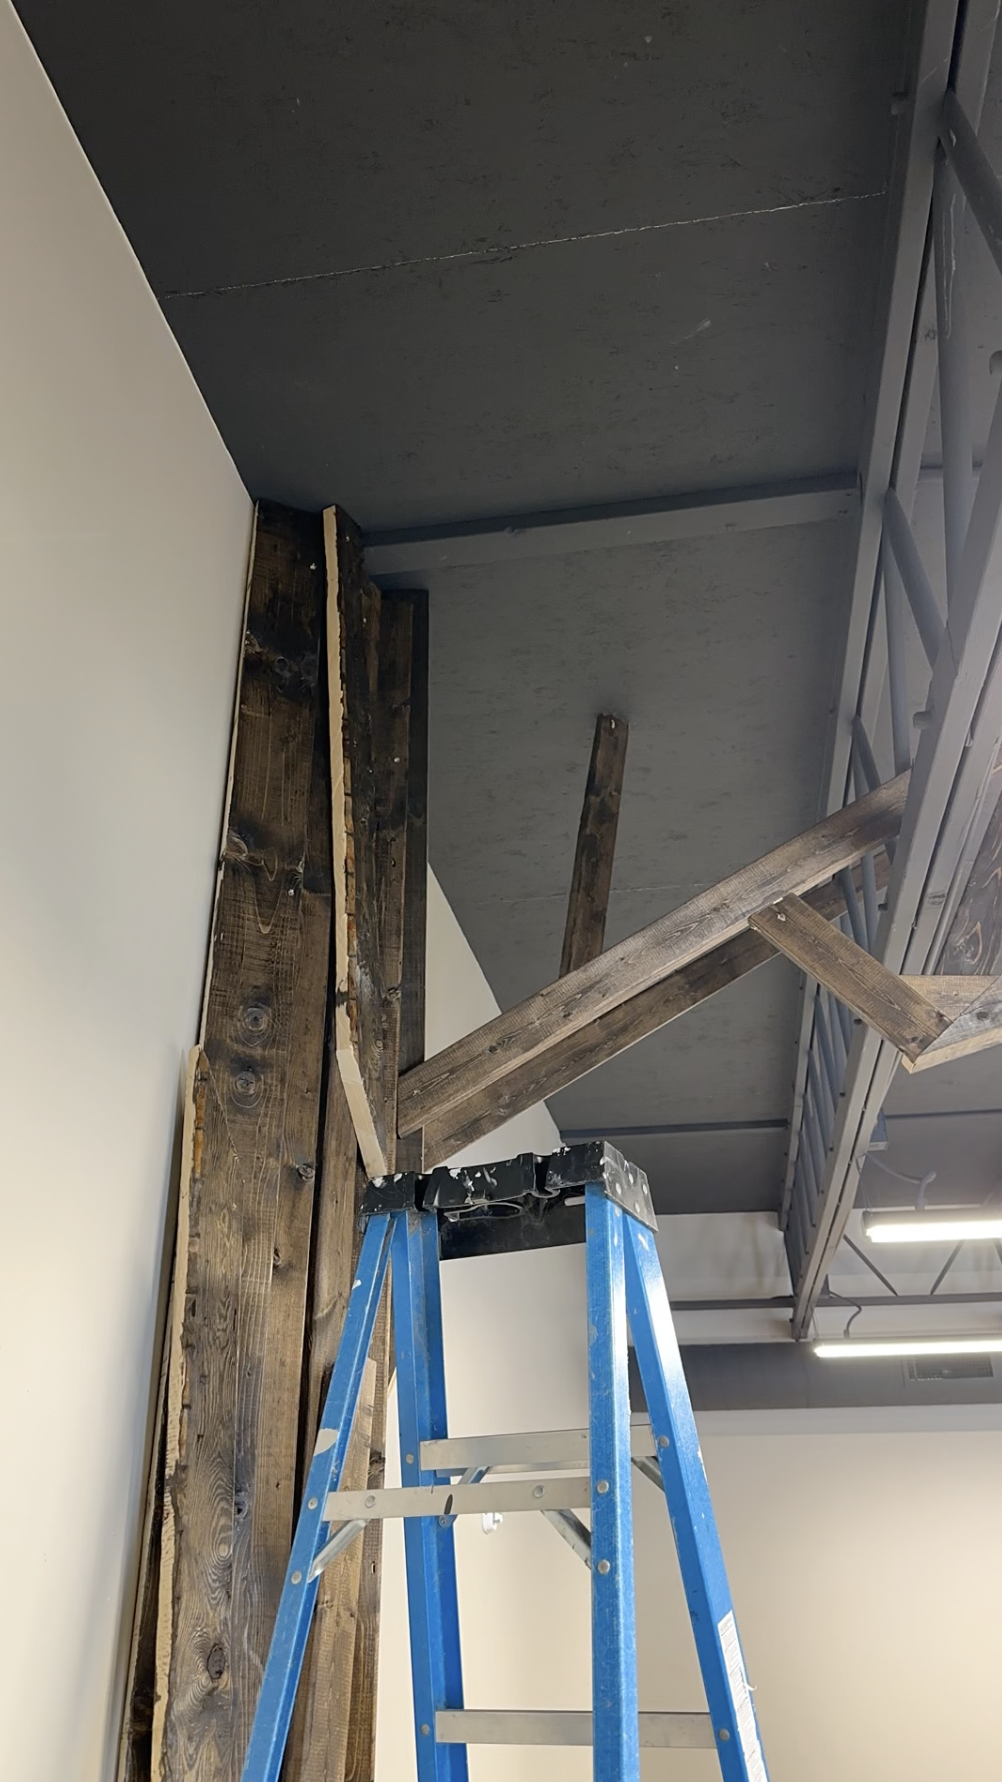
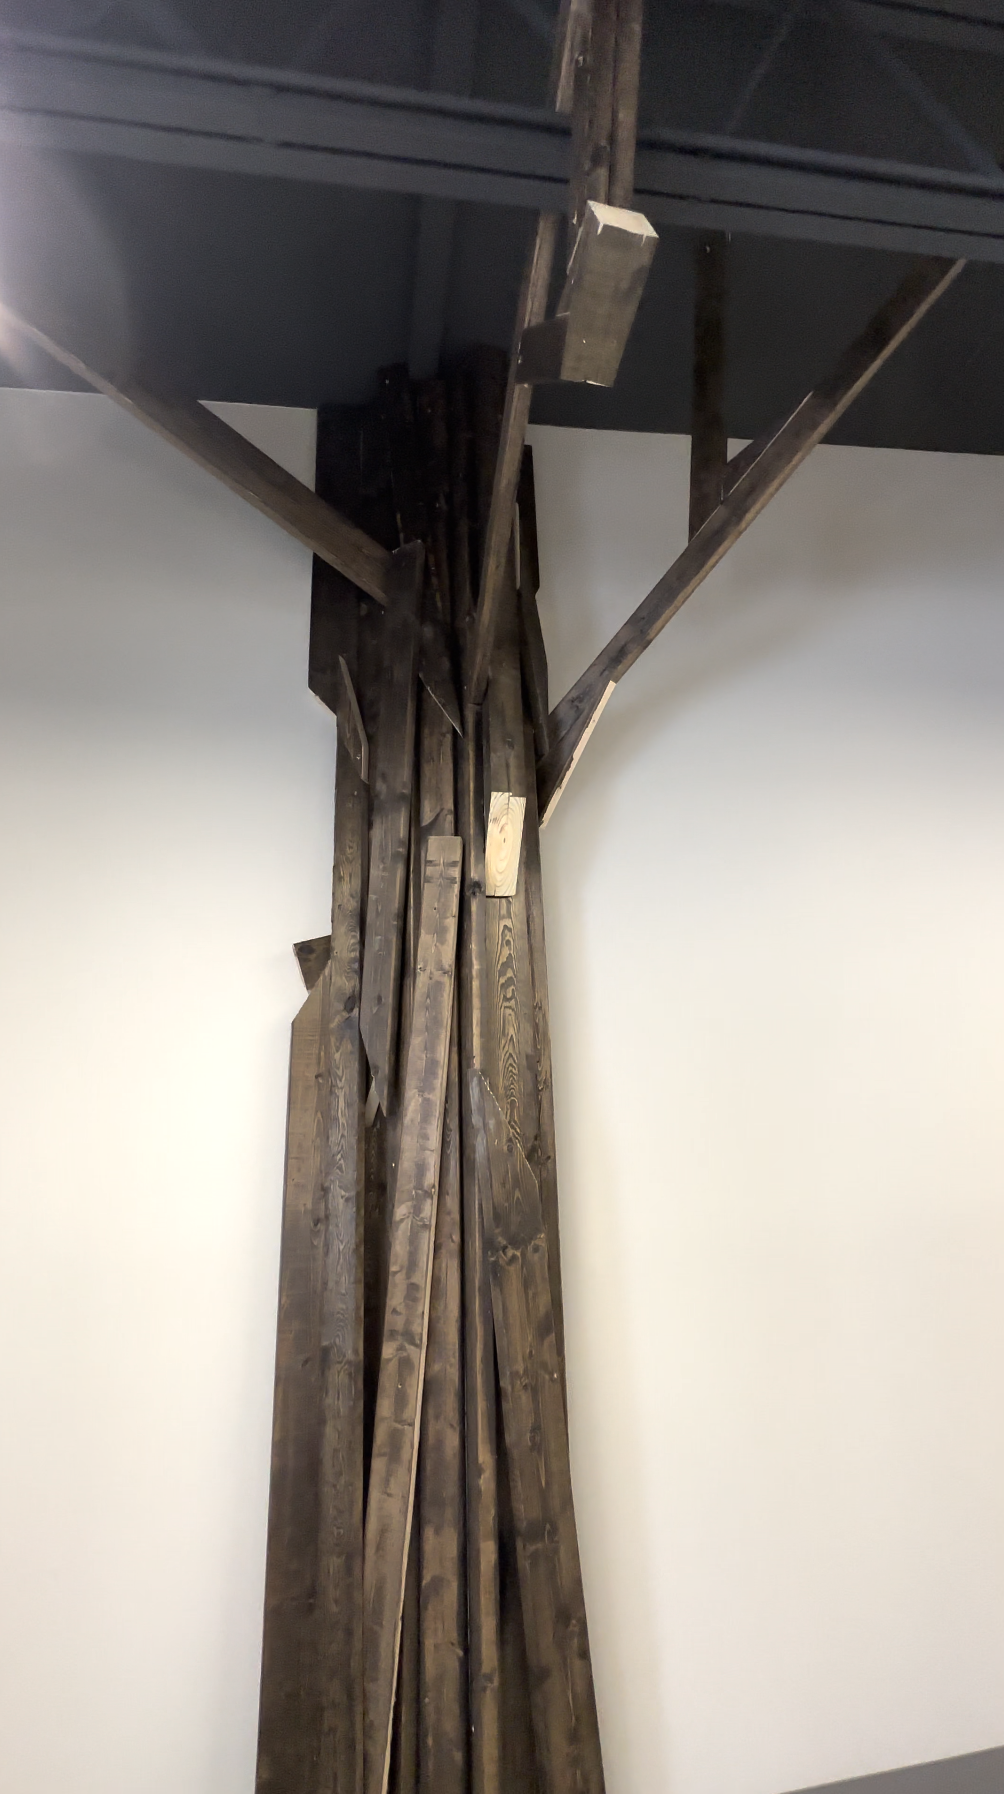
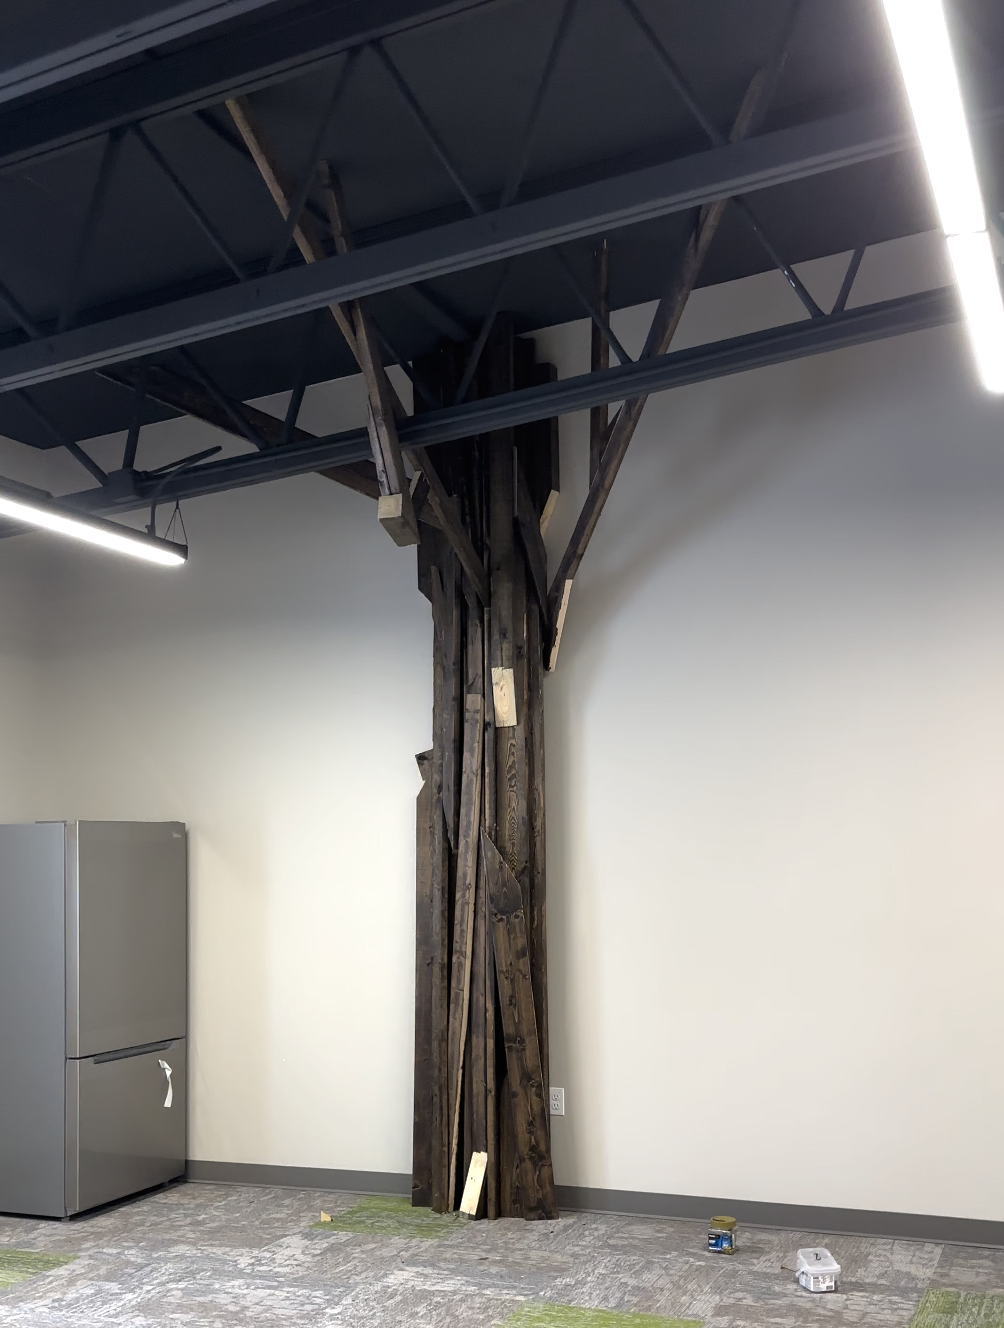
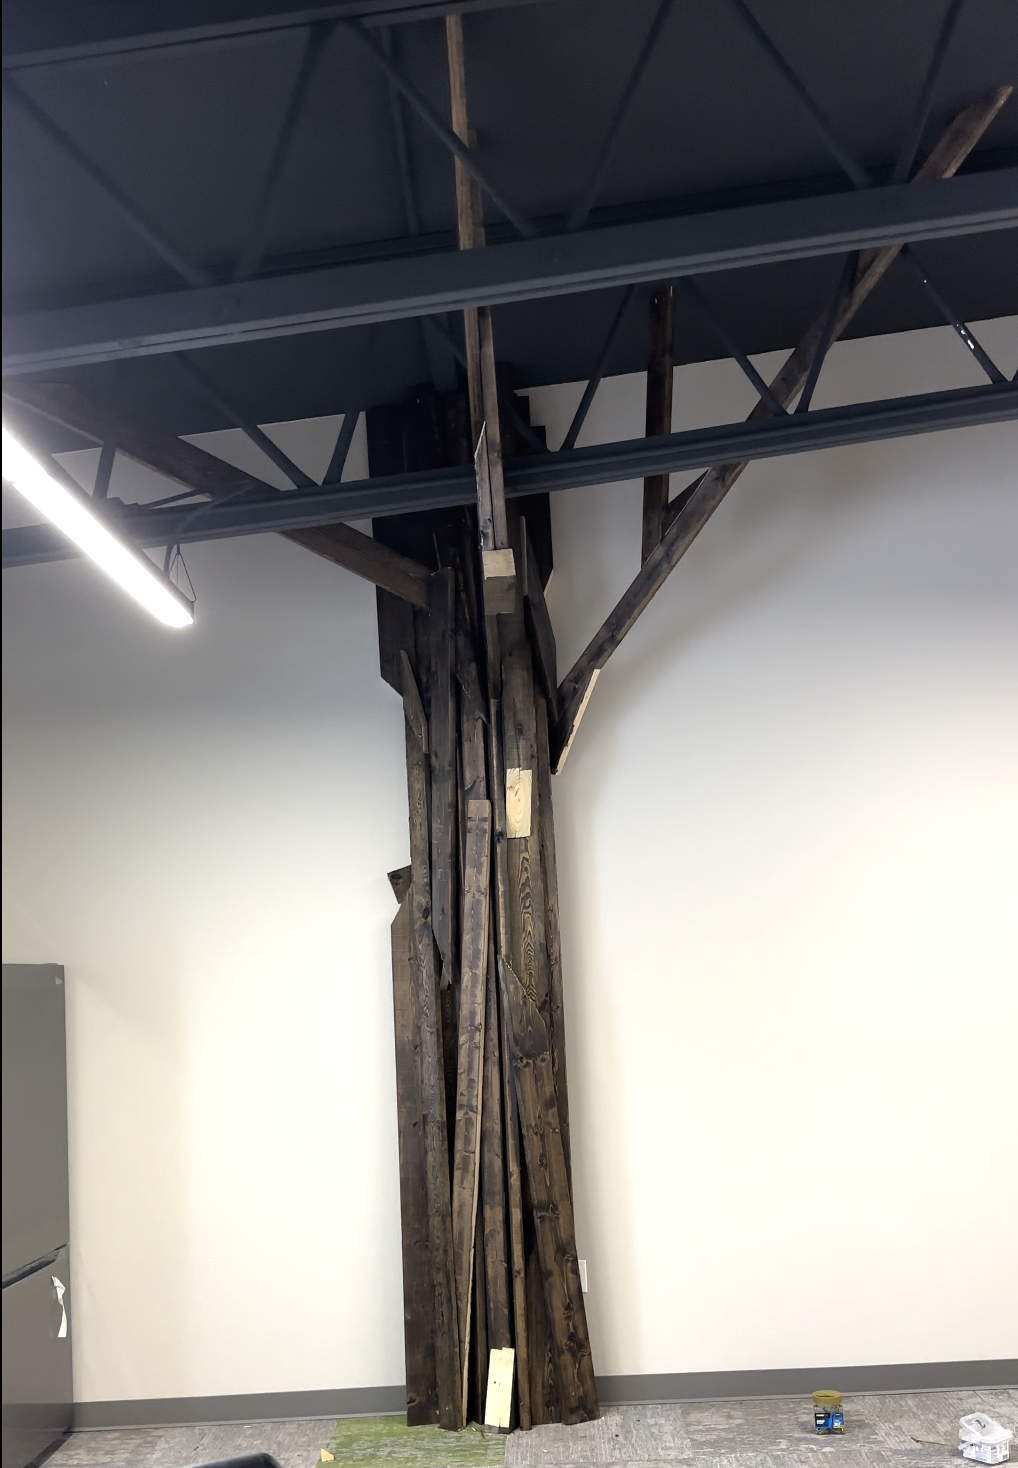
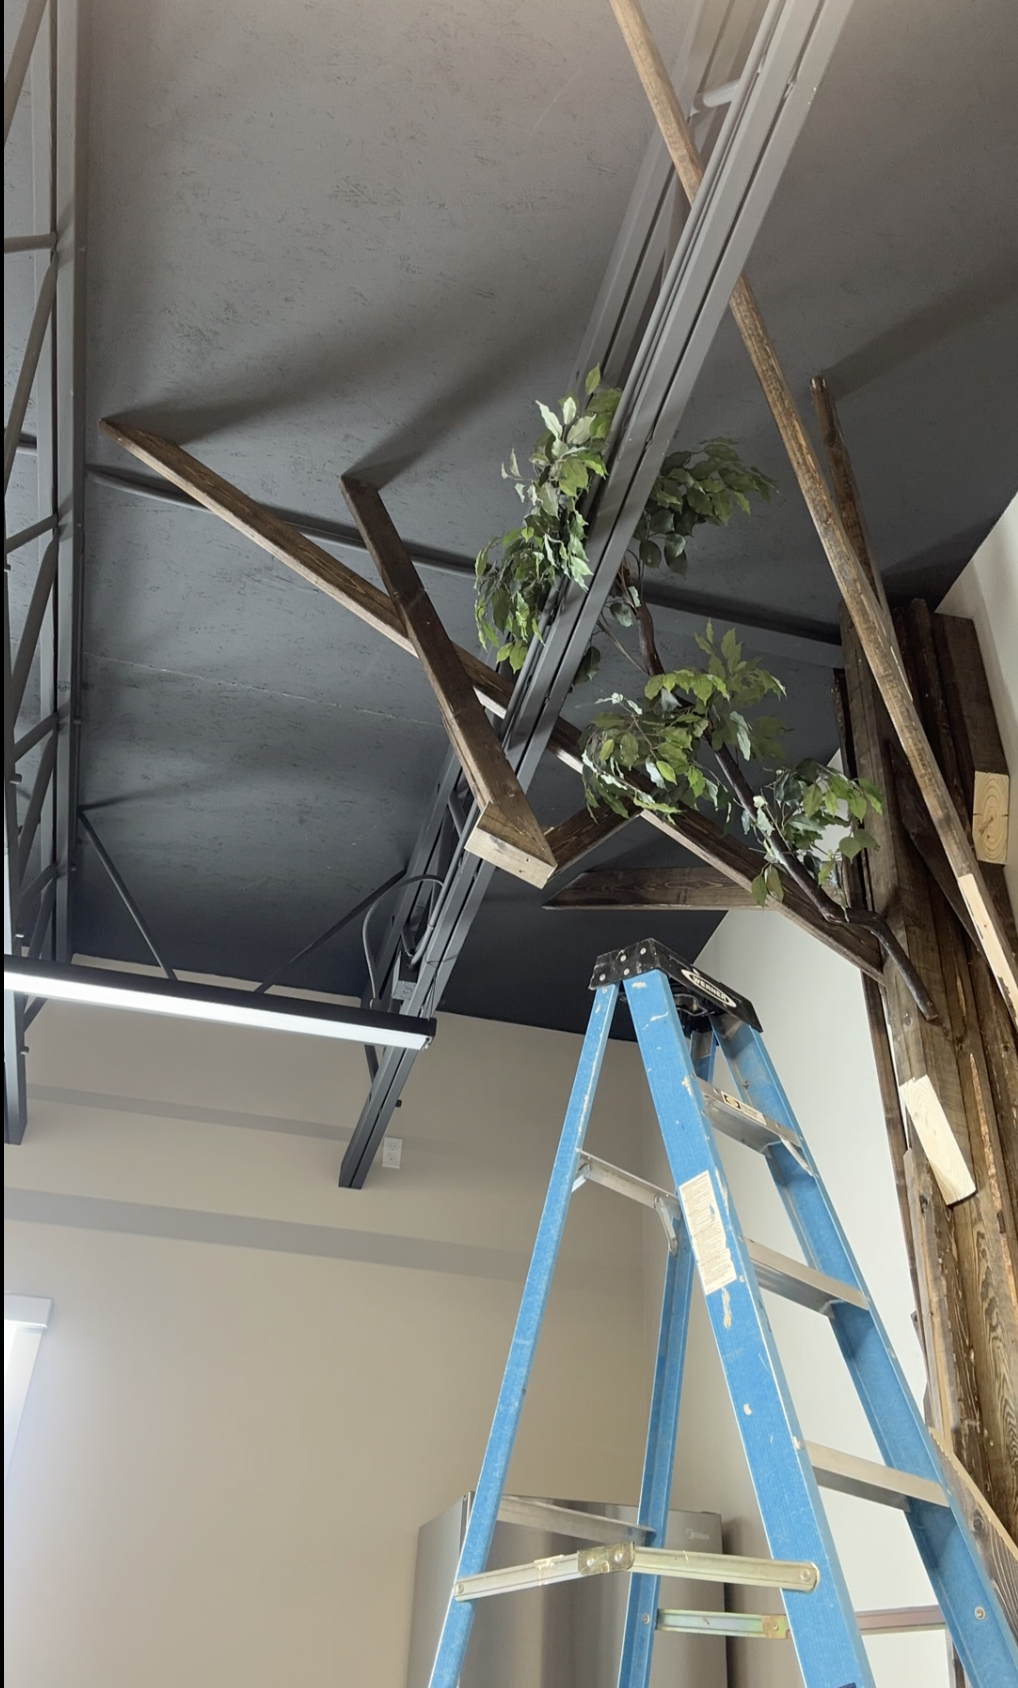
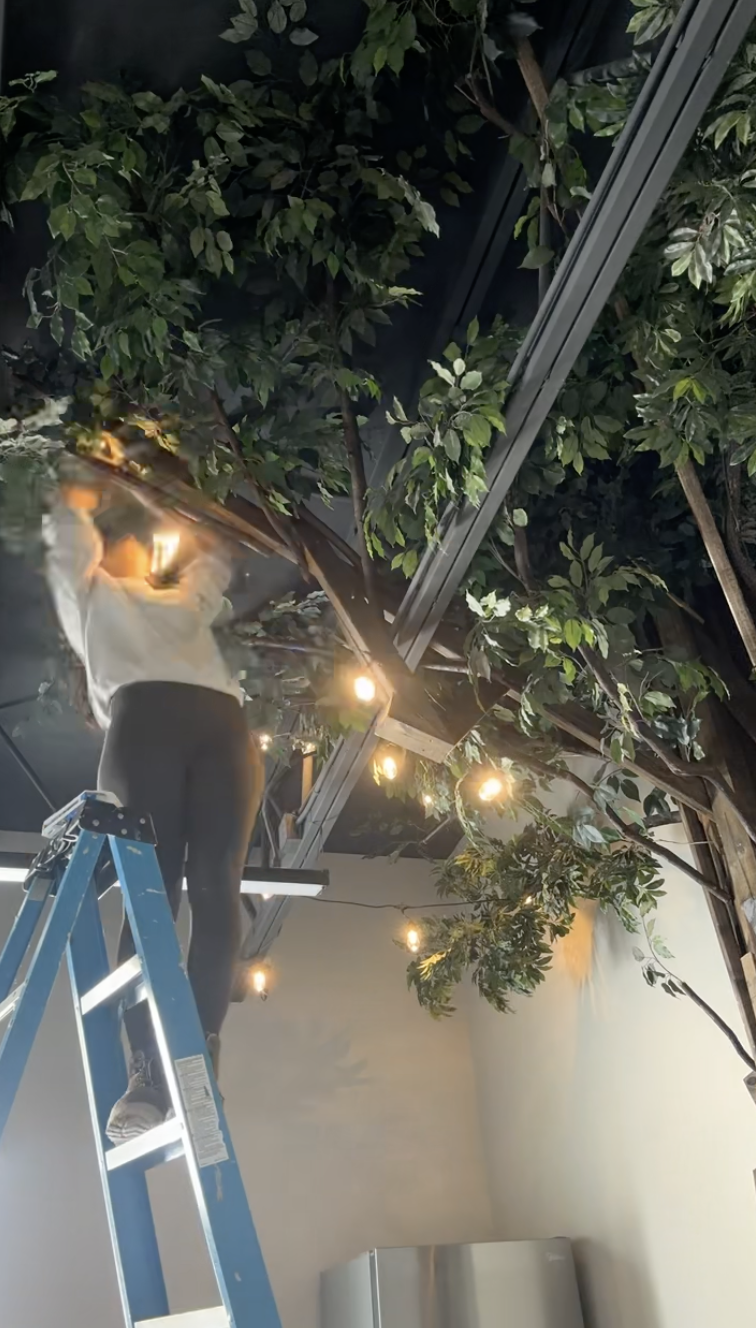
Step 5: Once you create a decent base. Begin to take the 2×4’s out from the tree towards the ceiling to create tree trunks.
I cut random angles so that the branches to add character to the tree.
The ceiling I was working with did have metal beams which made it easier to make the branches and it also provided reinforcement.
However, if you have a normal ceiling, I highly recommend planning reinforcement branches into your design and securing to the ceiling.
Add Leaves to the tree
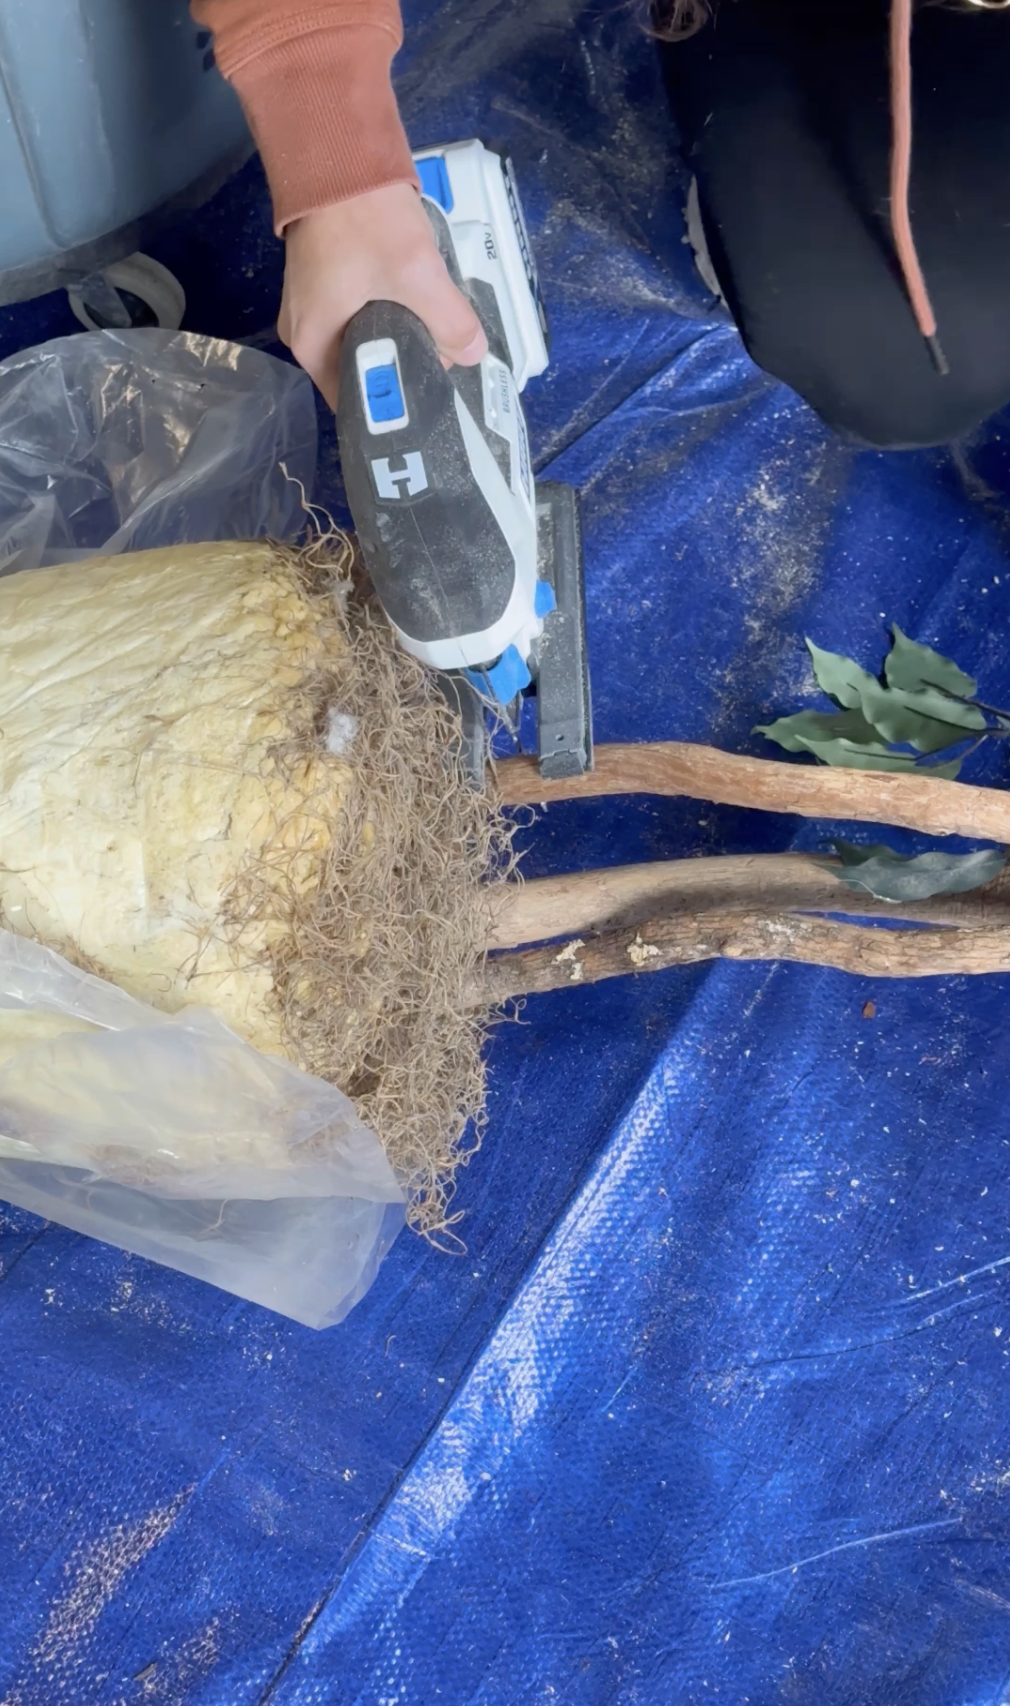
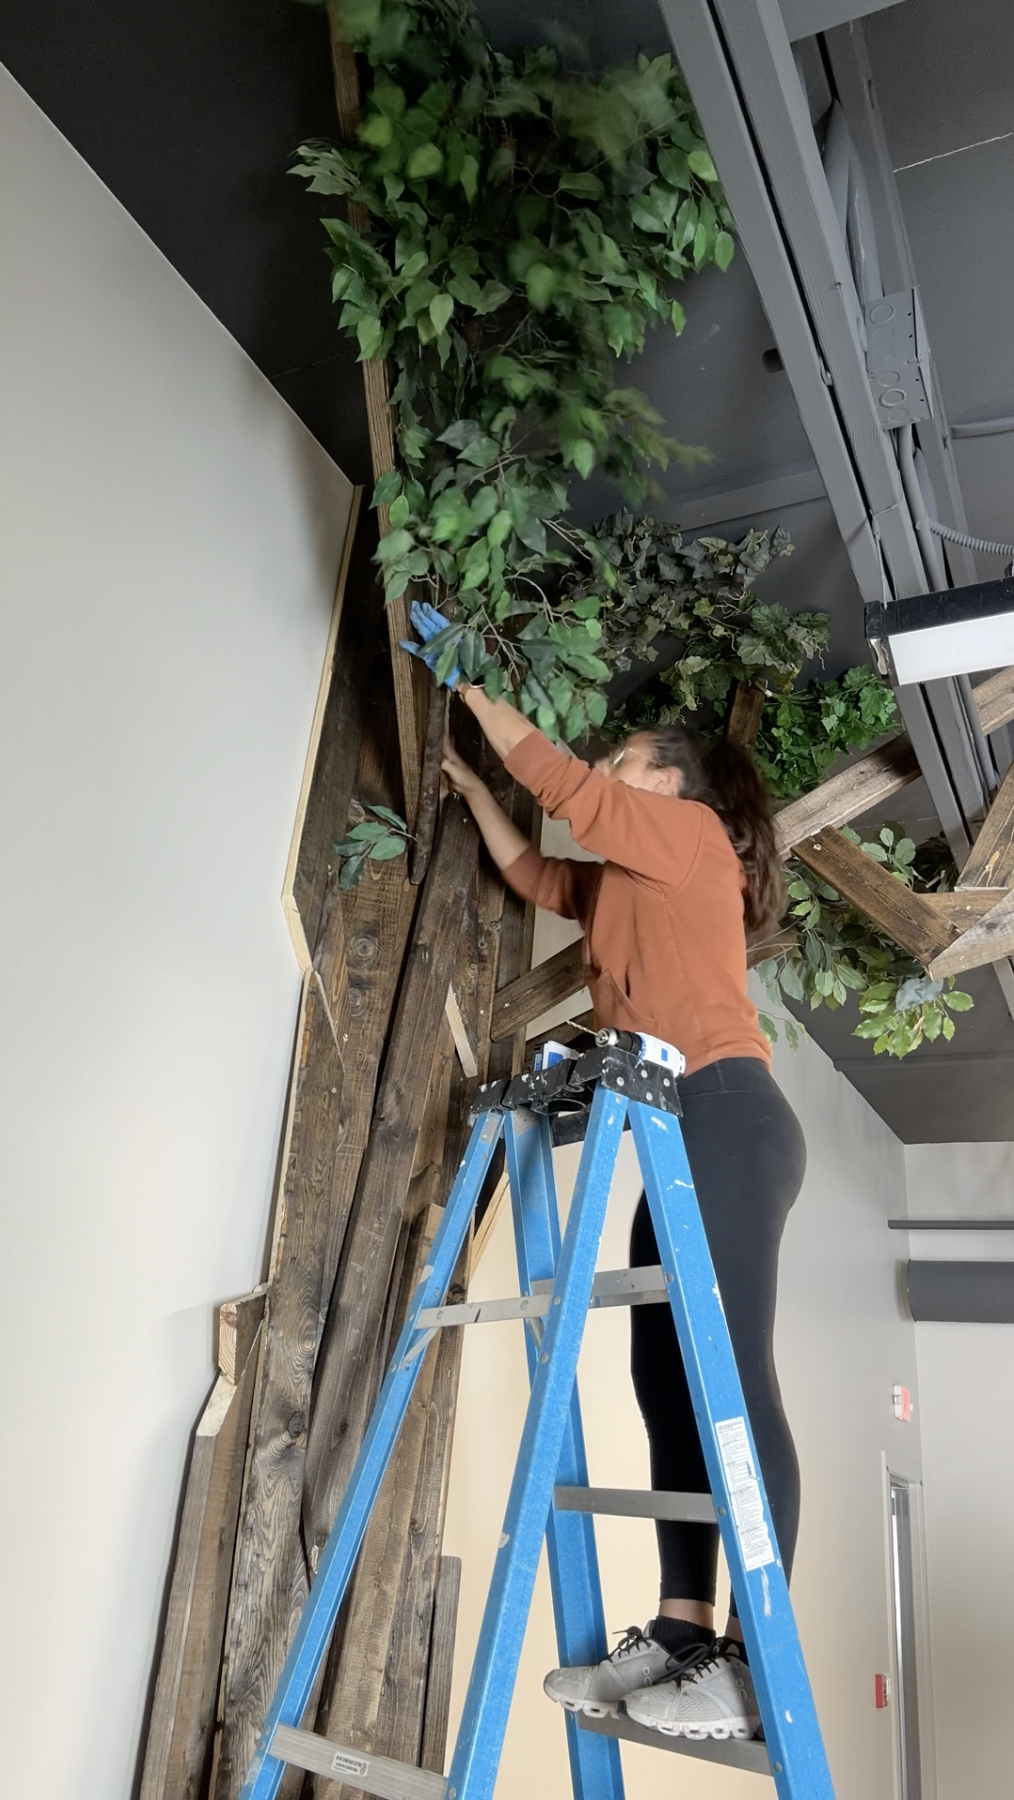
Step 6: Find old fake trees that you can use to add greenery to the tree.
I found mine in the church basement but thrift stores, estate sales, FB marketplace are also great affordable options.
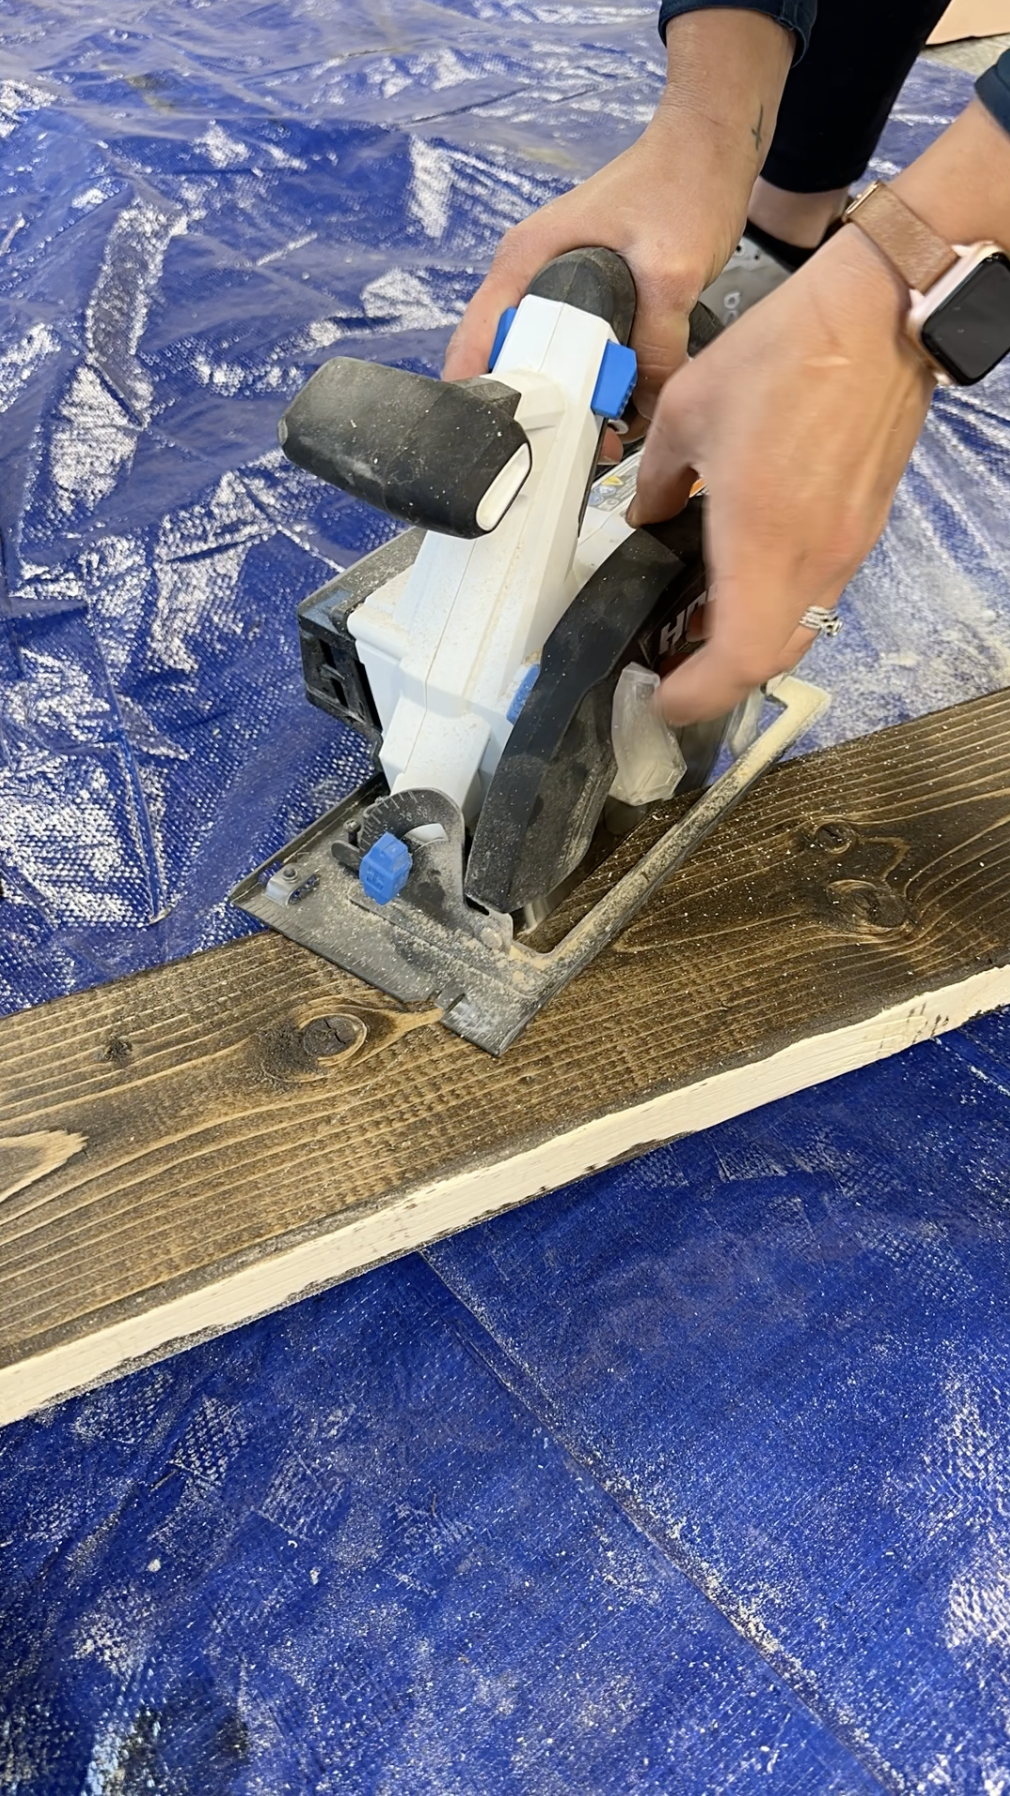
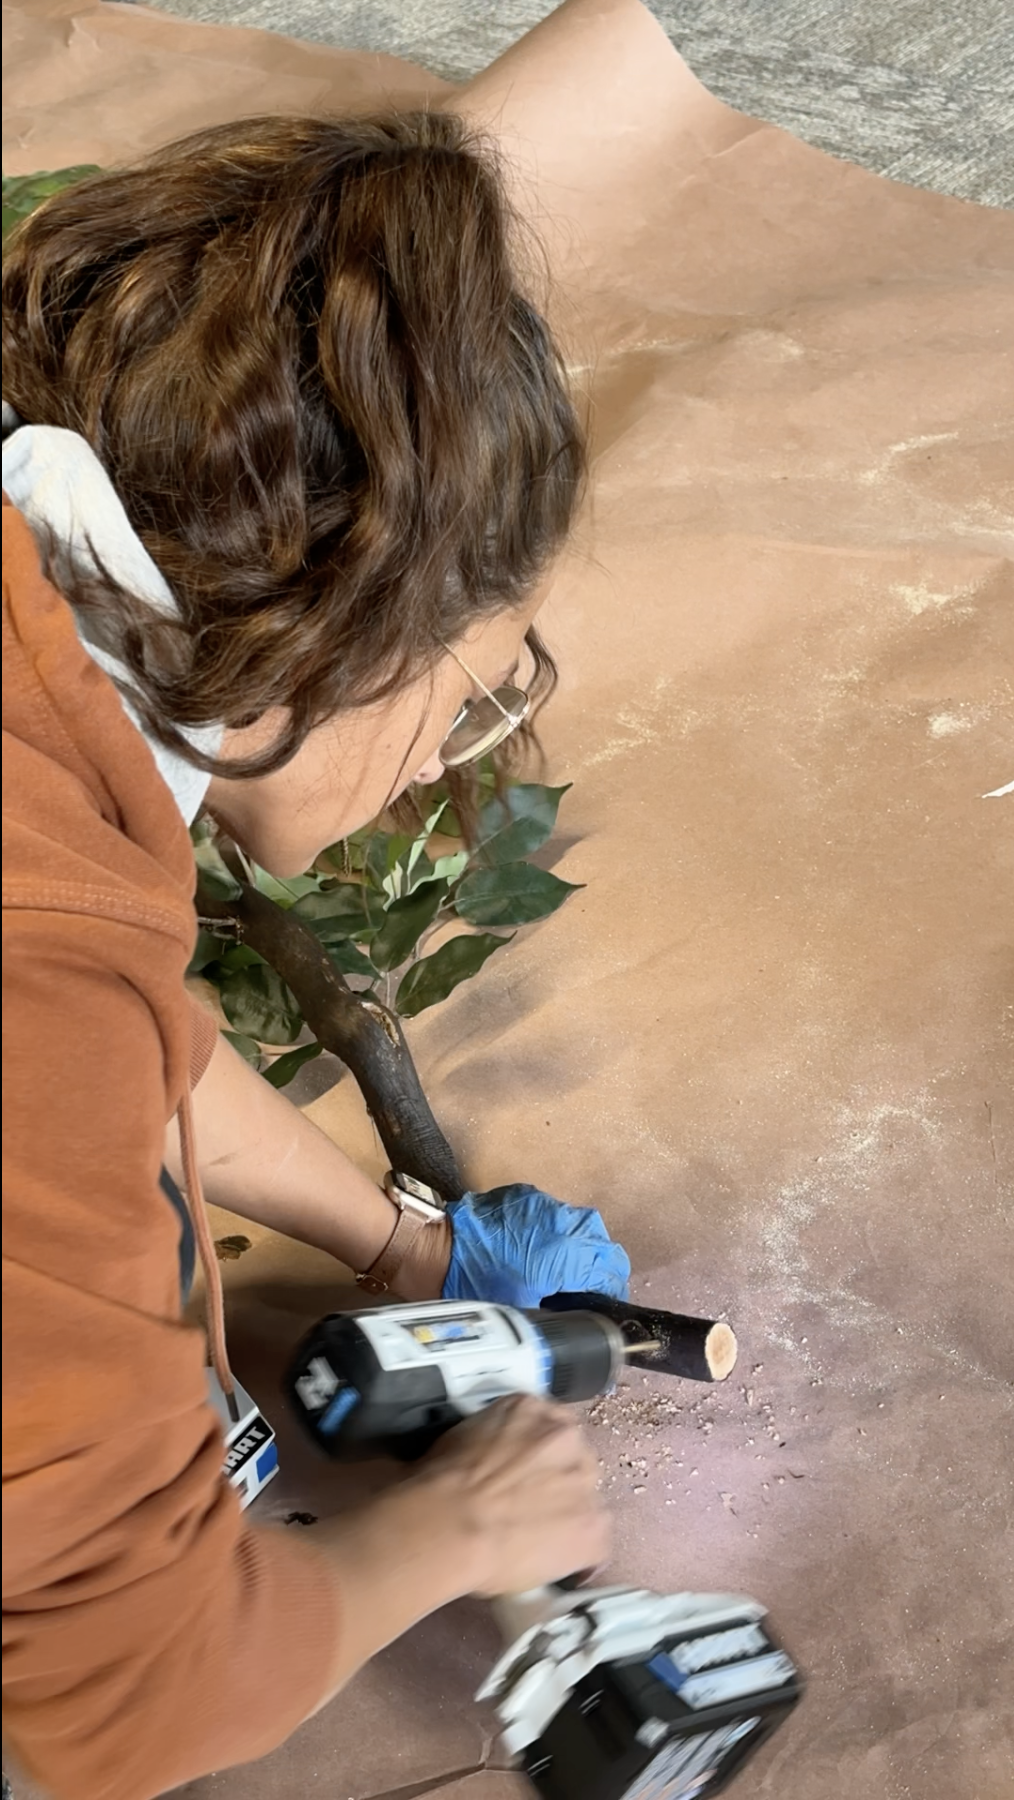
Step 7: Using a Jig Saw, cut the branches from the fake tree base.
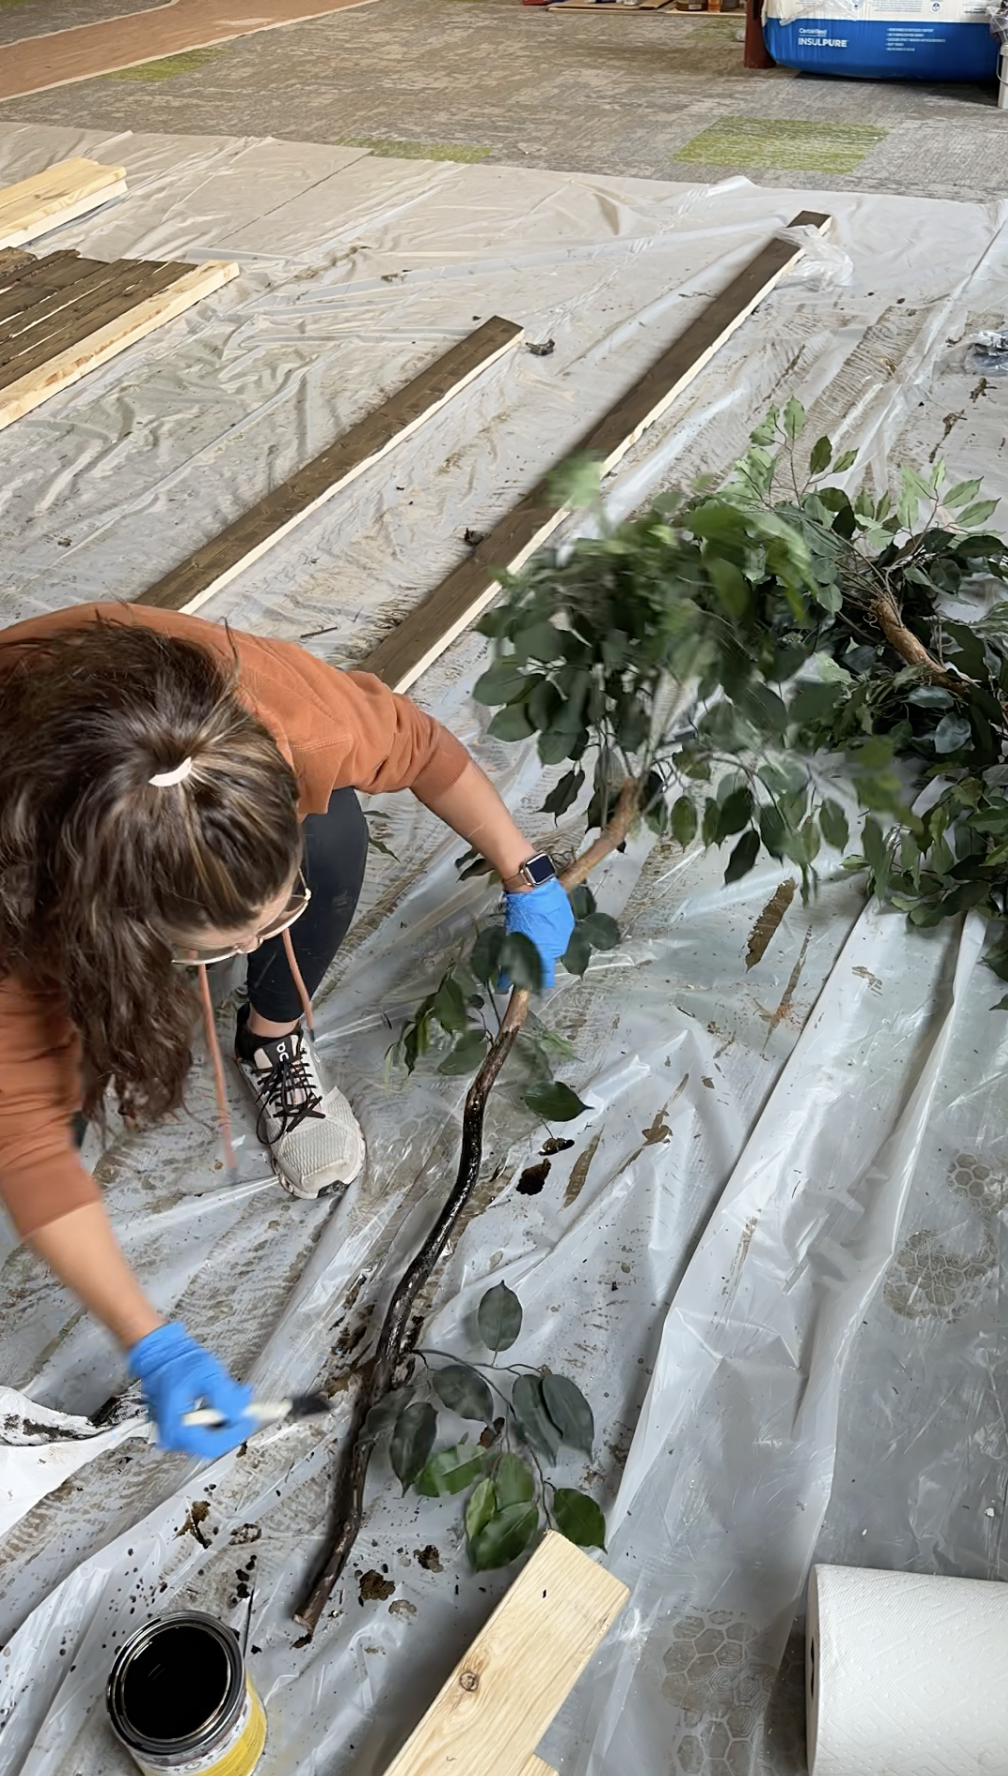
Step 8: Adjust the color of the branches to match the tree trunks and branches using stain.
Step 9: I use a drill bit smaller than the screw shaft. I usually just eyeball it. You just do NOT want it bigger than the screw shaft. Add a hole into your branch that you will use to attach the branch to the tree.
Step 10: Attach the branches to the 2×4’s to create a realistic tree top.
the tree’s final touches
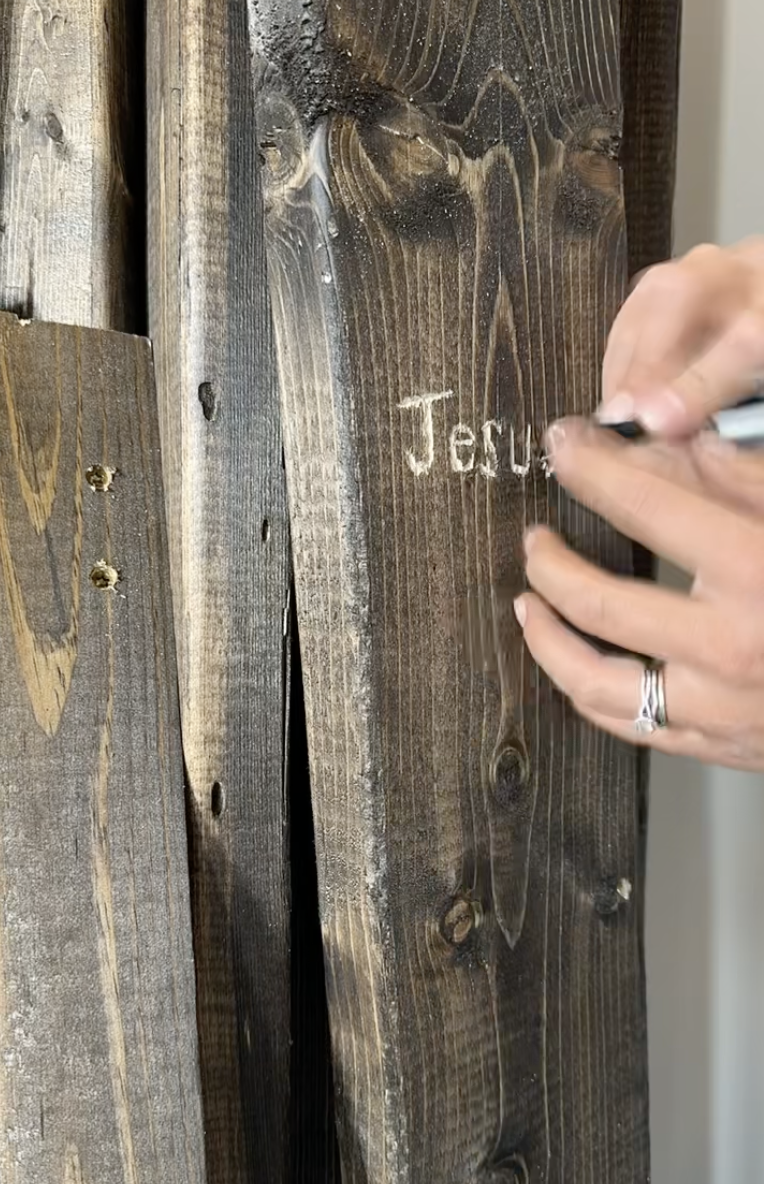

Step 11: Add Whimsical lighting and add a declaration of love carving.
How to do this in my home for a children’s bedroom or playroom?
It’s actually quite simple! First you will establish how high you want the tree to be. That will be your trunk then make the branches come proportionally out of the trunk towards the ceiling.
-Alyssa


Comments