
Material List:
4- 2X4 @ 8′
2- 1/2″ sanded plywood @ 2′ X 4′
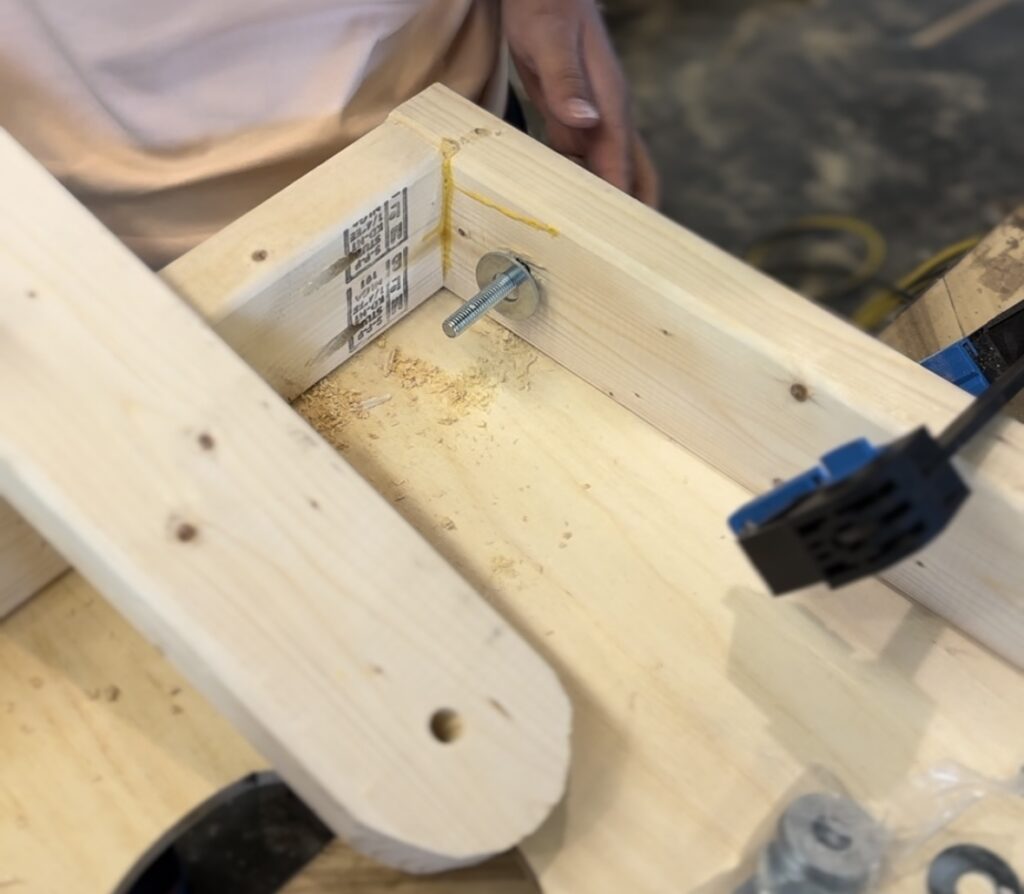
4- 1/2″ X 3.5″ Carriage Bolts
4- 1/2″ Zinc Washers
2- 1/2″ Wing Nuts
2.5″ pockethole screws (the blue ones)
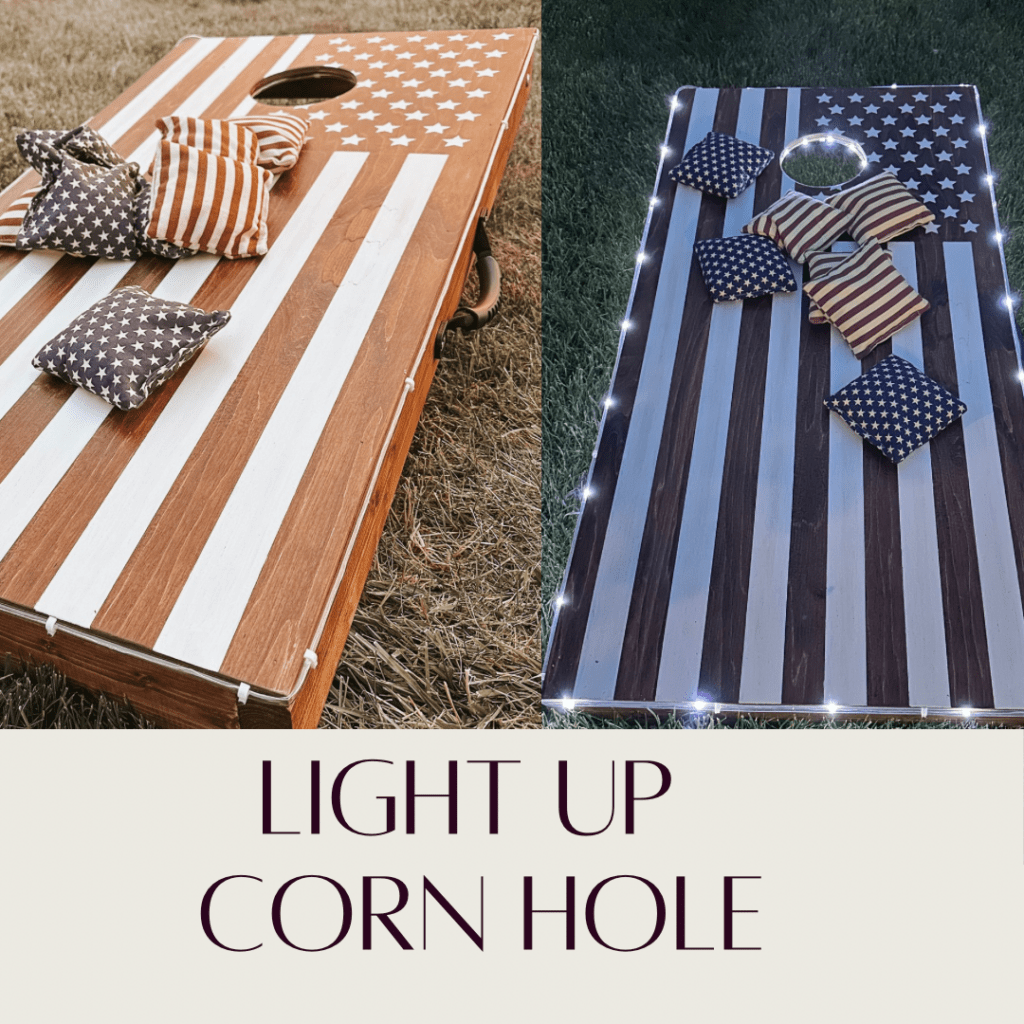
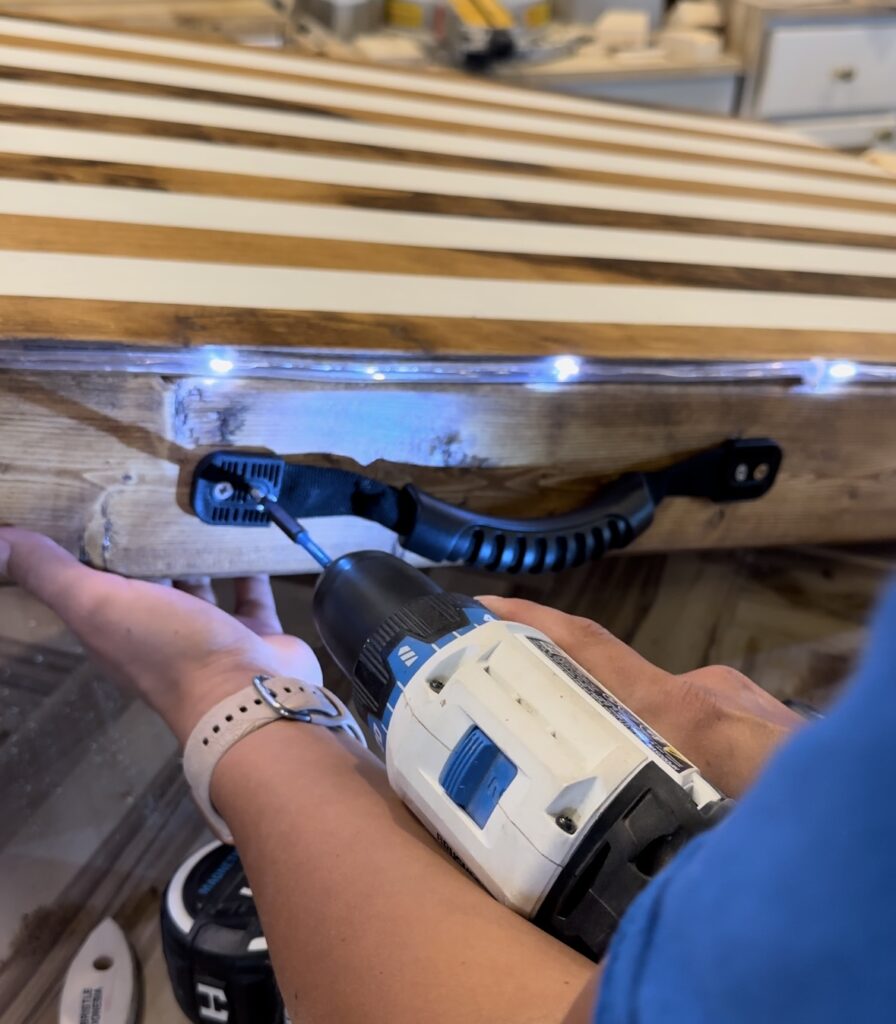
Cornhole Board Lights (linked here)
Kayak Handles (linked here)
Wood Glue
Exterior Satin Polyurethane
Paint & Stain of choice
Tools Needed:
Brad Nailer (or clamps are just fine too)
Drill
1/2″ Drill Bit
Jig Saw
Miter Saw (or any saw that can cut 2x4s)
Pocket Hole Jig (if you don’t have one of these, that’s OKAY! You can secure by driving 2″ GRK screws into the boards to make your frame)
Hammer (if you’re adding the lights)
Step One: Building the Base
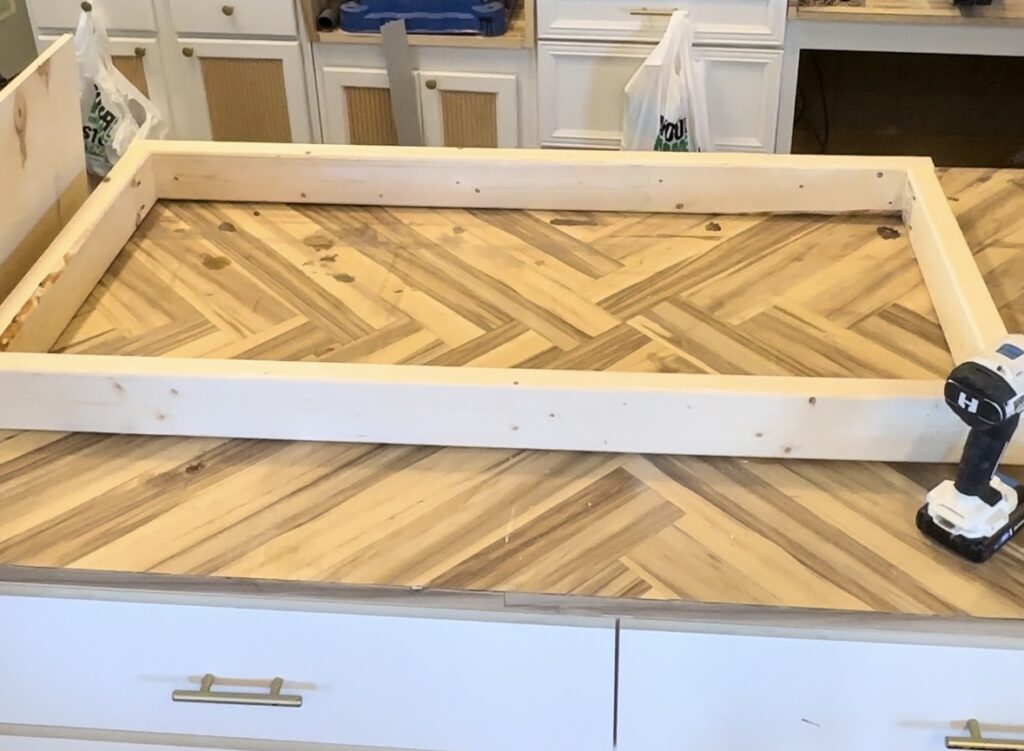
Cut your 2X4s. You’ll need 4 boards at 48″ and 4 boards at 21″. If you’re using a pocket hole jig, you will want to add two pocket holes to each end of the 21″ boards. Add glue to each end of the 21″ board and pocket hole into the 48″ boards until you have your frame built like the above photo
Step Two: Adding your Face
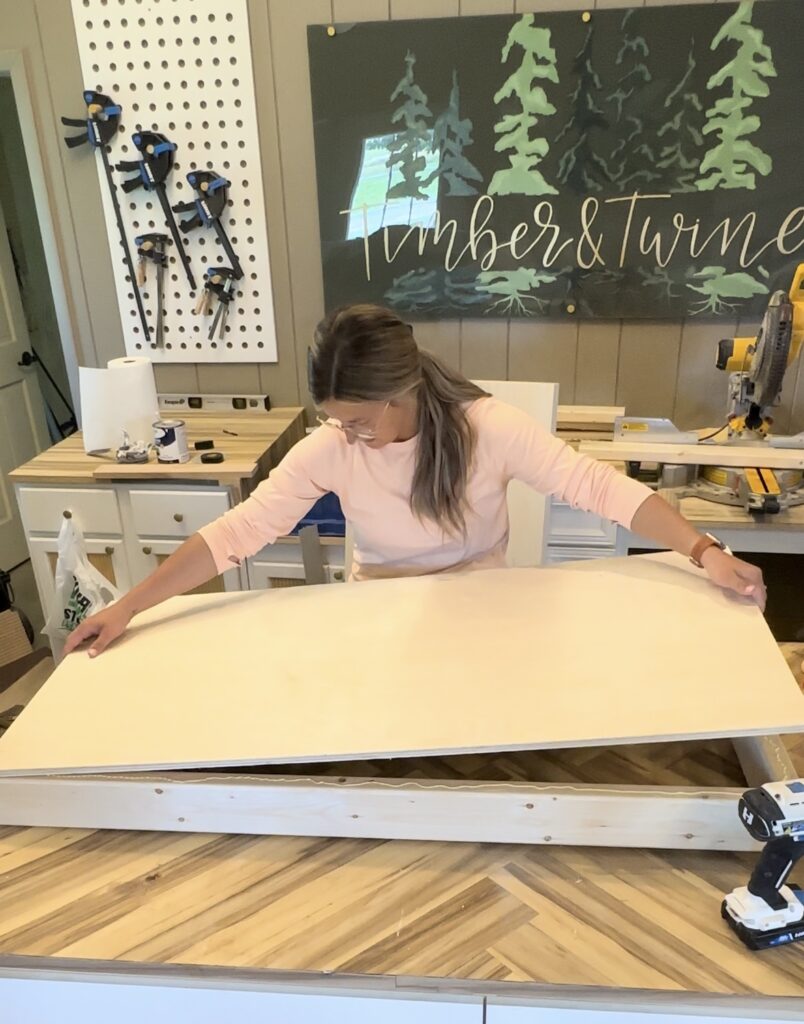
Next, run a bead of glue around the entire top of your frame. Set your 1/2″ plywood on top, making sure everything is lined up and even with the frame. Use your brad nailer, or clamps to hold down the plywood while the glue dries.
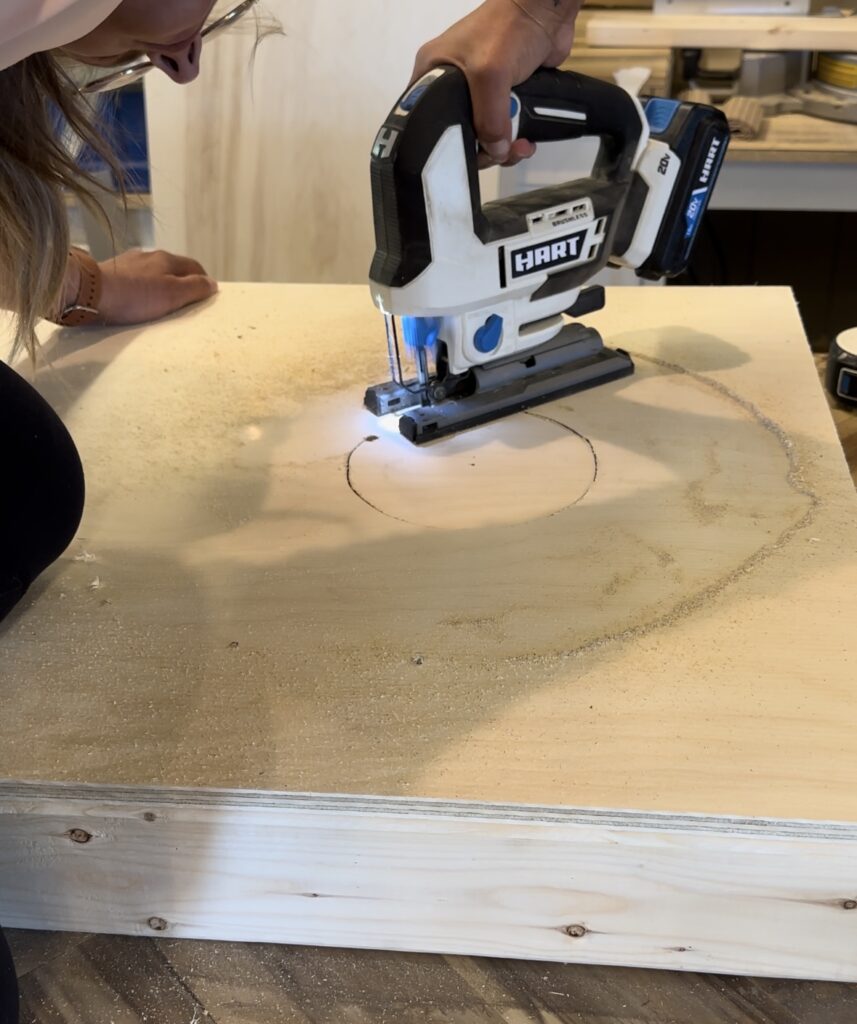
Step Three: Making your Hole
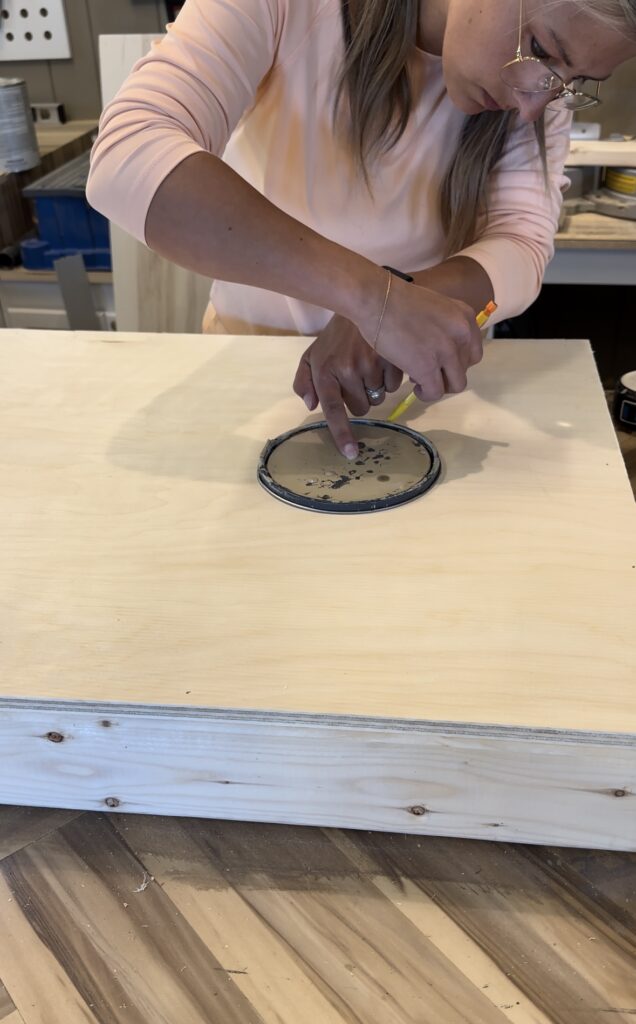
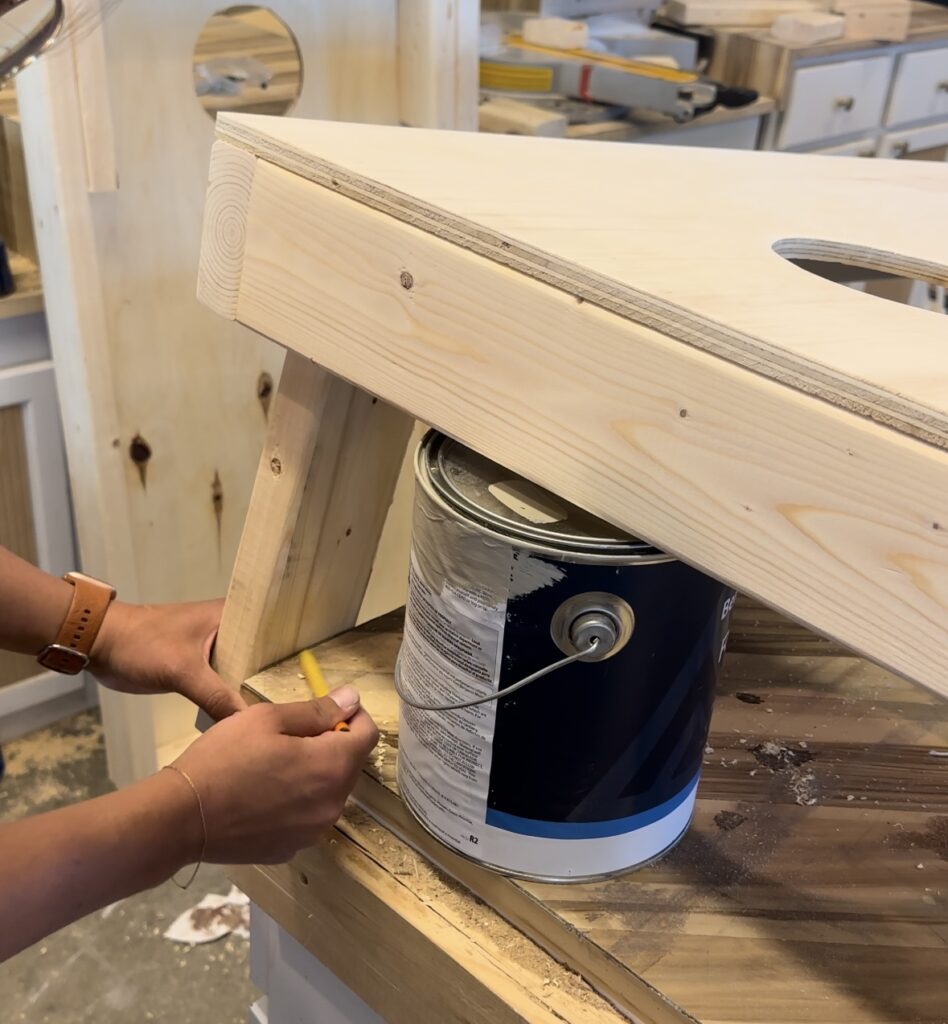
A regulation hole on a corn hole board is 6 inches in diameter. I tried to find something on hand that was circle shape and close to this size because I don’t have a compass. I found a paint can lid that was 6.25″ so I went with it! (I will take the extra 1/4″ help! lol ) I found the center of the board (12″ from each side, and 9″ from top) and marked it. Then placed the center of my lid on that dot and traced the circle.

I used a drill bit to create a small hole large enough for me to get my jig saw blade through.
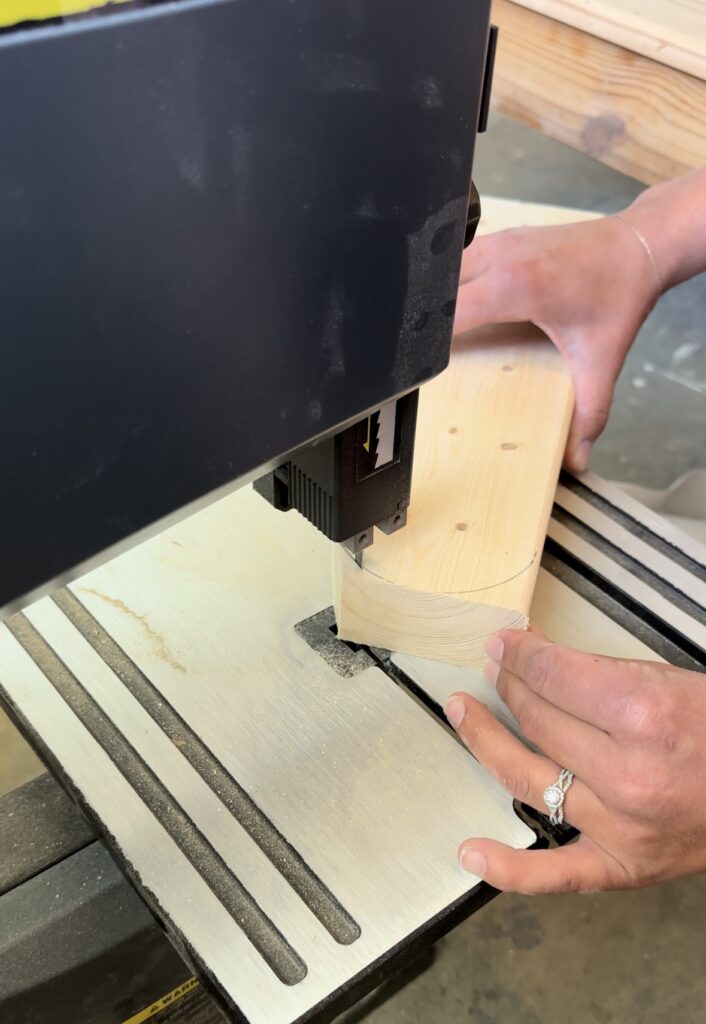
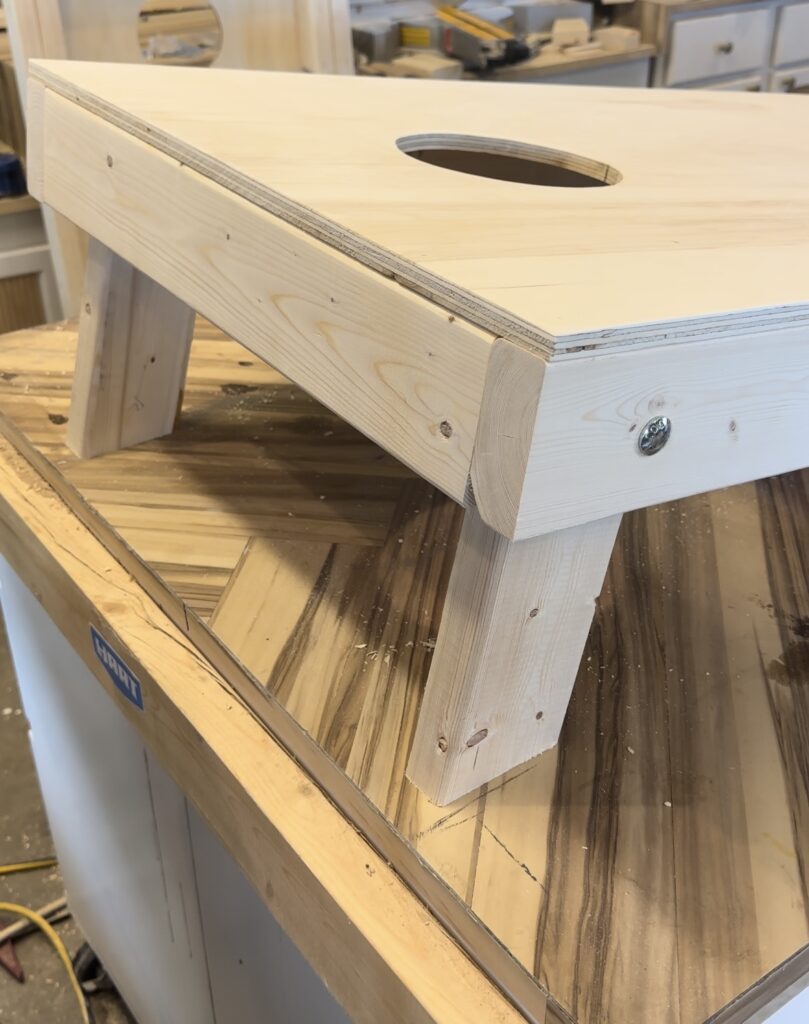
Step Four: Cutting legs into Semi-Circles
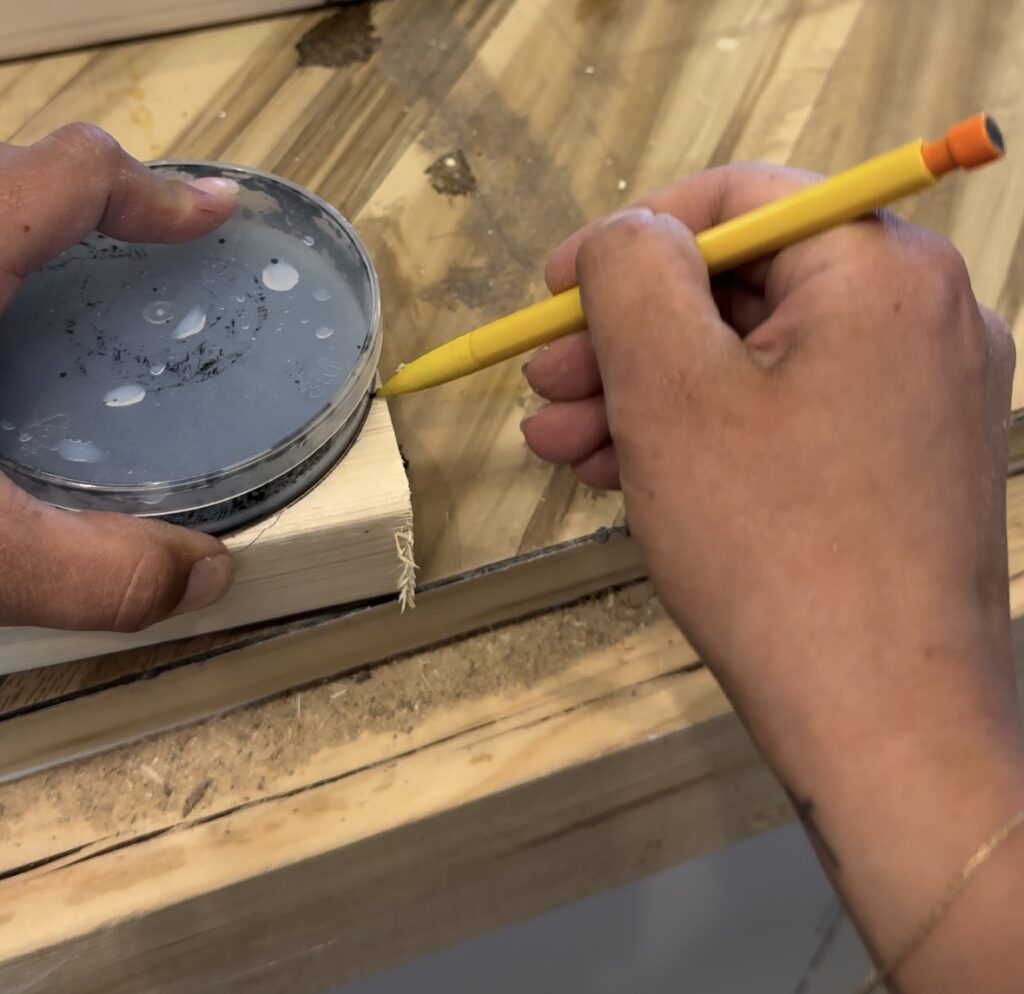
Again, I tried to search for circle that was 3.5″ in diameter (same width as the 2×4). I ended up finding an electrical tape container that was exactly 3.5″ in diameter. So I lined up the tape container on the end of the board so I could trace a perfect semi-circle.
Step Five: Assembling your Legs

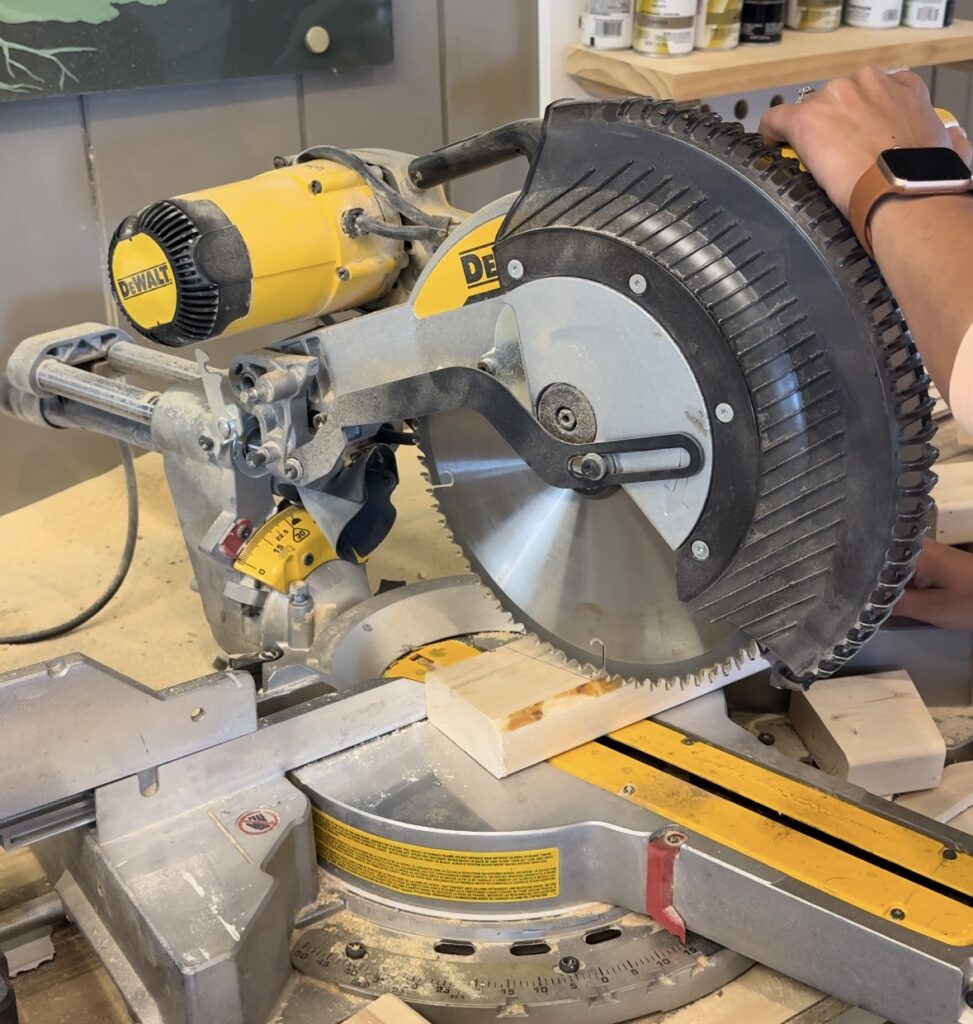
Step Six: Cutting your Leg Angles
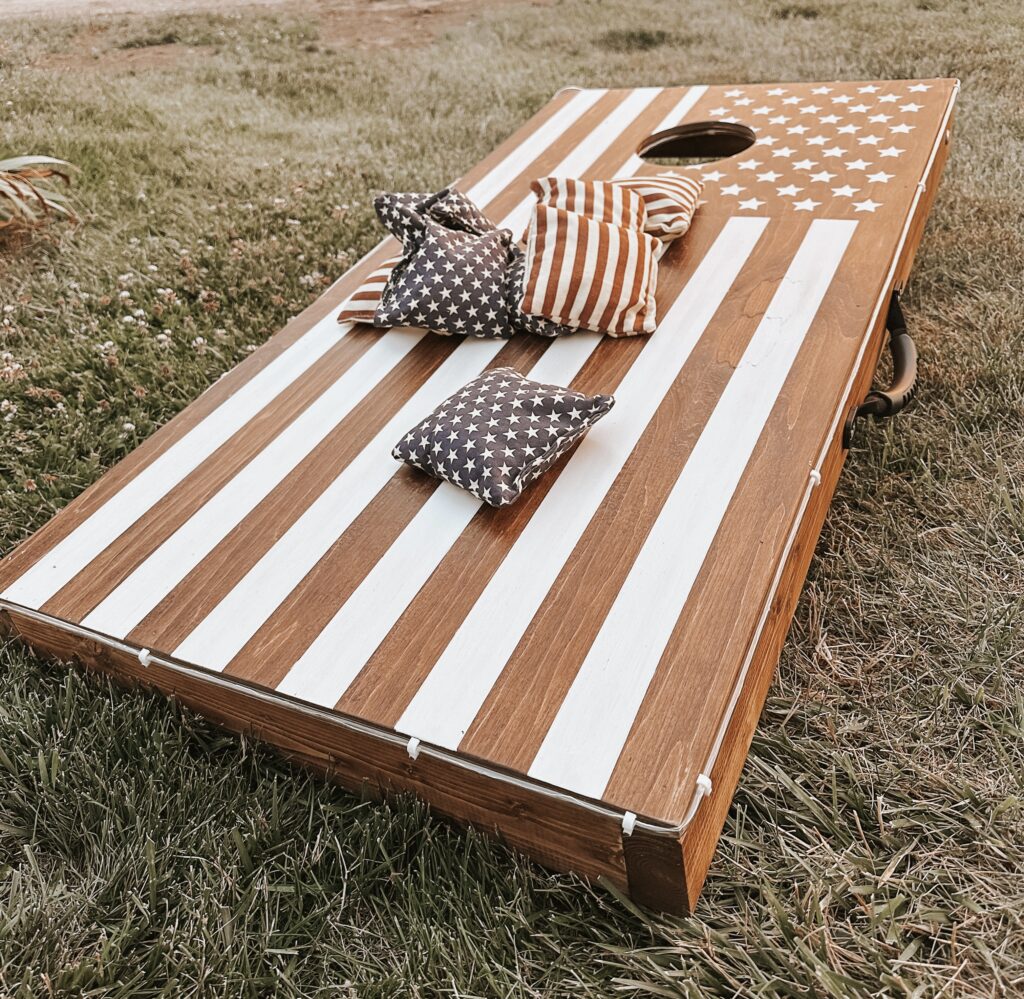
Step Seven: Customize it
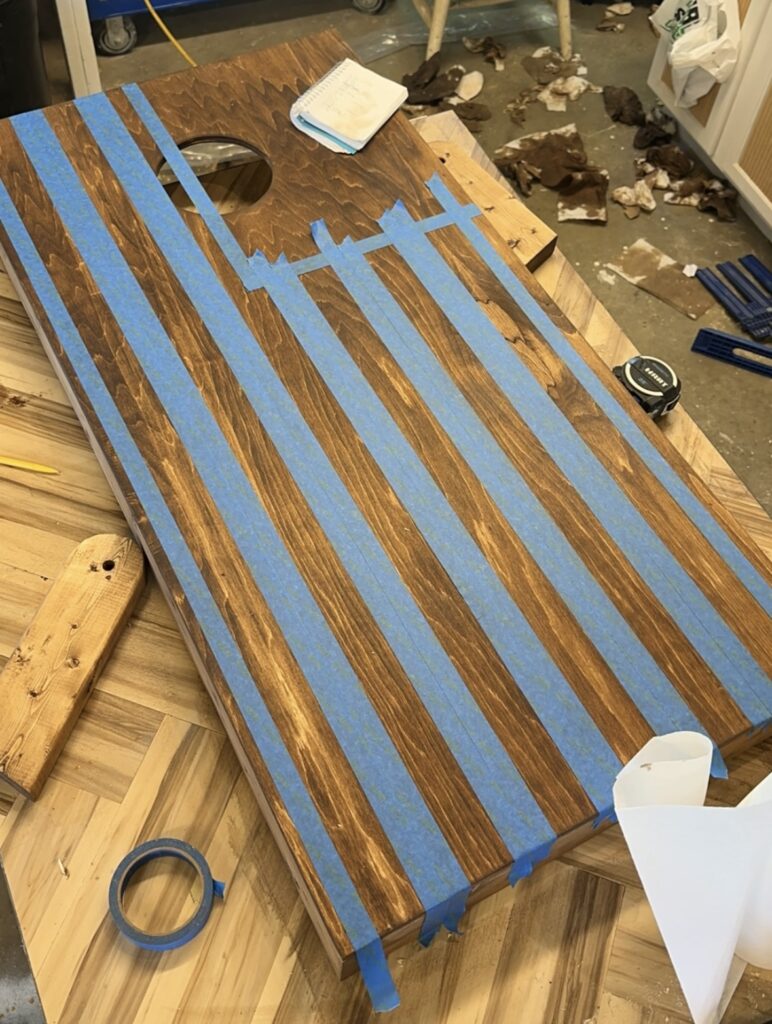
I chose to completely stain my boards using Early American by Minwax. After they were stained, I marked off 13 lines equally on the board. Using painters tape where I wanted to keep the stripes the stained color.
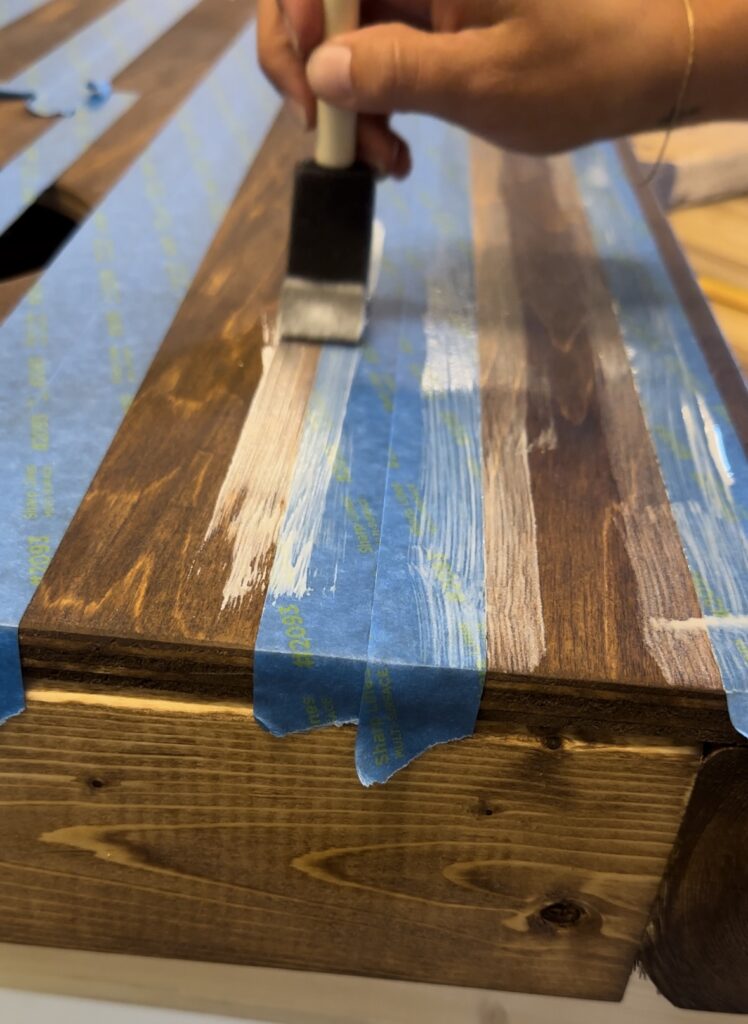
Once it was all taped off, I used Mod Podge to seal the tape edges to my white paint wouldn’t bleed, leaving me with nice crisp lines.
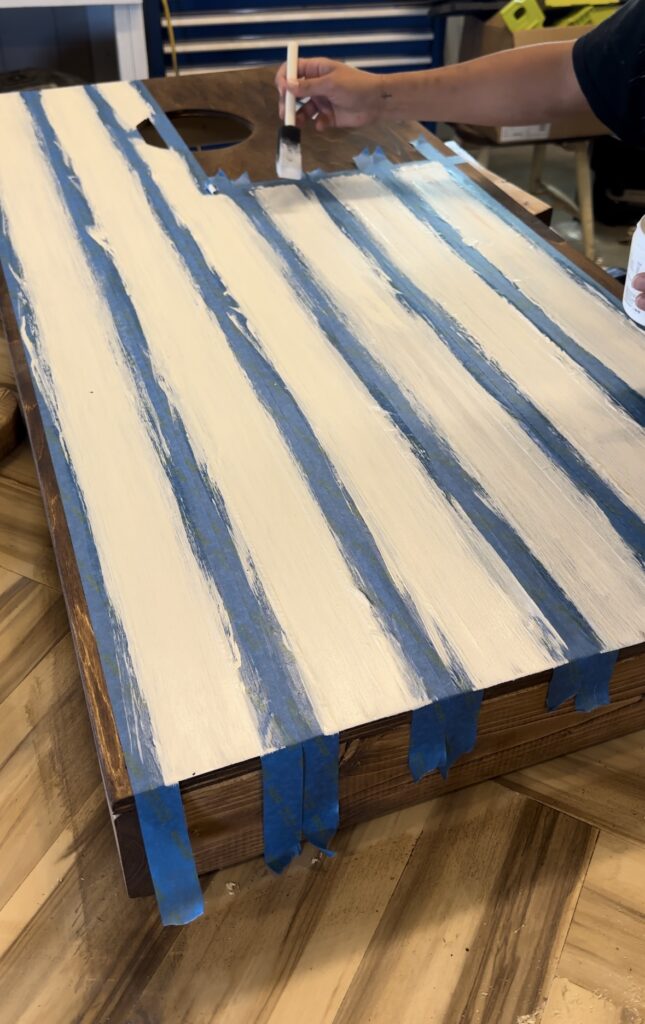
Once the Mod Podge dried I added two coats of white paint.
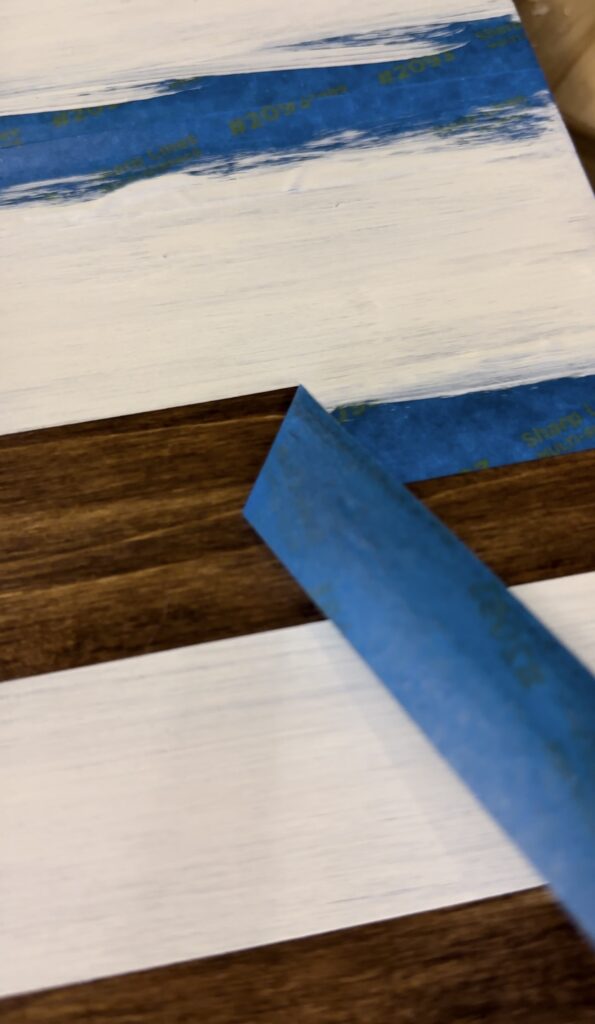
Removing the tape while the last coat is still wet will lessen the chance of the paint pealing up with the tape.
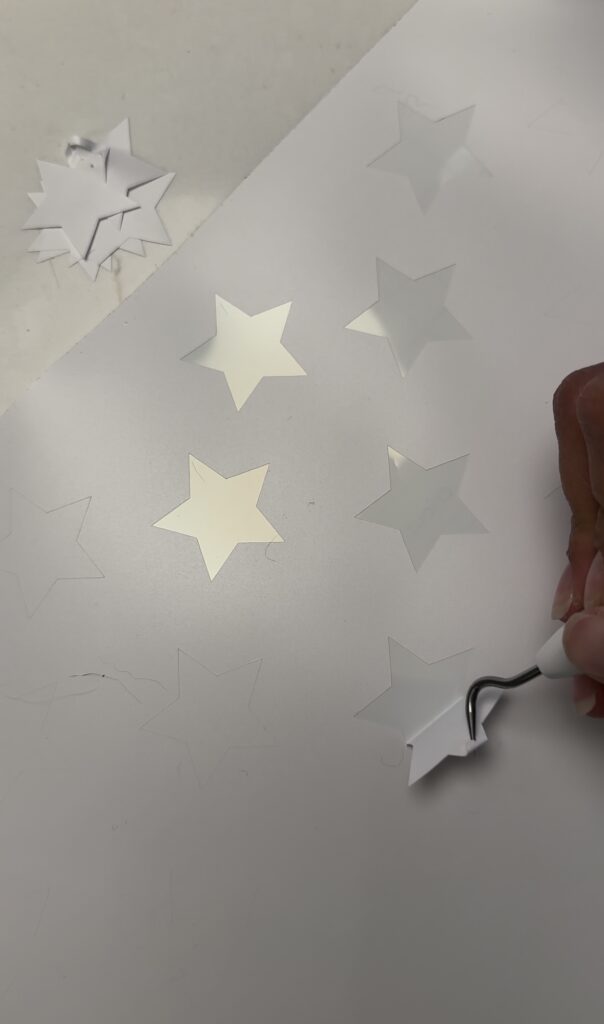
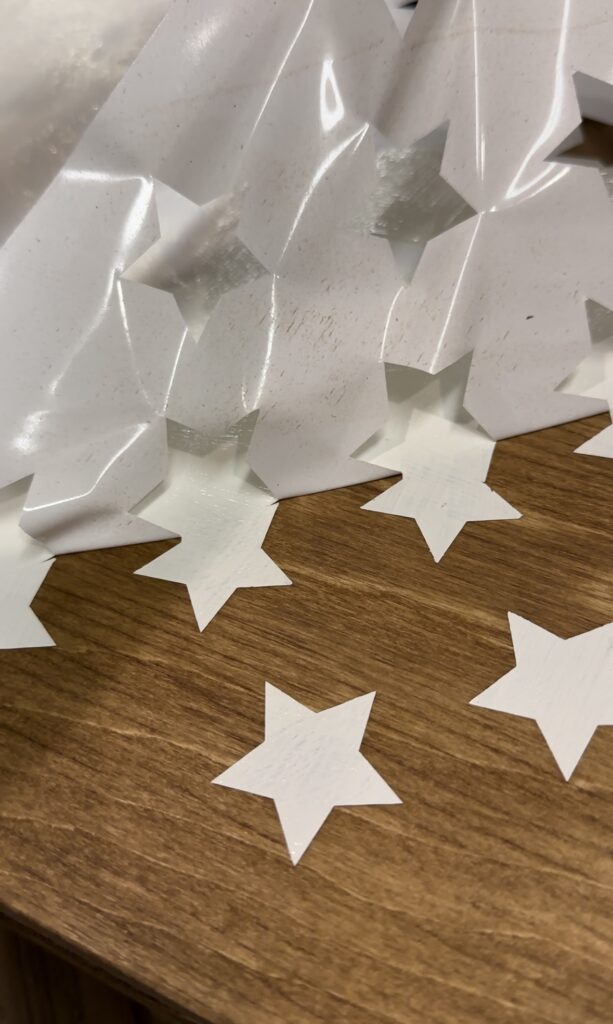
Then I went to my Cricut and made a star stencil with 50 stars. You could also order a star stamp off Amazon, and put your stars on that way as well. If you have Cricut design space, I made my stencil public, you can find it here. After my stars were cut out, I pulled my star shapes off the mat and used the left over as a stencil, lining it up on my board accordingly.
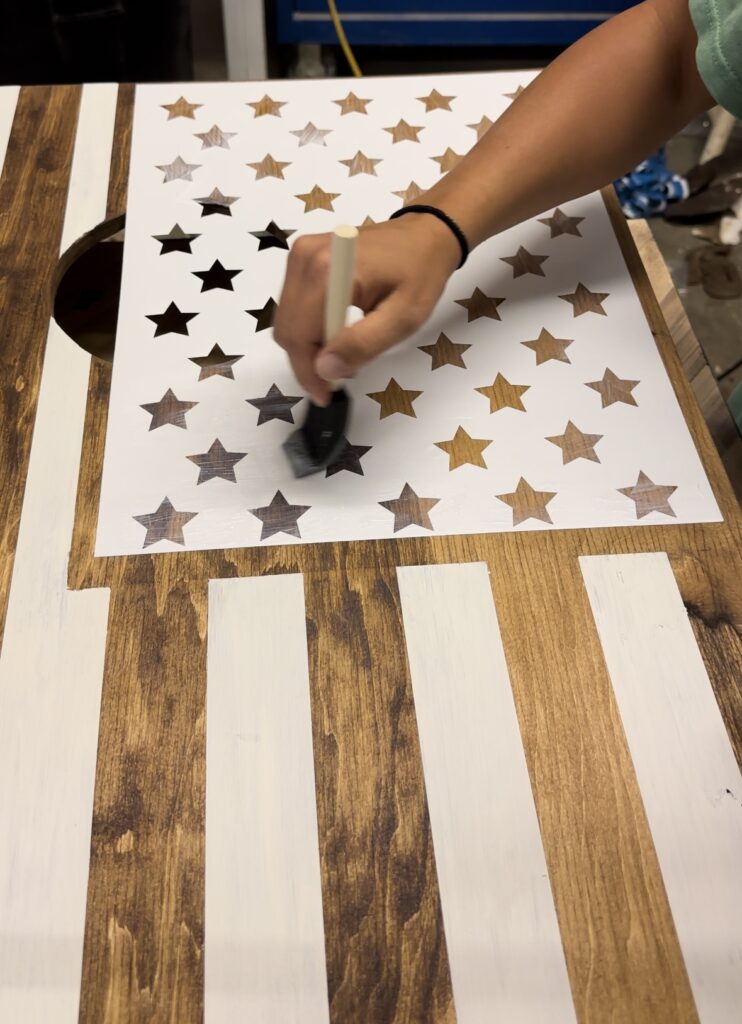
I then used Mod Podge to seal all the stars just like I did with the stripes.

And then painted two coats.
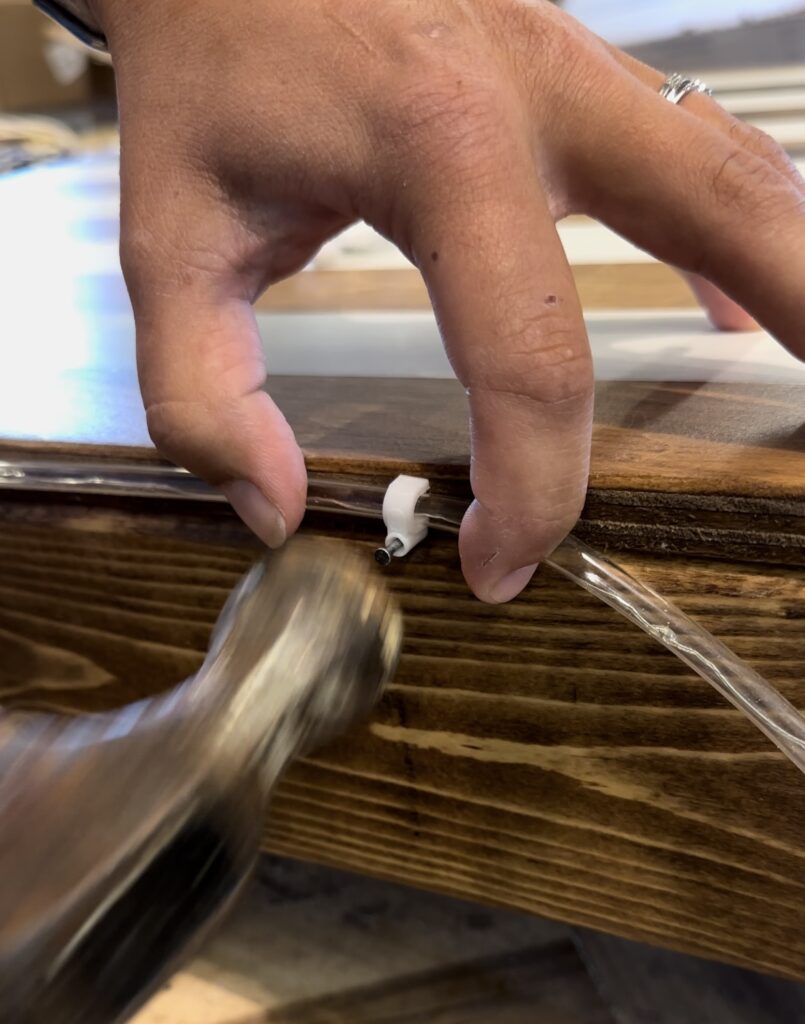
Step Eight: Seal & Add Lights & Handles
Step Nine: Finding bags
You can find bags just about anywhere. Amazon is a great place. I however was looking for unique hand made corn bags. So I searched Etsy and found the cutest set of vintage bags. However, after everything is said and done, Riley decided since he’s a firefighter, he wanted bags made from old recycled turnout gear. We found these on Etsy, which will be great because the reflective stripe should help when playing at night!
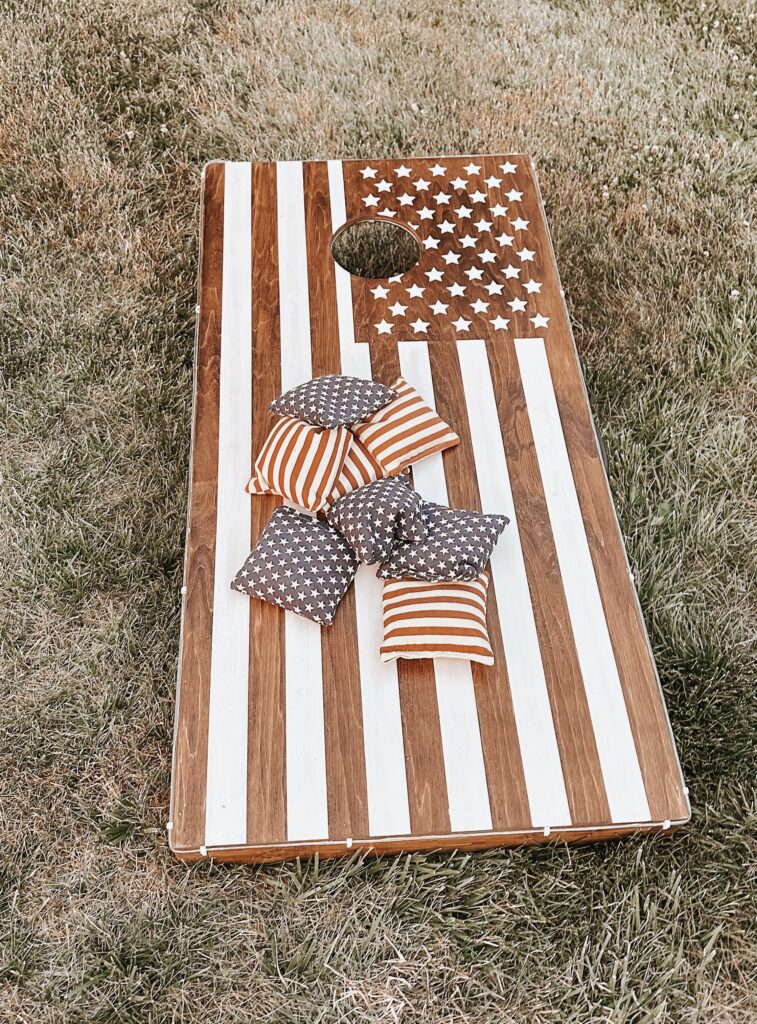
The new bags haven’t come in yet, but these vintage American bags are also from Etsy for a really great price. Linked here


Comments