
Cabinet doors play a pivotal role in defining the aesthetics of your kitchen or pantry. While store-bought cabinet doors are readily available, creating custom cabinet doors can add a unique touch to your space. Whether you’re a seasoned DIY enthusiast or a beginner looking for a rewarding project, this guide will walk you through the steps to make your own cabinet doors. With a few tools and some patience, you can transform your cabinets into something truly special.
Before you get started, gather the following materials and tools:
Materials:
- Wood: Choose a wood type that suits your style and budget, such as oak, maple, pine, or plywood.
- Wood Glue: High-quality wood glue for joining pieces securely.
- Kreg Jig Screws: For reinforcing joints.
- Sandpaper: Various grits (80, 120, and 220) for sanding and smoothing.
- Finishing Supplies: Choose a finish that complements your kitchen decor, such as paint, stain, or varnish.
- Cabinet Hardware: Knobs, handles, or hinges to attach to your cabinet doors.
Tools:
- Table Saw or Circular Saw: For cutting the wood to size.
- Miter Saw: For making precise angle cuts if your design requires it.
- Sander: Optional, for adding decorative edges or patterns.
- Kreg Jig Pocket Hole: For adding pocket holes to hold your door securely together
- Kreg Jig Hinge Jig: For attaching the hinges to your cabinet doors.
- Clamps: To hold pieces in place during assembly.
- Power Drill: To secure the kreg jig screw intro the holes.
- Brad Nailer: For securing the face plates to any existing drawers.
- Measuring Tape, Square, and Pencil: For accurate measurements and marking.
- Safety Gear: Safety glasses, dust mask, and hearing protection.
Step 1: Measure and Plan before you start cutting wood, measure the cabinet openings where the doors will be installed. Make a detailed plan including dimensions, style, and any desired decorative features. When I measured my door I measure my opening.


A) You will do this by measuring from inside one piece of trim the inside of the opposite piece of trim. See Picture A. In my case when creating these doors, it was 33″.
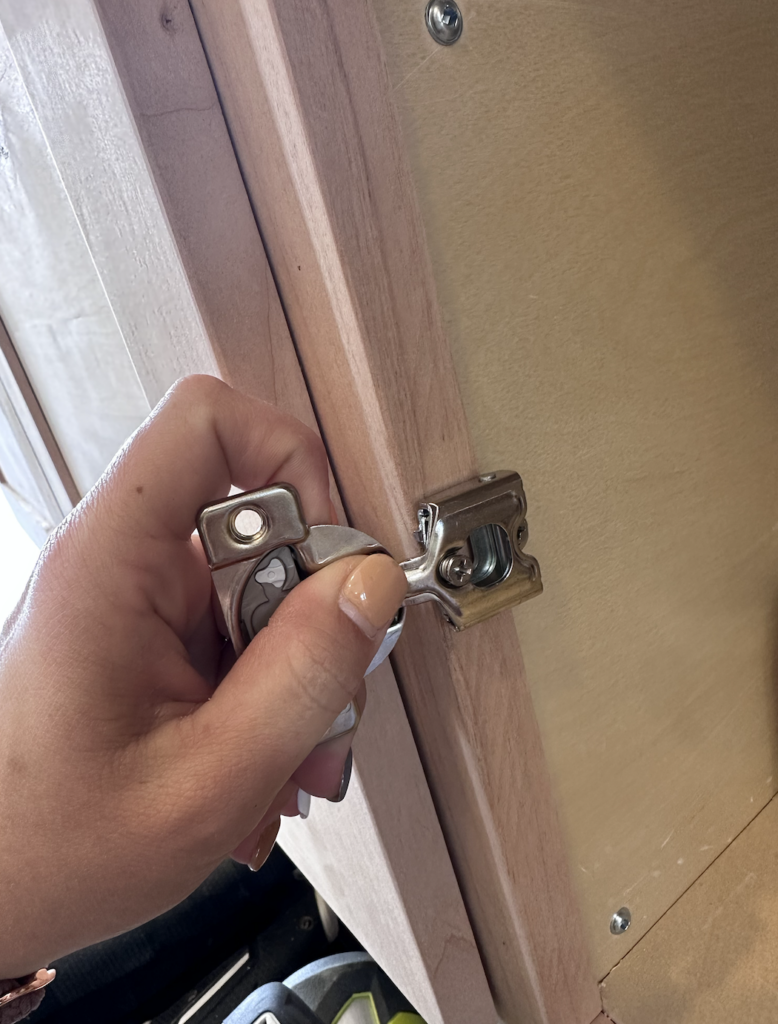
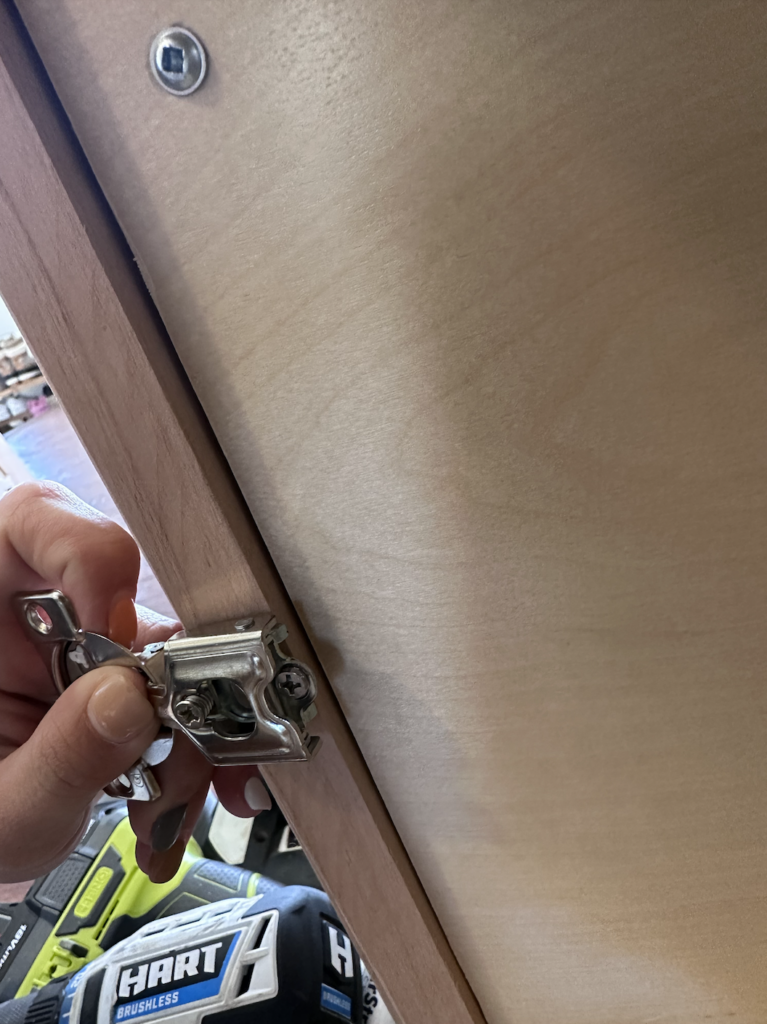
B) I bought face frame hinges. Which means it’s going to rest on the inner side of that trim once attached. See Picture B. You can get a non-face frame hinge if your piece of trim is longer and there is no lip. See Picture C. Look at your overlay number on the back you’ve purchase. Mine were 1/2″ overlay. Which means the door is going to lay 1/2″ over the trip on both sides. So 34″ is the total length from one of door to the other. Now if you are making dual doors, which I did in this picture. Look at your other cabinets or decide how big of a gap you want between each door. I wanted a 1/8″ gap. Which makes the new total length 33 7/8″ divide that by 2 and that means that 17 7/16″ for each Stiles.
D) I will repeat the measuring for the height of each door as well. My height was 19″ and I wanted a 1/2 inch overhang which means each door rail needs to be 20″.
E) I am also adding a trim piece at the center of the cabinet so the doors don’t bevel into the cabinet.
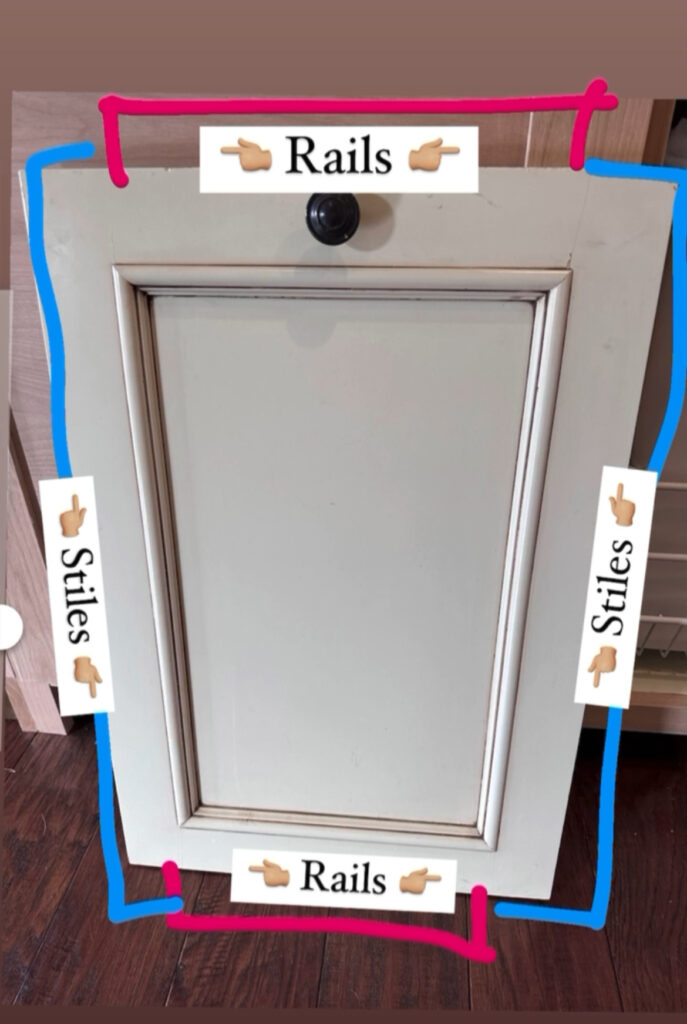
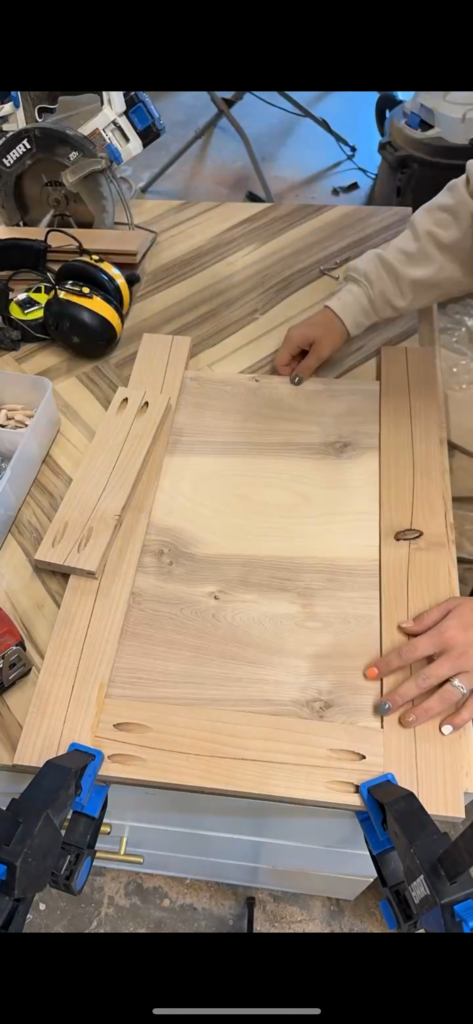
Step 2: Cut the Wood Using your table saw or circular saw according to your measurements. Remember to cut accurately, and if you’re creating a frame and panel design, cut pieces for both the frame and the panel. Per door you should have 1 Panel Piece, 2 Rails and 2 Stiles. If your door is meant to be a square the Rails and Stiles should be the same length. When creating doors, generally your Stiles are longer than the rails. However when creating drawer covers the rails will be longer.

A) Once your pieces are cut. Take your Stiles and Rails and run them through your table saw to create a channel. This is how you will secure the frame to the panels.
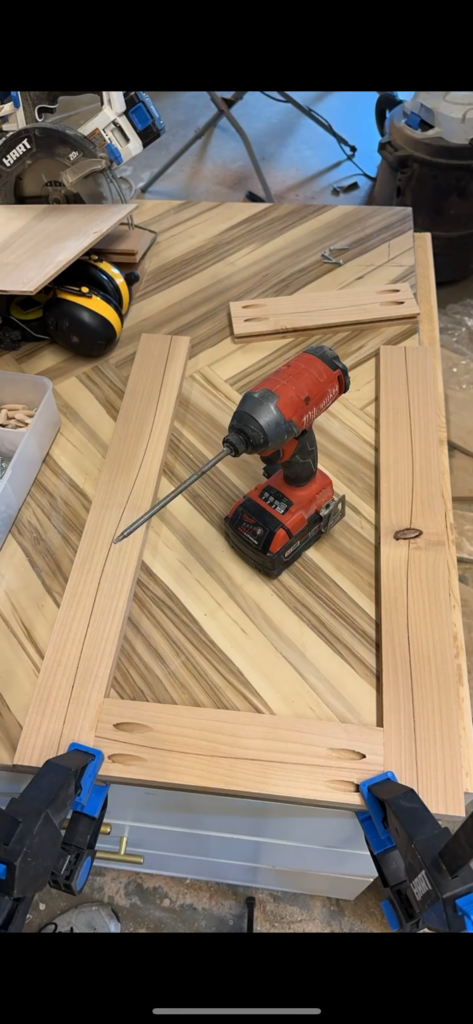
B) After the channels are created, create 4 pocket holes on each of your two rail pieces.
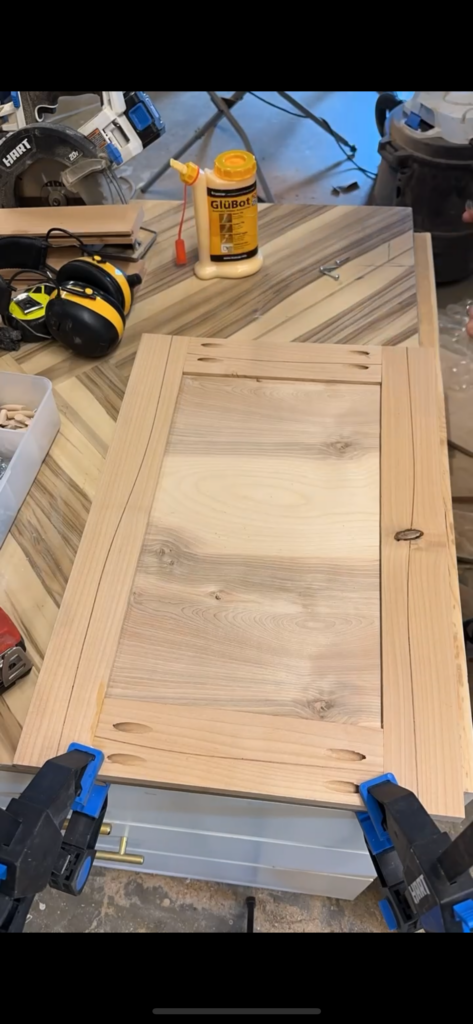
Step 3: Assemble the frame of your cabinet door using wood glue, clamps and kreg jig screws. For added strength, reinforce the joints with wood screws. Ensure the corners are square by using a square tool.


Step 4: Sand and Smooth Sand all surfaces of your cabinet door, starting with coarse sandpaper (80 grit) and progressing to finer grits (120 and 220). This will give your door a smooth finish and help the paint or stain adhere better.
Step 5: Add Decorative Features (Optional) Use a router to add decorative edges (beveled) or patterns to your cabinet doors if desired. This step can add a unique touch to your project.
Step 6: Finish Your Cabinet Doors Apply your chosen finish, whether it’s paint, stain, or varnish, following the manufacturer’s instructions. Let it dry completely before proceeding.

Step 7: Install Hardware Attach knobs, handles, or hinges to your cabinet doors as needed. Make sure they are level and aligned for a professional look.
Creating custom cabinet doors can be a satisfying DIY project that adds a personal touch to your living space. By following these steps and taking your time, you can achieve professional-looking results. Experiment with different wood types, finishes, and designs to match your unique style. With a bit of patience and the right tools, you’ll have stunning cabinet doors that you can proudly call your own. Happy Building!
-Alyssa


Comments