
Materials Used (Based on my wall dimensions of 12′ wide X 9.5′ tall):
- 3 packages of faux stone panels
- 1 packages of thumb tacks
- Heavy Duty Scissors
- 3 half gallons of Tec ready-to-use Grout, in “BRIGHT WHITE”
- Grout float
- Grout Sponge & Water pale for clean up
- Hammer
Step One: Determine wall size
This is a little tricky, but don’t be intimidated! To get the sq ft of a wall, measure height and width and then multiple them together. Ex: if your wall is 8ft tall by 10ft long, your wall is 80 sq ft. These panels come in a pack of 5 that covers 33 sq ft. So to complete your wall, you will need 3 packs of 5 panels.
Step Two: Cut panels to size
In this step, I prefer to start at the top where it’s a bit harder to hide any imperfections. In my living room, I am working with a vaulted ceiling and I’m not great with math. To calculate the angles at the peaks I am using computer paper that I taped together as a template to get the angle I need.

Once I have my angle folded on my paper, I am laying that paper overtop of my faux stone panel and cutting those angles right into my faux stone panel like below.
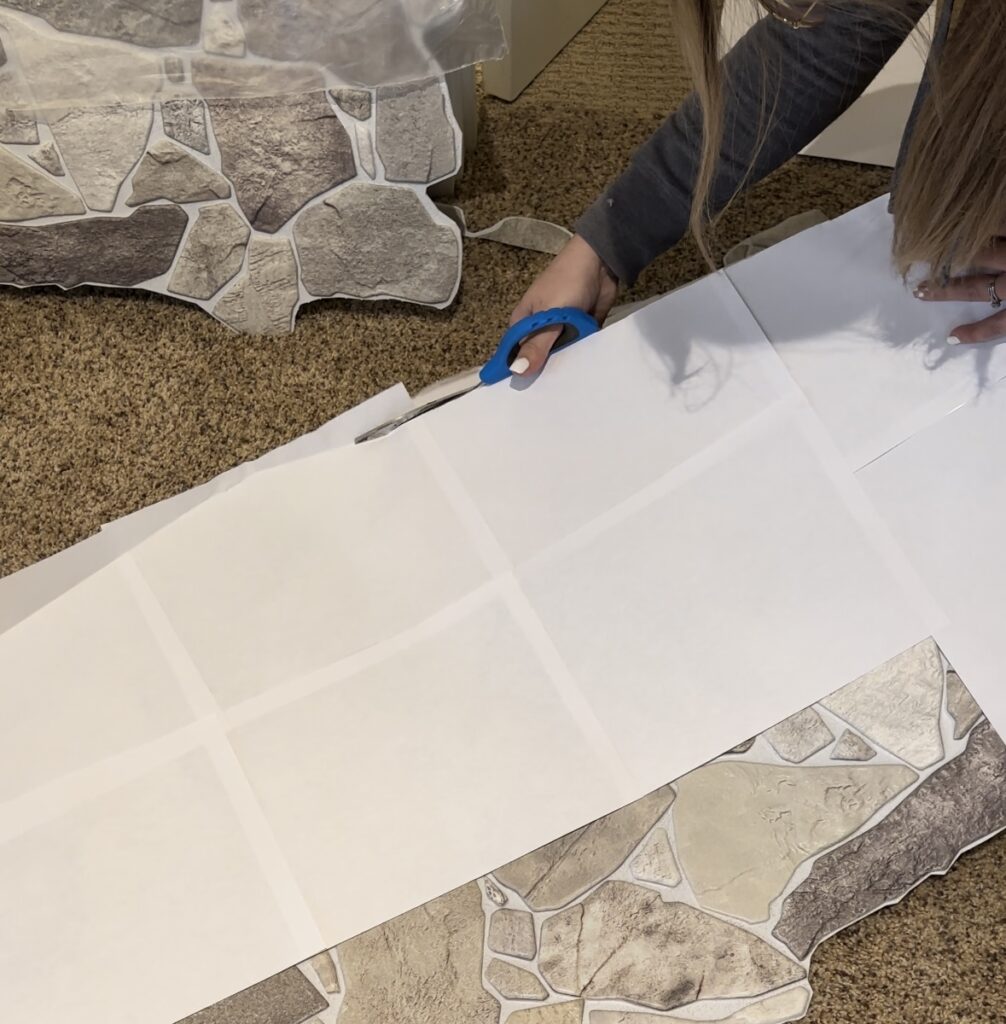
Once the angle is cut into the stone panel and double checked that it fits, you’re ready to move onto Step Two!
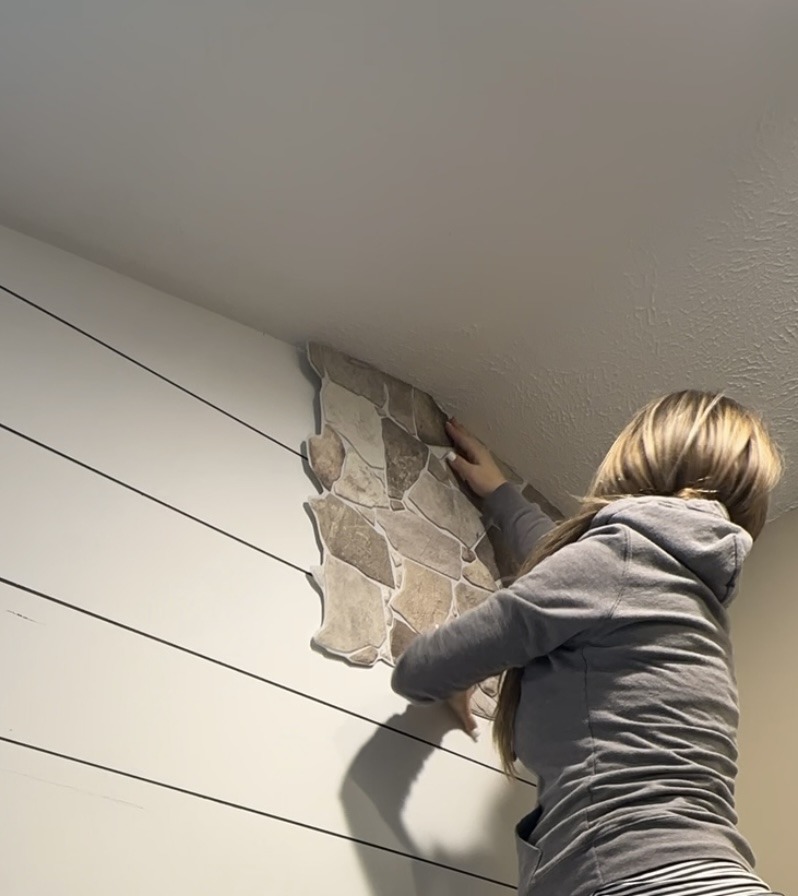
Step Two: Adding tacks & hanging panels
Once you have dry fitted your first panel and it’s a good fit. I took around 5-7 tacks to poked them through the panels. I tried to space them out in to corners and middle sections so they could bare the weight of the grout in the next step. Pro Tip: Make sure you are poking your tacks into the white “grout” groves of the faux panels. This will make it easier to hide the tack heads when you’re grouting.
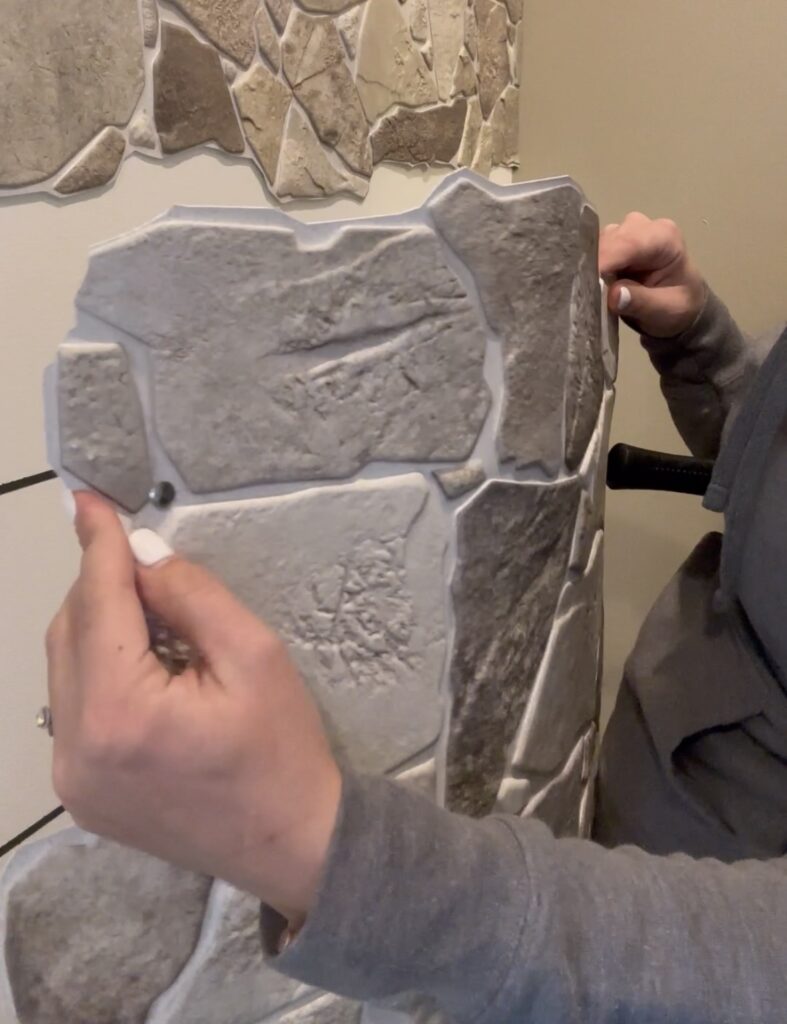
Once your tacks are all poked through and ready to go, line your panel up with where you need it to be on the wall. Grab a hammer and gently tap the tacks into the wall. Make sure to go slow, you don’t want your tacks to bend or go in sideways.
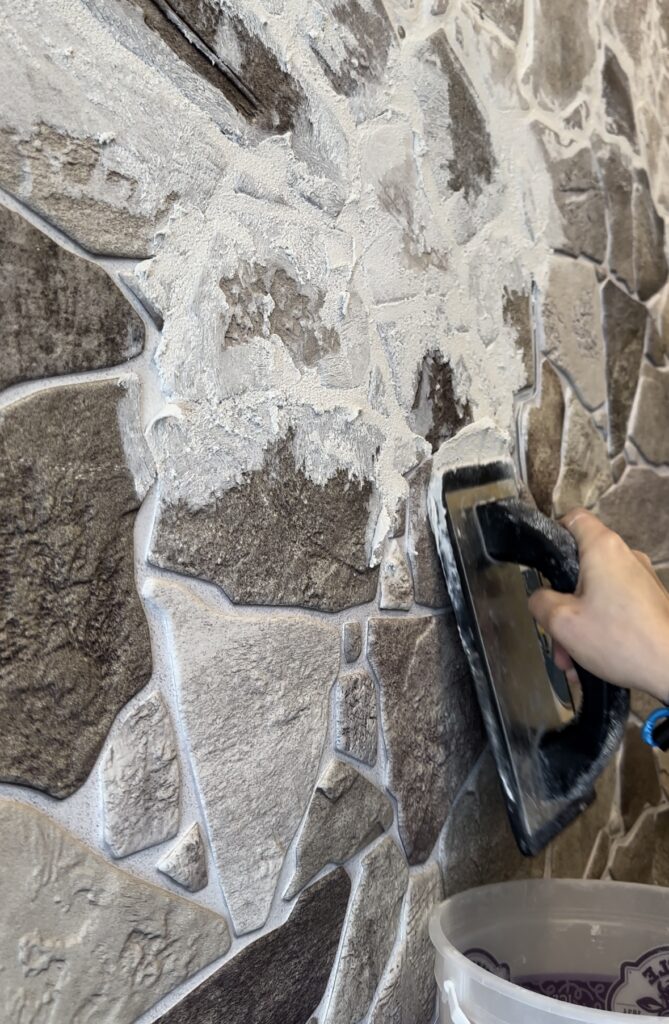
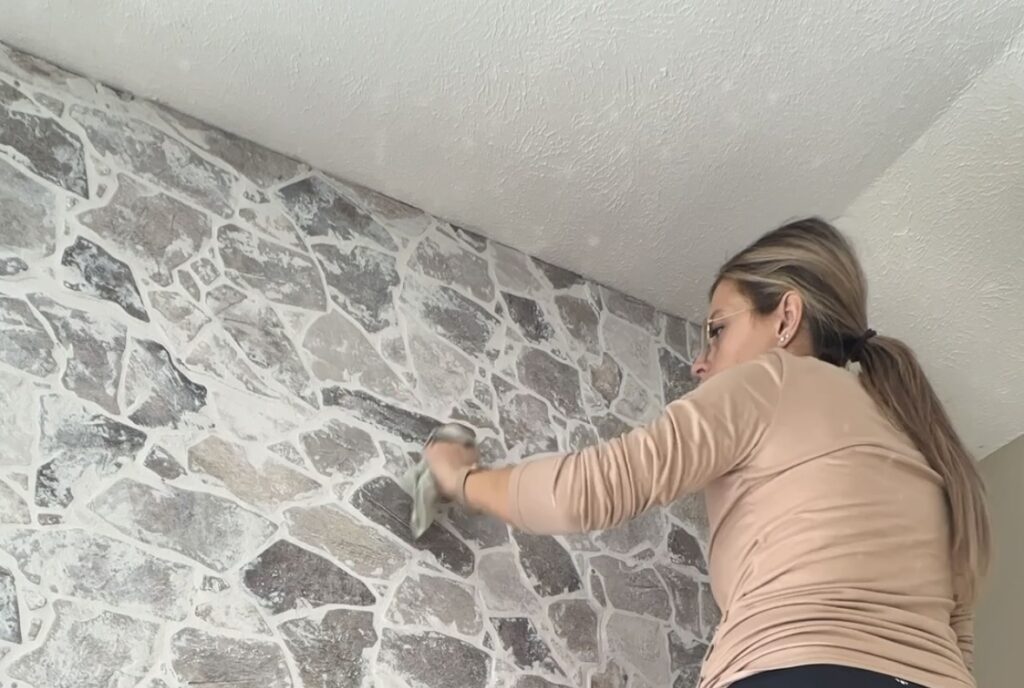
Step Three: Grout
This is the messy step. I choose to use premixed grout because its less of a headache than having to mix my own. However, the little buckets I buy, don’t easily fit a grout float into them. So I take the grout out of the little pale and use an ice cream bucket because my grout float easily fits in it and it makes applying the grout way less messy! You’re going to grout this wall as if it is any tile wall! If you’ve never grouted before, watch a couple quick YouTube tutorials to familiarize yourself first. But don’t fret, you really can’t mess it up, I apply grout into all the faux stone “gaps” and scrap away any excess so I’m not wasting grout. (If you want to see exactly how I did this, you can check out my highlight bubbles on Instagram labeled “Faux Stone”.
Step Four: Clean Up
I let the grout dry before I take my water bucket and grout sponge to it. Typically about an hour or whenever it feels dry to the touch. (I usually apply one grout bucket and then turn around and clean up the same section I just grouted) However, don’t wait more than an hour and a half because it makes it harder to wipe the grout off the stone. If you have a 5 gallon pail, it will work best because you won’t have to clean the water out as often. I also prefer the sponges with the white abrasive side so I can really scrub the faux stone to get that grout off. Pro Tip: wipe the damp sponge across the entire section you are cleaning up and “rewet” the grout on the stone faces. Once the grout absorbs a little bit of the water from the sponge, it will wipe away SO much easier and you won’t have to scrub nearly as much! Try avoiding the grout that is set into the grout lines, you want to smooth it, but not remove it, you’re main focus is removing the grout off the faces of the stone. You can see in the photo below, the right side is cleaned, and the left side I am still working on.
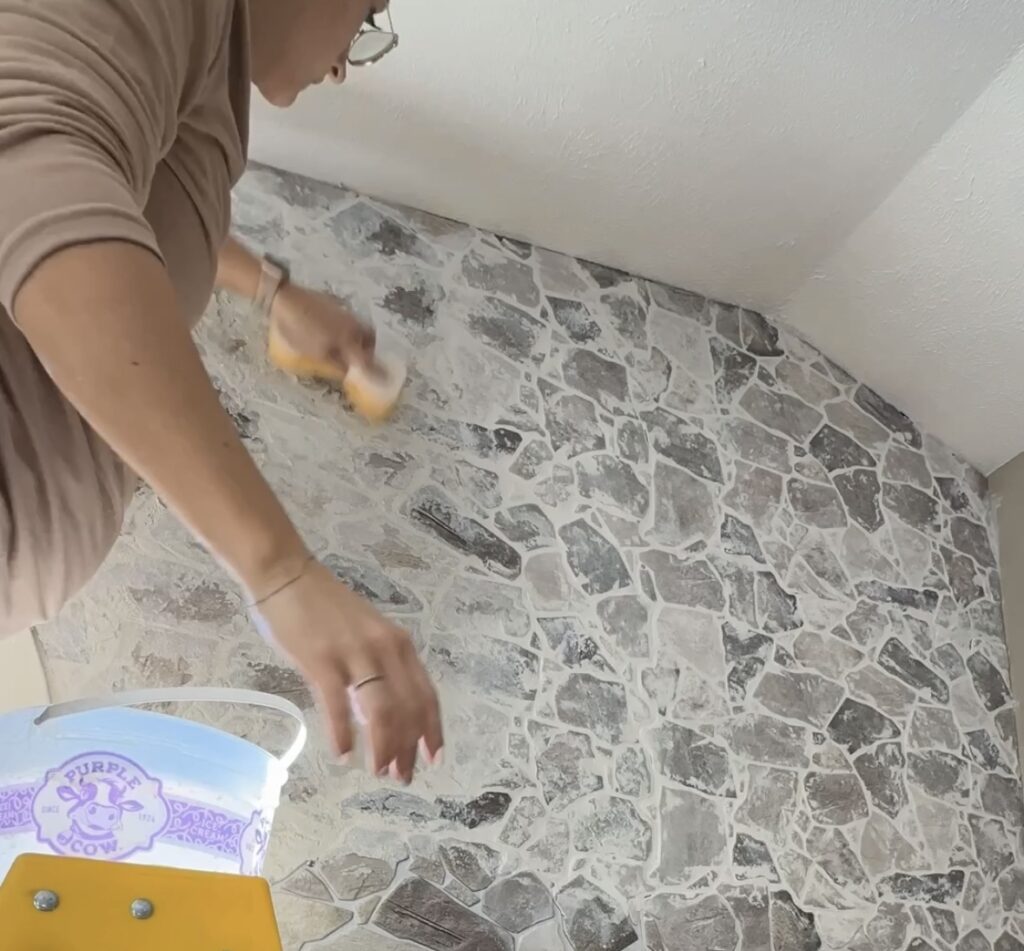
After I sponged off most of the grout, I grab a rag and clean off any foggy stones to give it the finished polished look.
That’s all there is to it! Now you have a faux stone wall that is the focal point of your entire space! It’s really a pretty easy project, and makes such a statement!


How has the grout held up? Could thinset be used in place of grout and keep the ‘over grouted’ look?
iy would be worth a try! my guess is that it would work!