

Looking for an easy weekend project to spruce up a space? I dare you to not fall in love with this one! This is a hallway right off my front door and connects the mudroom to the laundry room, so its one of the first things you see as you enter the house. I had this faux shiplap on the wall for the last 8 years (made from ripped 1/4″ painted luann plywood as I didn’t have a good budget to work with) but its falling apart and looking grungy. Its served its purpose, and now that my budget allows, I’m ready to really transform this hallway into something I truly love!
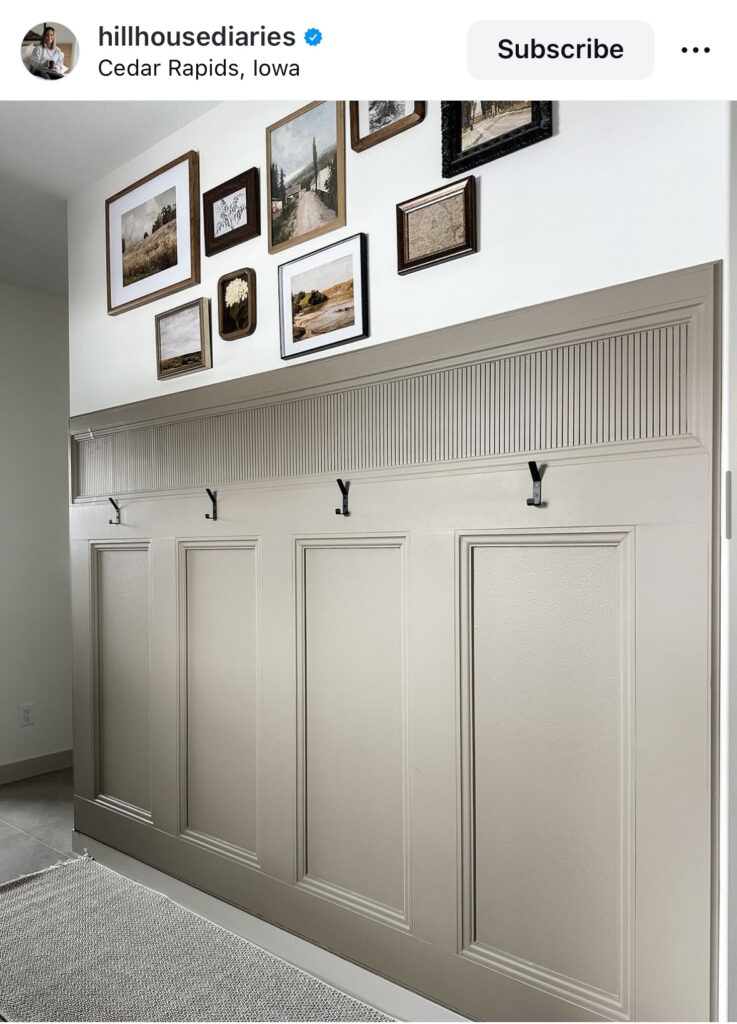
@hillhousediaries created this STUNNING wall treatment and as soon as I saw it I KNEW I had to have it in my home too. If you don’t already follow her, go! She is one of my favorite humans on this earth and has an amazing eye for design!
Materials Used:
This calculator is SO HANDY to help you figure out how many and how wide you want your panels to be!
Benjamin Moore ScuffX paint in satin Swiss Coffee
Wood Filler
Caulk
Spackling
Painters Tape
Miter Saw to make cuts on 45
BEFORE WE START: ADDITIONAL INFORMATION
My ceilings are 8ft tall. This wall treatment, from floor to top is 73 3/8″ (just over 6’1″) tall. My hooks hang on horizontal 1X6 (I screwed the 1×6 into studs for extra support so I could screw my hooks directly into 1X6 and not have to use drywall anchors. Hooks hang at eye level, approx: 5ft from ground. From ceiling down to the top of cove moulding is 21″.
Step One: Cove Moulding
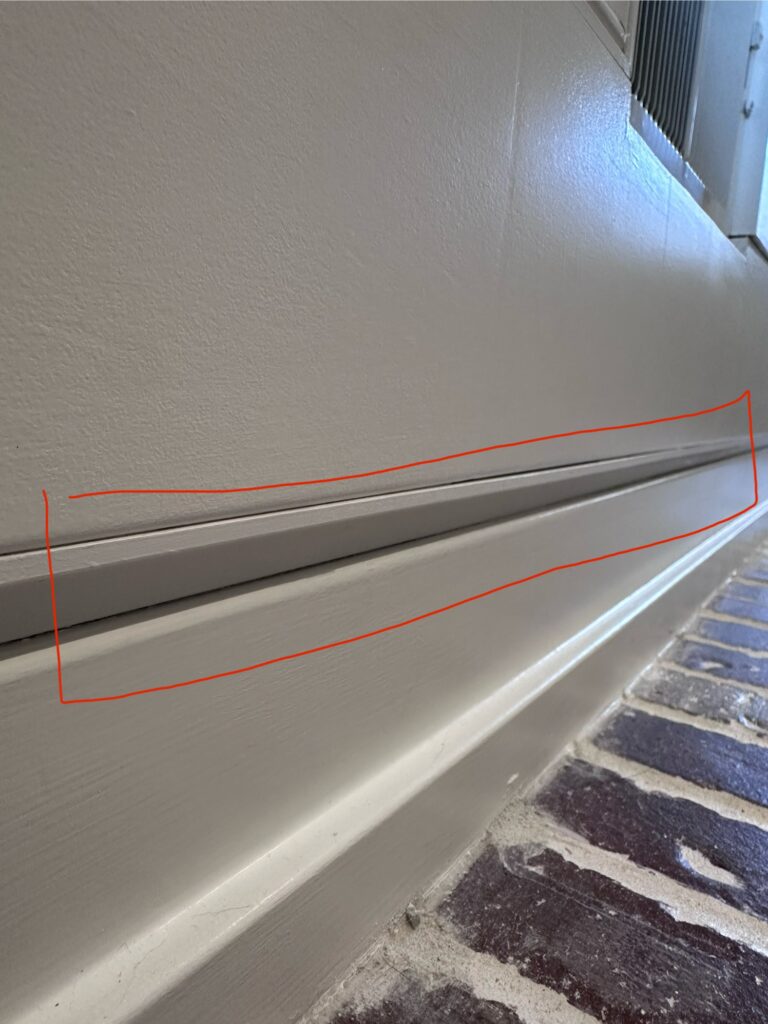
I’m using Cove moulding as my first step because this will create a nice transition from my base boards to my 1X6. Without this cove moulding the 1X6 will stick out from the baseboards and look a little odd and out of place.
Step Two: Horizontal & Vertical 1X6

I cut my vertical pieces 45″ tall.
Step Three: MDF Shoe Moulding
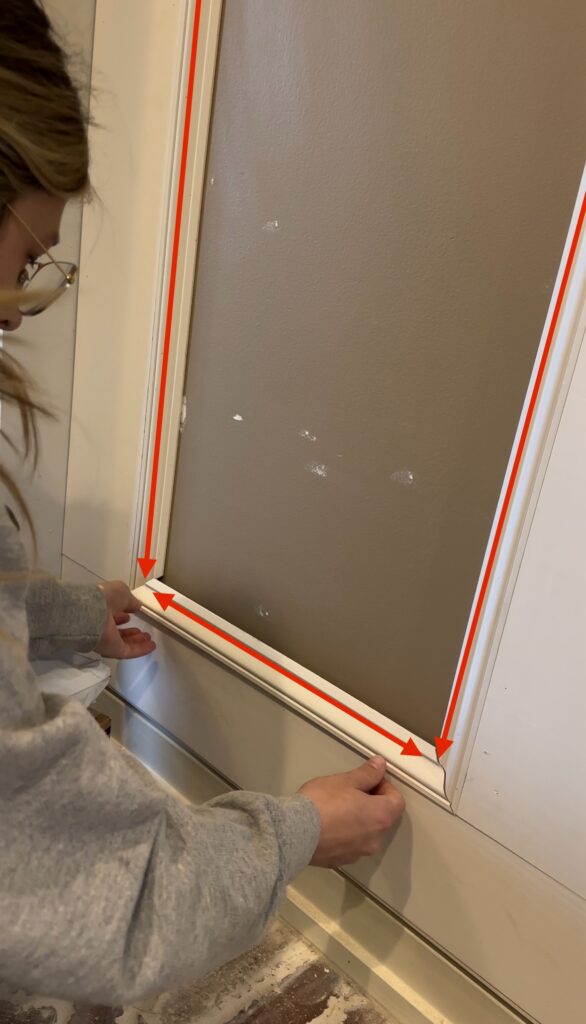
Make sure when you’re adding your base shoe moulding that you’re cutting the corners on 45 degree angles.
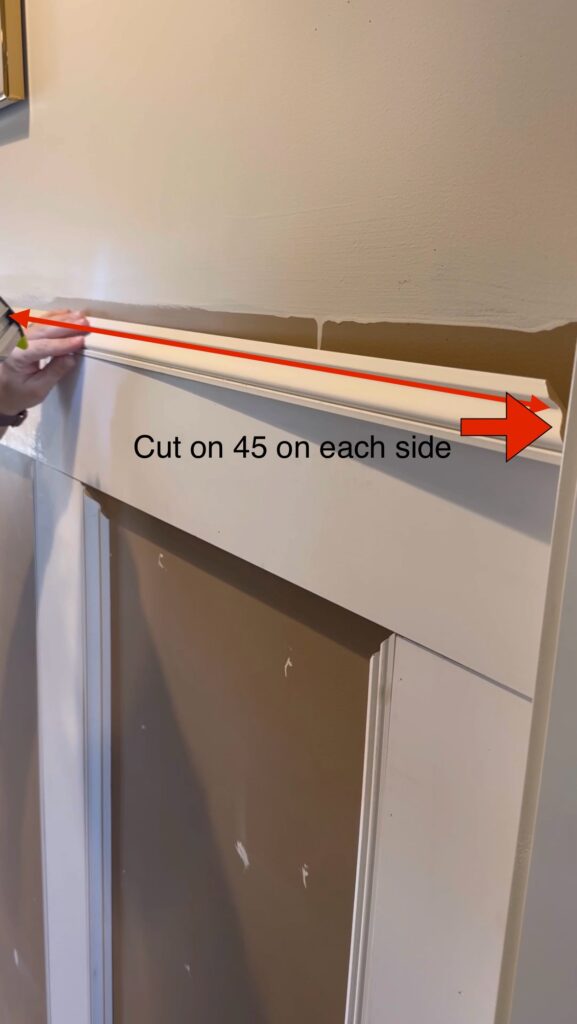
You’re also going to add the shoe moulding above your top 1X6. **Make sure you cut each end at 45 so you can add your shoe moulding correctly in step five.
Step Four: Pole Wrap
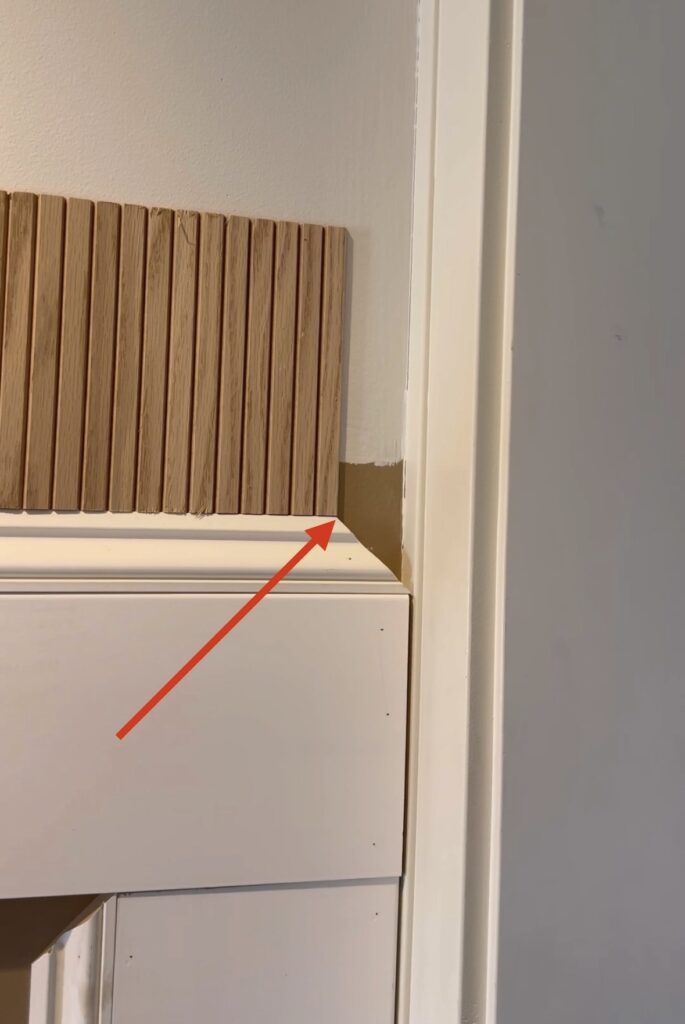
Measure out your pole wrap and cut on a miter saw. (I measure, mark and cut my pole wrap while its still rolled up! Make sure when you add your pole wrap you are only bringing it up to the shortest corner of your 45 degree angle. This will give enough room in step five to add your final shoe moulding.
Step Five: Final Shoe Moulding Border

Piece the last few shoe moulding pieces together using 45 degree angles on sides and top.
Step Six: 1X4 and Cove Moulding
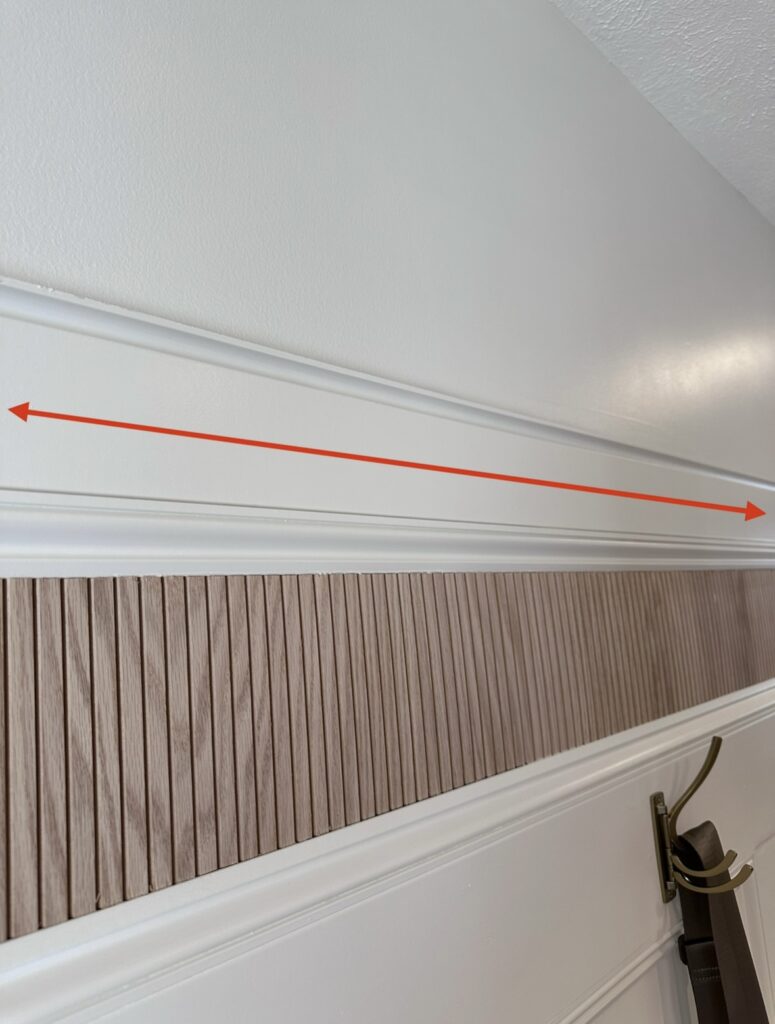
Add 1×4 above shoe moulding

Add Cove moulding above 1×4
Step Seven: Prep and Paint
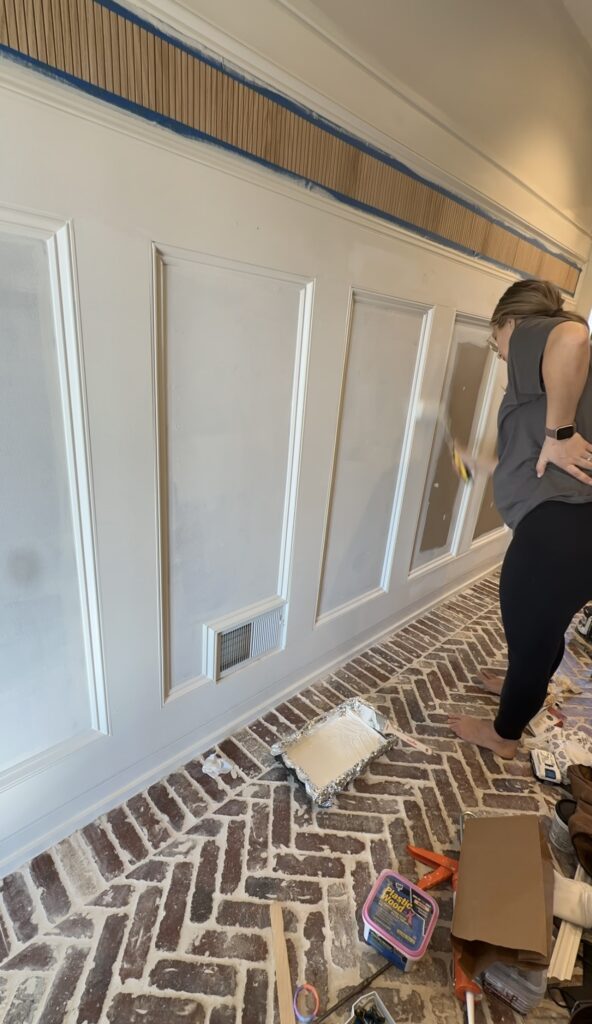
Fill in any nail holes and edge/blunt joints (where would meets wood) with wood filler. Caulk any edges where wood meets wall. Sand everything smooth and wipe any dust off. Tape off anything you don’t want painted, I chose to leave the pole wrap raw with the help of all of you! I used Benjamin Moore Swiss Coffee in ScuffX satin. I will NEVER NOT use Scuff X paint in a high traffic, high touch area. It is scuff proof, child proof and SO easy to clean up! It’s more money than some other paints, but take it from a girl who used to buy the cheapest paint out there, just splurge and buy the good stuff or you’ll learn the hard way like I did!
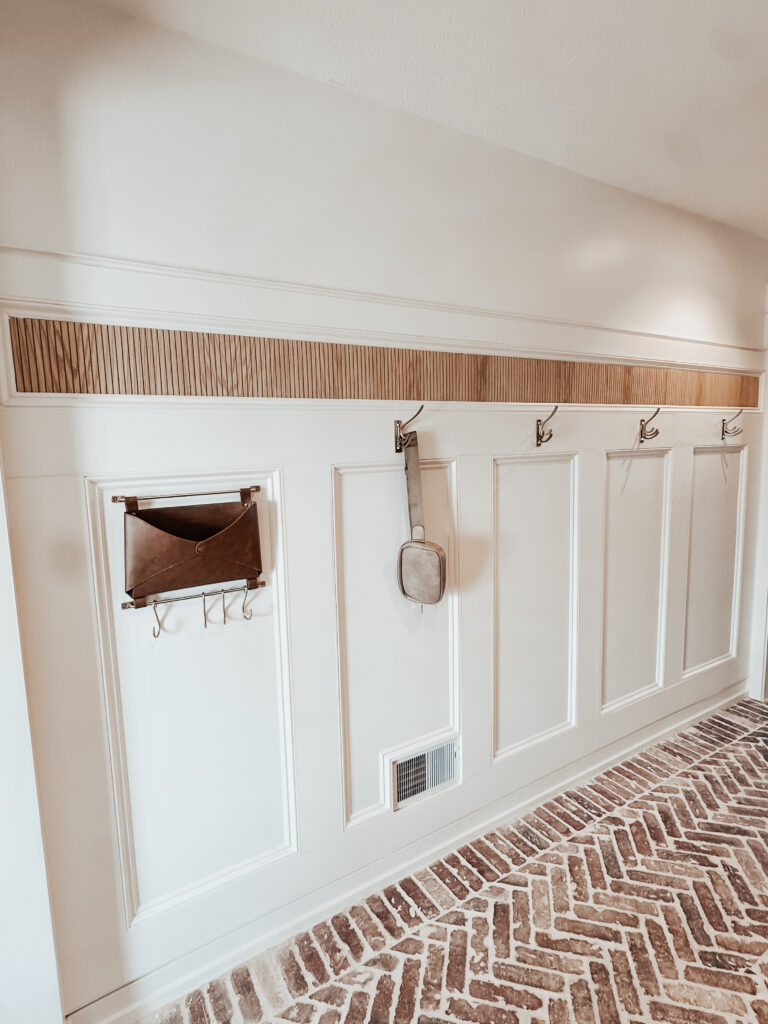
Add all the details! I choose not to add picture frames back above the wall treatment bc I love the clean look it has now. And picture this space full of backpacks and coats… its going to clutter fast and pictures way too high is just going to make it look busier, in my opinion.
As always, comment any questions or reach out if I missed any details! I hope you enjoy this fast and easy project as much as I have!


Comments